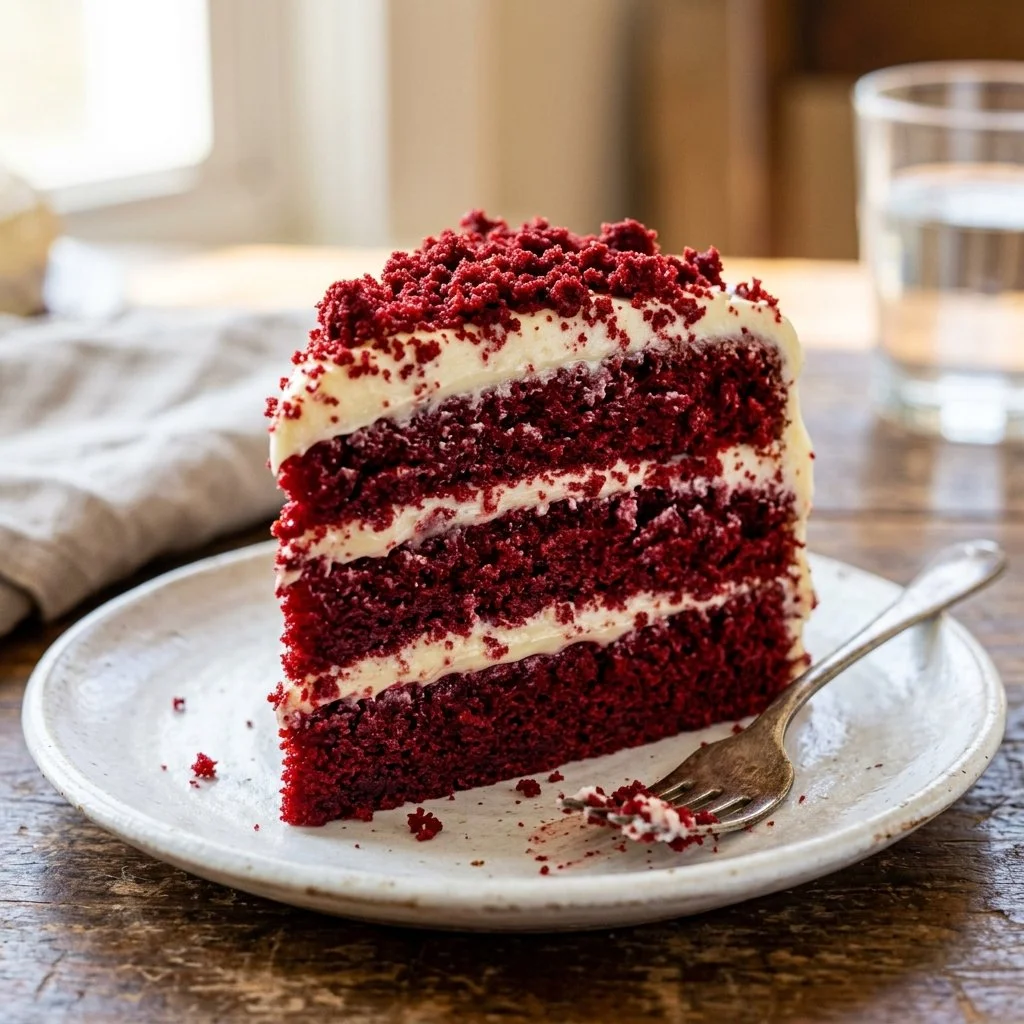
There’s something undeniably magical about baking a cake, especially when that cake is a stunning Red Velvet, with its deep crimson hue and rich, velvety texture. Each time I whip one up, I’m transported back to a cozy kitchen filled with the sweet aroma of baking treats, reminiscent of celebrations and family gatherings. I can almost hear the laughter of loved ones as we gather around the table, eagerly waiting to savor that first slice.
Red Velvet cake has always captured my heart—not only because of its looks but also for its deliciously moist texture and tangy, sweet flavor that dances on the palate. It’s the perfect treat for special occasions, from birthdays to simply treating yourself or someone you love. Let’s embark on this delightful baking adventure together, shall we?
Recipe Timing
- Prep Duration: 20 minutes
- Active Cooking: 30 minutes
- Total Duration: 1 hour
- Portion Size: Serves 12
- Complexity: Simple
Nutritional Recipe
- Calories per portion: Approximately 360 calories
- Protein: 3.5 grams
- Carbs: 53 grams
- Fats: 16 grams
- Fiber: 0.5 grams
- Sugars: 30 grams
- Sodium: 280 mg
Why You’ll Love This Red Velvet Cake
This Red Velvet Cake is not just another dessert; it’s a celebration all on its own! Did you know that the red color comes from a blend of cocoa and buttermilk? Alongside that, the addition of vinegar makes the cake impossibly moist and tender. Topped with luscious cream cheese frosting, each bite is a burst of flavor that’s equal parts sweet, tangy, and oh-so-satisfying. Whether you’re serving it at a festive gathering or enjoying a slice with your coffee, this cake is sure to impress.
The Complete Cooking Journey
-
Step 1: Preheat the Oven
Set your oven to a warm 350°F (175°C) and prepare your cake pans by greasing and flouring them. This step ensures our cakes come out easily without any sticky mishaps! -
Step 2: Prepare the Dry Ingredients
In a medium bowl, sift together the all-purpose flour, baking soda, salt, and cocoa powder. This not only combines the ingredients but also aerates the flour for a fluffier cake. -
Step 3: Whisk the Wet Ingredients
In a large bowl, blend the vegetable oil, granulated sugar, and eggs until everything is well mixed. You want the mixture to look smooth and vibrant—this is the base that creates a beautifully moist cake. -
Step 4: Introduce the Flavor Bombs
Pour in the buttermilk, add the red food coloring, vanilla extract, and vinegar. Mix gently until all the ingredients come together harmoniously. Prepare to be entranced by the vibrant red color! -
Step 5: Combine the Mixtures
Gradually fold the dry ingredients into the wet ones. Be gentle here; we want to mix just until you see a smooth batter. Overmixing can lead to a dense cake! -
Step 6: Fill the Cake Pans
Divide the batter evenly between your prepared pans. You’ll want to maintain a steady hand to ensure even baking. -
Step 7: Bake to Perfection
Place your filled pans into the preheated oven. Bake for about 25-30 minutes, or until a toothpick inserted into the center comes out clean. This is where the wonderful aroma will start to fill your kitchen! -
Step 8: Cool Down
Once baked, let your cakes cool in the pans for about 10 minutes. Then, carefully transfer them to a wire rack for complete cooling. Patience pays off here! -
Step 9: Frost and Enjoy
Once the cakes have cooled completely, generously frost them with creamy, dreamy cream cheese frosting. And voila! You have yourself a stunning Red Velvet Cake.
Ingredients:
- 2 1/2 cups all-purpose flour
- 1 1/2 cups granulated sugar
- 1 teaspoon baking soda
- 1 teaspoon salt
- 1 tablespoon cocoa powder
- 1 1/2 cups vegetable oil
- 1 cup buttermilk, room temperature
- 2 large eggs
- 2 tablespoons red food coloring
- 1 teaspoon vanilla extract
- 1 teaspoon white vinegar
Serving Suggestions & Pairings
This cake shines on its own but can be paired beautifully with a side of fresh berries or a scoop of vanilla ice cream for added indulgence. A simple cup of coffee or a glass of milk will make the experience even more satisfying.
Storage & Leftovers Guide
Store any leftover cake in an airtight container in the refrigerator for up to 5 days. You can also freeze slices for up to 3 months. Just wrap them well in plastic wrap or foil to prevent freezer burn!
Kitchen Wisdom & Success Tips
- Do Not Overmix your batter once the dry ingredients are added to achieve that light, fluffy texture.
- For added flavor, consider using a dash of almond extract along with the vanilla.
- If you like a richer chocolate flavor, you can slightly increase the cocoa powder.
Flavor Variations & Adaptations
Feel free to switch up the frosting! A chocolate ganache or whipped cream can offer a delightful twist. You could also add a pinch of cinnamon for a warm spice note to the cake.
Reader Questions & Solutions
-
Q: Can I use regular milk instead of buttermilk?
A: Yes! You can make a simple substitute by mixing regular milk with a teaspoon of lemon juice or vinegar. Let it sit for 5-10 minutes before using. -
Q: What if I don’t have red food coloring?
A: You can use beet juice for a natural color, though it might slightly alter the flavor. -
Q: How do I ensure my cake layers are even?
A: Use a kitchen scale to measure your batter in each pan for balanced layers—or level them with a spatula before baking. -
Q: Can I make this gluten-free?
A: Absolutely! Just swap the all-purpose flour for a gluten-free blend. -
Q: How can I make my cake rise more?
A: Make sure your baking soda is fresh, and don’t skip the vinegar—it’s what gives Red Velvet its lift!
Wrapping Up
Creating a Red Velvet Cake is not just about the final product; it’s about the joy you experience while baking it. There’s a unique pleasure in watching the transformation of simple ingredients into a beautiful, delicious cake. So grab your apron and let this vibrant cake bring a splash of joy into your kitchen. Celebrate every occasion, big or small, with a slice of this delightful Red Velvet Cake! Happy baking!
PrintRed Velvet Cake
A stunning Red Velvet Cake with a deep crimson hue, deliciously moist texture, and tangy, sweet flavor topped with creamy frosting.
- Prep Time: 20 minutes
- Cook Time: 30 minutes
- Total Time: 50 minutes
- Yield: 12 servings 1x
- Category: Dessert
- Method: Baking
- Cuisine: American
- Diet: Vegetarian
Ingredients
- 2 1/2 cups all-purpose flour
- 1 1/2 cups granulated sugar
- 1 teaspoon baking soda
- 1 teaspoon salt
- 1 tablespoon cocoa powder
- 1 1/2 cups vegetable oil
- 1 cup buttermilk, room temperature
- 2 large eggs
- 2 tablespoons red food coloring
- 1 teaspoon vanilla extract
- 1 teaspoon white vinegar
Instructions
- Preheat the oven to 350°F (175°C) and grease your cake pans.
- Prepare the dry ingredients by sifting together the all-purpose flour, baking soda, salt, and cocoa powder.
- Whisk the vegetable oil, granulated sugar, and eggs until smooth.
- Introduce the buttermilk, red food coloring, vanilla extract, and vinegar; mix gently.
- Combine the dry ingredients with the wet ingredients until you have a smooth batter.
- Fill the prepared pans evenly with the batter.
- Bake for 25-30 minutes, or until a toothpick comes out clean.
- Cool the cakes in the pans for 10 minutes before transferring them to a wire rack.
- Frost the cooled cakes with cream cheese frosting and enjoy!
Notes
Store leftover cake in an airtight container in the refrigerator for up to 5 days or freeze slices for up to 3 months.
Nutrition
- Serving Size: 1 slice
- Calories: 360
- Sugar: 30g
- Sodium: 280mg
- Fat: 16g
- Saturated Fat: 2g
- Unsaturated Fat: 14g
- Trans Fat: 0g
- Carbohydrates: 53g
- Fiber: 0.5g
- Protein: 3.5g
- Cholesterol: 30mg