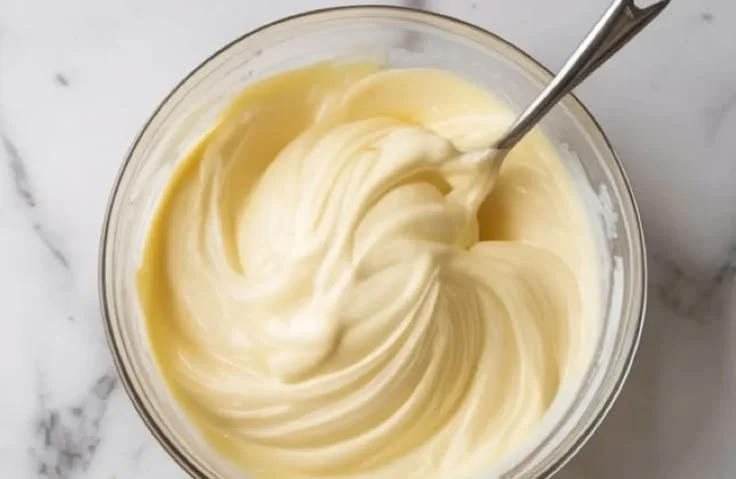
There’s something magical about summertime that beckons us to indulge in creamy, cool treats. I remember countless afternoons as a child, running through the sun-kissed gardens of my grandmother’s house, laughter echoing in the air. Those were the days when the temptations of frozen desserts complemented the warmth of the sun. My grandmother would churn her famous vanilla ice cream manually, a labor of love that would take hours. However, I’m here to share a modern twist on that classic—a recipe for No-Churn Chocolate Ice Cream that captures the essence of childhood summers while saving you time. The best part? No ice cream maker required!
Recipe Timing
- Prep Duration: 15 minutes
- Active Cooking: 15 minutes
- Total Duration: 6 hours (includes freezing time)
- Portion Size: Serves approximately 6-8
- Complexity: Simple
Nutritional Recipe
- Calories per portion: Approximately 250
- Protein: 3 grams per serving
- Carbs: 29 grams per serving
- Fats: 14 grams per serving
- Fiber: 2 grams per serving
- Sugars: 22 grams per serving
- Sodium: 70 mg per serving
Why You’ll Love This No-Churn Chocolate Ice Cream
Imagine biting into a rich, velvety scoop of chocolate ice cream, a burst of cocoa enveloping your senses, instantly transporting you back to those carefree summers. This recipe promises creamy goodness that you can whip up in mere minutes, all without the fuss of a churner. It’s a decadent dessert that comes together easily and requires no complicated equipment—just your trusty mixing bowls, and a bit of patience as it freezes to perfection. Perfect for gatherings or quiet evenings at home, this chocolate ice cream is sure to enchant the hearts of both kids and adults alike!
The Complete Cooking Journey
Let’s dive into making this delightful No-Churn Chocolate Ice Cream. With a few simple steps, you’ll soon be enjoying this easy treat that’s as fun to make as it is to eat!
Ingredients:
- 2 cups heavy cream
- 1 can (14 ounces) sweetened condensed milk
- 1 cup unsweetened cocoa powder
- 1 teaspoon vanilla extract
- A pinch of salt
Method:
Step 1: Whip the Heavy Cream
In a large bowl, whip the heavy cream until stiff peaks form. You want it to be fluffy and airy, perfect for creating a creamy texture in the ice cream. This is where the magic begins!
Step 2: Mix the Sweet Ingredients
In another bowl, combine the sweetened condensed milk, cocoa powder, vanilla extract, and salt. Mix until well combined, creating a rich chocolate base ready to embrace the whipped cream.
Step 3: Combine the Mixtures
Gently fold the whipped cream into the chocolate mixture until fully incorporated. Be careful not to deflate the cream; this is crucial for keeping your ice cream light and fluffy.
Step 4: Prepare for Freezing
Pour the mixture into a loaf pan or airtight container. This is where your ice cream will take on its final form, so ensure it’s snug and even.
Step 5: Freeze for Perfection
Freeze for at least 6 hours or until firm. This is where the waiting game begins! Just a bit of patience, and you’ll be rewarded with a cold treat.
Step 6: Scoop & Serve
Once it’s firm, scoop and serve the chocolate ice cream. Grab your favorite cones or bowls, and enjoy each creamy bite!
Serving Suggestions & Pairings
This No-Churn Chocolate Ice Cream is delightful on its own, but why not elevate it further? Top it with chocolate sauce, a sprinkle of homemade brownie bits, or whipped cream for extra indulgence. Pair it with fresh berries for a burst of color and flavor—a perfect balance to the richness of the chocolate. If you’re feeling adventurous, scoop it into an affogato and pour a shot of hot espresso over it for a fabulous coffee twist!
Storage & Leftovers Guide
Once you’ve made this delicious treat, store any leftovers in an airtight container in the freezer. It should last for about 2 weeks—although with how scrumptious it is, I doubt it will last that long! Just let it sit at room temperature for a few minutes before scooping for the best texture.
Kitchen Wisdom & Success Tips
- Make sure your heavy cream is cold before whipping; it whips better that way!
- For a creamier ice cream, you can fold in a couple of tablespoons of softened cream cheese or use full-fat coconut milk for a dairy-free version.
- If you prefer a sweeter ice cream, consider adjusting the amount of sweetened condensed milk to your taste.
Flavor Variations & Adaptations
Experiment with flavors by adding mix-ins such as crushed peppermint candies for a holiday twist or a swirl of peanut butter for an indulgent combo. You could also replace the cocoa powder with chocolate syrup for a sweeter, more chocolatey flavor. The possibilities are endless!
Reader Questions & Solutions
-
Can I use low-fat cream?
- Low-fat cream won’t whip up as well, so it’s best to stick with heavy cream for the best texture.
-
How do I keep ice crystals from forming?
- Make sure your mixture is well-incorporated and freeze it properly; an airtight container helps too!
-
Can I use a different flavor of extract?
- Absolutely! Almond extract or mint extract can give a delightful twist to your chocolate ice cream.
-
How can I make this recipe dairy-free?
- Substitute heavy cream with coconut cream and the condensed milk with coconut sweetened condensed milk.
-
Can I make this ice cream vegan?
- Yes! Use coconut cream, a dairy-free sweetened condensed milk alternative, and ensure the cocoa powder is vegan-friendly.
Wrapping Up
This No-Churn Chocolate Ice Cream is a simple yet fulfilling way to relive those cherished summer days. So gather your ingredients, channel your inner child, and dig into making this creamy delight. Remember, cooking is all about joy—so celebrate each scoop you share with family and friends! Happy ice cream making!
PrintNo-Churn Chocolate Ice Cream
A quick and creamy no-churn chocolate ice cream that captures the essence of summer with rich cocoa goodness.
- Prep Time: 15 minutes
- Cook Time: 15 minutes
- Total Time: 375 minutes
- Yield: 6-8 servings 1x
- Category: Dessert
- Method: Freezing
- Cuisine: American
- Diet: Vegetarian
Ingredients
- 2 cups heavy cream
- 1 can (14 ounces) sweetened condensed milk
- 1 cup unsweetened cocoa powder
- 1 teaspoon vanilla extract
- A pinch of salt
Instructions
- Whip the heavy cream in a large bowl until stiff peaks form.
- Mix the sweetened condensed milk, cocoa powder, vanilla extract, and salt in another bowl until well combined.
- Fold the whipped cream into the chocolate mixture until fully incorporated.
- Pour the mixture into a loaf pan or airtight container.
- Freeze for at least 360 minutes or until firm.
- Scoop and serve the chocolate ice cream.
Notes
Top with chocolate sauce or fresh berries for extra indulgence.
Nutrition
- Serving Size: 1 serving
- Calories: 250
- Sugar: 22g
- Sodium: 70mg
- Fat: 14g
- Saturated Fat: 8g
- Unsaturated Fat: 6g
- Trans Fat: 0g
- Carbohydrates: 29g
- Fiber: 2g
- Protein: 3g
- Cholesterol: 60mg