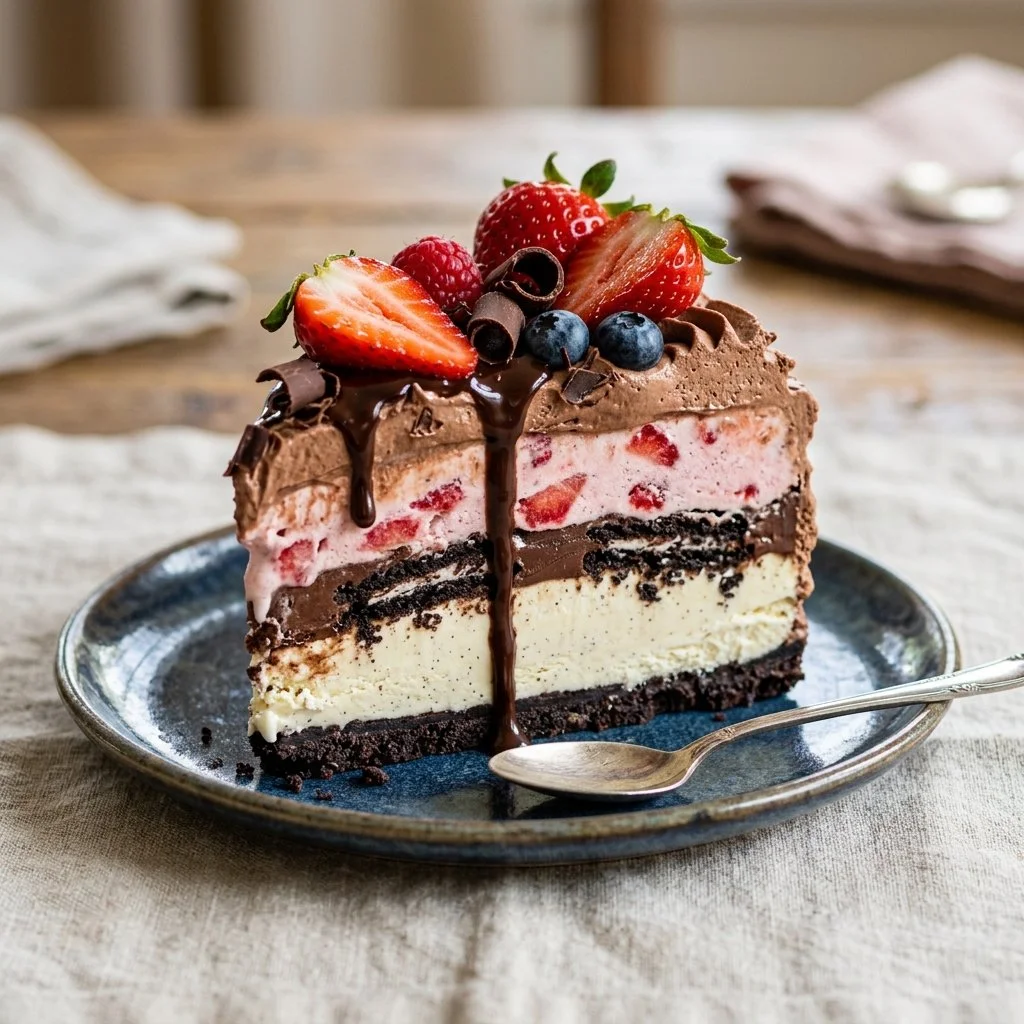
There’s something undeniably magical about ice cream cake. It feels like a celebration on a plate, a delightful merging of fluffy cake and creamy ice cream, that stirs fond memories of birthdays spent with laughter and joy. I remember standing in the kitchen, mixing the cake batter, the aroma of chocolate wafting through the air, as my siblings eagerly anticipated the moment we would take the first slice. The combination of flavors and textures makes this cake a stunning centerpiece for any occasion, whether it’s a casual summer gathering or a festive birthday bash.
Recipe Timing
- Prep Duration: 30 minutes
- Active Cooking: 30 minutes
- Total Duration: 4 hours and 30 minutes (including freezing time)
- Portion Size: Serves 10-12
- Complexity: Simple
Nutritional Recipe
- Calories per portion: Approximately 320
- Protein: 4g per serving
- Carbs: 43g per serving
- Fats: 14g per serving
- Fiber: 1g per serving
- Sugars: 25g per serving
- Sodium: 220mg per serving
Why You’ll Love This Homemade Ice Cream Cake
This homemade ice cream cake is a delightful way to indulge your sweet tooth and enjoy the versatility of flavors. With the base of your favorite cake (chocolate or vanilla) layered with creamy ice cream, you’ll find bites that are both pleasingly soft and delectably cool. The whipped cream frosting adds a light touch, while drizzle of chocolate syrup or fudge (or both!) elevates it to dessert royalty. Plus, it’s so easy to customize, letting you use unique flavors or add your favorite decorations, making it perfect for any personal touch.
The Complete Cooking Journey
There’s a joy in layering cake with ice cream, almost like building the perfect delectable masterpiece. Picture this: a fluffy layer hugging the ice cream, enveloped by a cloud of creamy whipped topping, all garnished with cheerful sprinkles. Each slice not only promises a taste of nostalgia but also a core memory waiting to happen. Let’s embark on this sweet journey together, making the ultimate ice cream cake that’s bound to impress.
Ingredients:
- 1 box of cake mix (chocolate or vanilla)
- 2 pints of ice cream (your choice of flavors)
- 1 container of whipped cream
- Chocolate syrup or fudge (optional for drizzling)
- Sprinkles (optional for decoration)
Method:
### Step 1: Bake the Cake
Begin by baking the cake according to package instructions. Ensure that the cake is allowed to cool completely—this is crucial for the next steps, as we don’t want our ice cream to melt!
### Step 2: Slice the Cake
Once cooled, carefully slice the cake in half horizontally. This will create two layers that will cradle your ice cream perfectly.
### Step 3: First Cake Layer Placement
Place one layer of the cake on a serving plate. This will be the foundation for your delicious creation.
### Step 4: Spread the First Pint of Ice Cream
Now it’s time to spread one pint of your chosen ice cream flavor over the cake layer. Use an offset spatula for a smooth, even layer.
### Step 5: Second Cake Layer Placement
Gently place the second layer of cake on top of the ice cream, like a cozy blanket over a warm bed.
### Step 6: Spread the Second Pint of Ice Cream
Spread the second pint of ice cream over the second layer of cake, creating that evenly layered ice cream delight.
### Step 7: Frost the Cake
Frost the entire cake with whipped cream, smoothing it out to create a lovely exterior—think of it like the cozy, inviting frosting on a winter treat.
### Step 8: Drizzle and Decorate
Now for the fun part—drizzle with chocolate syrup or fudge if desired and top with sprinkles to add a pop of color and festive flair.
### Step 9: Freeze the Cake
Finally, pop the assembled cake into the freezer for at least 4 hours before serving. This helps meld the layers beautifully.
Serving Suggestions & Pairings
Serve the ice cream cake cold, slicing it into generous pieces. Pair with fresh fruit, such as sliced strawberries or raspberries, for a refreshing contrast. You could also serve it alongside a cup of coffee or a tall glass of milk to balance the sweetness of the cake.
Storage & Leftovers Guide
Leftovers can be stored in the freezer as long as they’re covered. Ideally, try to consume it within a week for the best taste and texture. If you are anticipating some leftover slices, consider cutting the cake into smaller pieces before freezing!
Kitchen Wisdom & Success Tips
- Make sure the cake has cooled completely to prevent the ice cream from melting.
- If the ice cream is too hard to spread, let it sit out for a few minutes to soften, but don’t let it melt!
- You can decorate the cake with fresh fruit or nuts for added flavor and texture.
Flavor Variations & Adaptations
Feel free to mix and match flavors! Consider a vanilla cake with strawberry ice cream or a chocolate cake with mint chocolate chip ice cream. You can get creative with seasonal flavors too—like pumpkin in the fall or peppermint around the holidays!
Reader Questions & Solutions
-
What if I don’t have an offset spatula?
You can use the back of a spoon or a regular spatula, just take your time to spread evenly! -
Can I make this cake dairy-free?
Absolutely! Use dairy-free cake mix and ice cream, and follow the same method. -
How can I avoid the ice cream melting while icing the cake?
Work quickly, and feel free to place the cake in the freezer between steps if needed. -
Is there a way to decorate without sprinkles?
Yes, you can use edible glitter, or fresh fruit, or simply leave it plain to let the layers shine! -
How can I tell if it’s ready to serve?
Once frozen for at least 4 hours, the cake should hold its shape when sliced. If it appears very solid, let it sit about 5 minutes at room temperature before serving.
Wrapping Up
Creating this homemade ice cream cake allows you to indulge your creative culinary spirit while enjoying one of life’s simplest pleasures—ice cream! Each slice is a delightful combination of textures and flavors that can brighten any day, making it perfect for birthdays or Sunday dinners. So grab your ingredients, gather your loved ones around, and let this delightful recipe turn a simple day into a sweet celebration. Happy baking, and even happier indulging!
PrintHomemade Ice Cream Cake
A delightful homemade ice cream cake layered with fluffy cake and creamy ice cream, perfect for celebrations.
- Prep Time: 30 minutes
- Cook Time: 30 minutes
- Total Time: 270 minutes
- Yield: 10-12 servings 1x
- Category: Dessert
- Method: Freezing
- Cuisine: American
- Diet: Vegetarian
Ingredients
- 1 box of cake mix (chocolate or vanilla)
- 2 pints of ice cream (your choice of flavors)
- 1 container of whipped cream
- Chocolate syrup or fudge (optional for drizzling)
- Sprinkles (optional for decoration)
Instructions
- Begin by baking the cake according to package instructions. Ensure that the cake is allowed to cool completely.
- Once cooled, carefully slice the cake in half horizontally.
- Place one layer of the cake on a serving plate.
- Spread one pint of your chosen ice cream flavor over the cake layer.
- Gently place the second layer of cake on top of the ice cream.
- Spread the second pint of ice cream over the second layer of cake.
- Frost the entire cake with whipped cream.
- Drizzle with chocolate syrup or fudge if desired and top with sprinkles.
- Finally, pop the assembled cake into the freezer for at least 4 hours before serving.
Notes
Ensure the cake has cooled completely before adding ice cream to avoid melting.
Nutrition
- Serving Size: 1 slice
- Calories: 320
- Sugar: 25g
- Sodium: 220mg
- Fat: 14g
- Saturated Fat: 7g
- Unsaturated Fat: 5g
- Trans Fat: 0g
- Carbohydrates: 43g
- Fiber: 1g
- Protein: 4g
- Cholesterol: 30mg