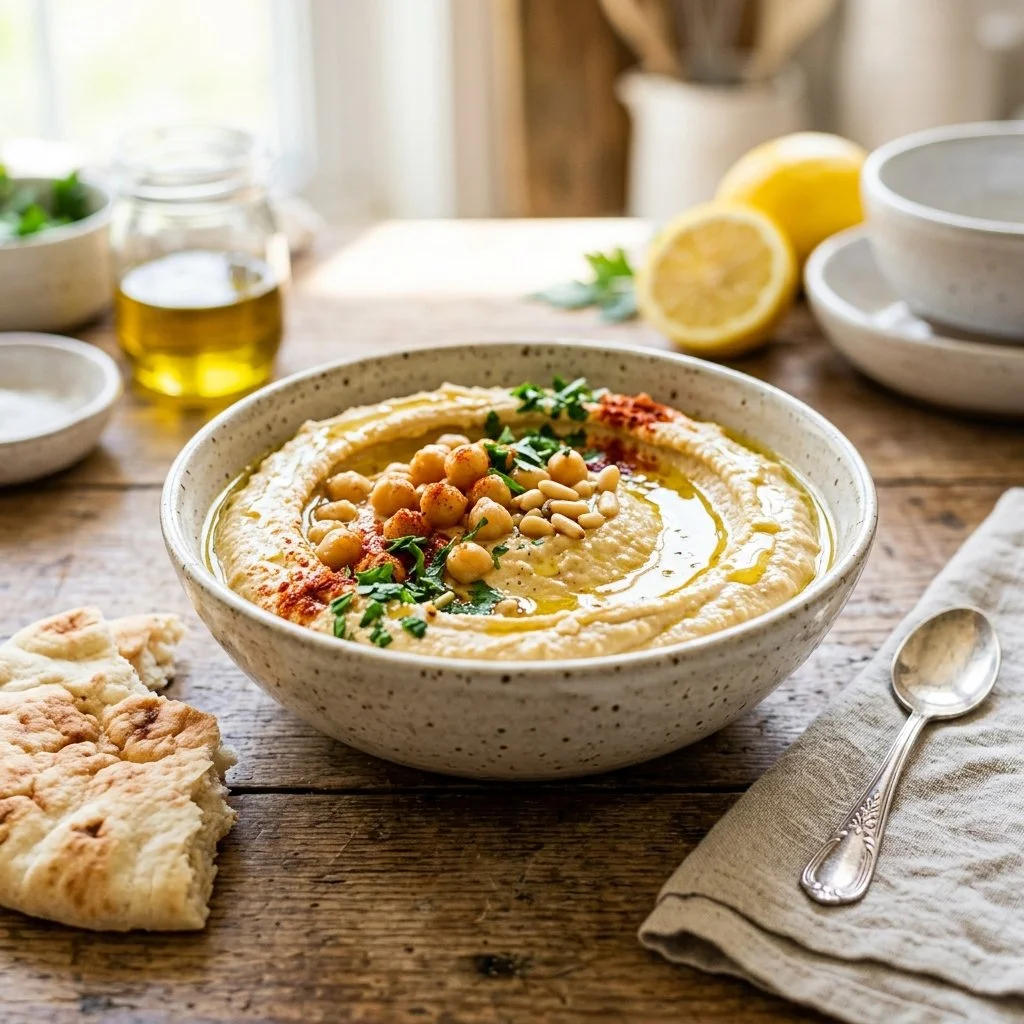
There’s something truly special about gathering around a bowl of homemade hummus, isn’t there? It’s not just a dip; it’s a gateway to vivid conversations, laughter, and a shared experience that brings people together. I can still remember the first time I tasted homemade hummus at a friend’s dinner party. As soon as I dipped a piece of warm pita into that creamy, garlicky goodness, my taste buds came alive in a delightful explosion of flavors. Since then, I’ve been on a mission to master this dip, each time tweaking and perfecting it to suit my taste.
Recipe Timing
- Prep Duration: 10 minutes
- Active Cooking: None (just blending!)
- Total Duration: 10 minutes
- Portion Size: Serves 4-6
- Complexity: Simple
Nutritional Recipe
- Calories per portion: Approximately 120
- Protein: 4 grams
- Carbs: 10 grams
- Fats: 8 grams
- Fiber: 3 grams
- Sugars: 1 gram
- Sodium: 250 mg
Why You’ll Love This Homemade Hummus
The beauty of this hummus lies in its simplicity and versatility. It can be a companion to a cozy night in, a vibrant appetizer for a party, or a healthy snack that keeps you satisfied throughout the day. Plus, you can customize it to your liking with various toppings or additional ingredients. The creamy texture, the bright tang of lemon, and the aromatic hint of garlic make it irresistible!
The Complete Cooking Journey
Are you ready to embark on this delicious journey of making homemade hummus? It’s beautifully simple and only requires a few ingredients and a few steps to create a dip that is not just tasty but also good for you!
Ingredients:
- 1 can (15 oz) chickpeas, drained and rinsed
- 1/4 cup tahini
- 1/4 cup water
- 2 tablespoons lemon juice
- 1 clove garlic, minced
- 2 tablespoons olive oil
- 1/2 teaspoon ground cumin
- Salt to taste
- Paprika for garnish
- Olive oil for drizzling
Method:
Step 1: Combine the Ingredients
In a food processor, combine the chickpeas, tahini, water, lemon juice, garlic, olive oil, ground cumin, and salt.
Step 2: Blend Until Smooth
Blend the mixture until it’s smooth and creamy. If you find that it’s too thick, don’t fret! Simply add more water, one tablespoon at a time, until you reach your desired consistency.
Step 3: Taste and Adjust the Seasoning
Taste your hummus and adjust the seasoning if necessary. Sometimes, a pinch more salt or an extra squeeze of lemon juice can elevate your dip to perfection!
Step 4: Transfer and Garnish
Transfer the hummus to a serving bowl. Drizzle with olive oil and sprinkle with paprika to make it look as good as it tastes.
Step 5: Serve It Up
Serve with warm pita bread, an array of fresh vegetables, or crunchy crackers for a delightful snack or appetizer.
Serving Suggestions & Pairings
This hummus pairs beautifully with sliced cucumbers, bell peppers, and cherry tomatoes. Creamy, light, and just the right amount of savory! For a Mediterranean feast, consider serving it alongside stuffed grape leaves, olives, and a short grain rice dish. You can even dollop it on salads for some extra flavor.
Storage & Leftovers Guide
Homemade hummus stores wonderfully in the refrigerator. Keep it in an airtight container, and it will last for about 3-5 days. If you ever find yourself with too much hummus (as if that’s even possible!), you can freeze it for up to three months! Just thaw in the fridge overnight before using.
Kitchen Wisdom & Success Tips
- Always taste as you go! Personalizing the seasoning will make it your perfect recipe.
- For a smoother texture, peel the chickpeas. It’s a bit tedious but makes a noticeable difference.
- Experiment with flavors! Roasted garlic, sun-dried tomatoes, or even a hint of harissa can lead to exciting variations.
Flavor Variations & Adaptations
Don’t hesitate to get creative! Add roasted red peppers for a sweet touch, or spice things up with some jalapeños. Herbs like cilantro or parsley can also bring a fresh note to your hummus.
Reader Questions & Solutions
-
Can I use dry chickpeas instead of canned?
Absolutely! Just soak and cook them first, and they’ll work beautifully. -
What if I don’t have tahini?
You can substitute it with almond butter or even a bit of peanut butter for a unique twist! -
How can I make my hummus spicier?
Consider adding a dash of cayenne pepper or a bit of chopped jalapeño. -
Can this be made in advance for a gathering?
Yes, hummus is perfect when made ahead. Just store it properly, and it will taste even better! -
What’s a good low-carb option for serving?
Try using veggie sticks like celery or bell peppers instead of bread for a fresh and crunchy alternative!
Wrapping Up
Crafting your own homemade hummus is not just about satisfying cravings; it’s a celebration of flavors, textures, and creativity. I hope this recipe inspires you to whip up your batch and share it with friends and family. Remember, it’s all about enjoying the process and making it your own. Happy cooking!
PrintHomemade Hummus
A simple and creamy homemade hummus that’s perfect for dipping and sharing.
- Prep Time: 10 minutes
- Cook Time: 0 minutes
- Total Time: 10 minutes
- Yield: 4-6 servings 1x
- Category: Appetizer
- Method: Blending
- Cuisine: Mediterranean
- Diet: Vegan
Ingredients
- 1 can (15 oz) chickpeas, drained and rinsed
- 1/4 cup tahini
- 1/4 cup water
- 2 tablespoons lemon juice
- 1 clove garlic, minced
- 2 tablespoons olive oil
- 1/2 teaspoon ground cumin
- Salt to taste
- Paprika for garnish
- Olive oil for drizzling
Instructions
- Combine the chickpeas, tahini, water, lemon juice, garlic, olive oil, ground cumin, and salt in a food processor.
- Blend until smooth and creamy. Add more water if needed.
- Taste and adjust the seasoning as necessary.
- Transfer to a serving bowl. Drizzle with olive oil and sprinkle with paprika.
- Serve with warm pita bread, fresh vegetables, or crackers.
Notes
Homemade hummus stores well in the fridge for 3-5 days. Can be frozen for up to three months.
Nutrition
- Serving Size: 1 serving
- Calories: 120
- Sugar: 1g
- Sodium: 250mg
- Fat: 8g
- Saturated Fat: 1g
- Unsaturated Fat: 7g
- Trans Fat: 0g
- Carbohydrates: 10g
- Fiber: 3g
- Protein: 4g
- Cholesterol: 0mg