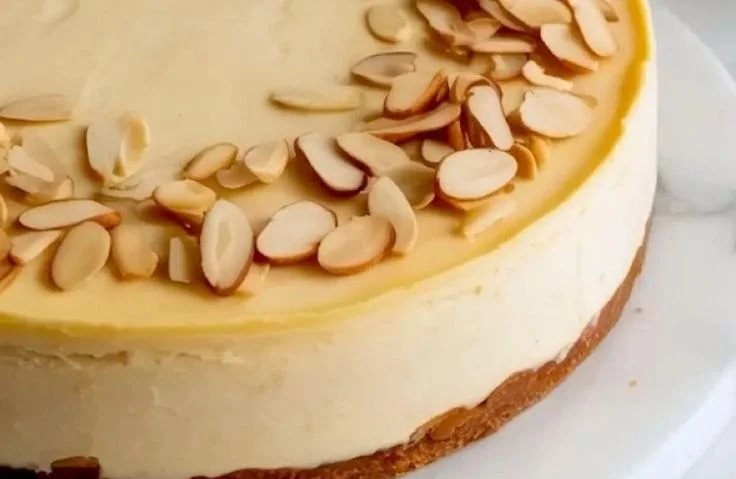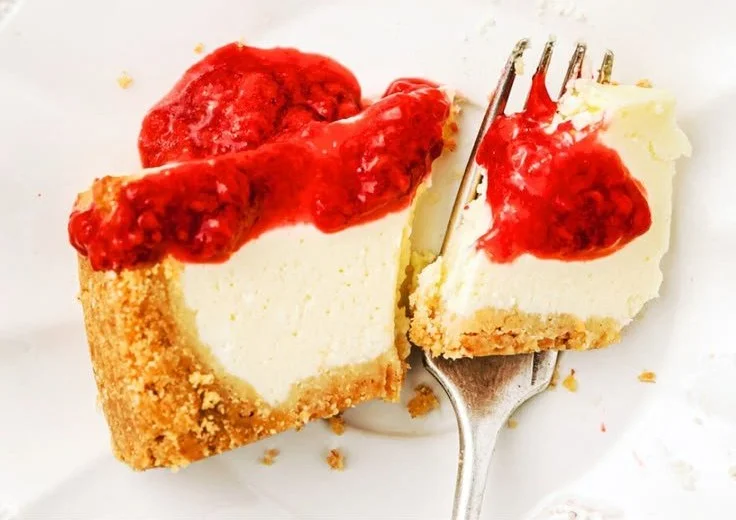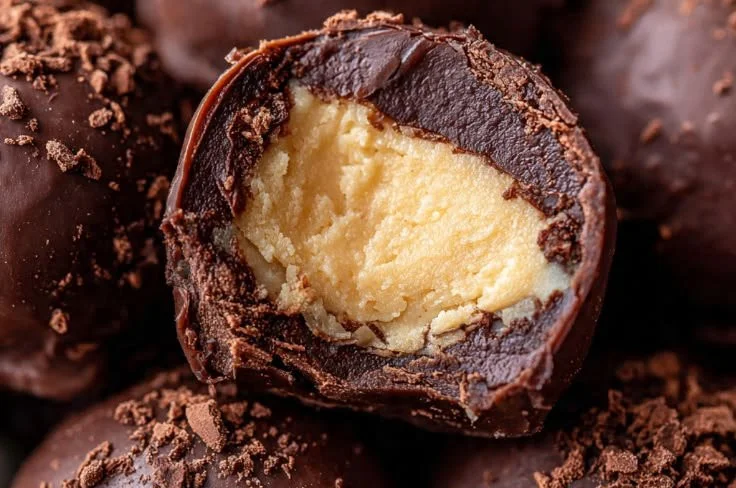
As summer heat builds, I often find myself craving something cool, creamy, and undeniably delicious. It was on one such sweltering afternoon that I discovered the joy of Frozen Cheesecake Bites. The idea came to me during a leisurely stroll through my kitchen, a place where inspiration often strikes. A bit of cream cheese, some sugar, and a handful of chocolate chips later, my culinary adventure led to these heavenly frozen treats.
There’s something incredibly satisfying about sinking your teeth into a chilled cube of cheesecake, its silky texture married beautifully with a rich chocolate coating. These bites aren’t just a dessert; they’re a celebration of all that is sweet and refreshing. Perfect for gatherings, or simply as a reward for enduring the day, they embody everything I love about summertime treats.
Recipe Timing
- Prep Duration: 15 minutes
- Active Cooking: 10 minutes
- Total Duration: 2 hours 30 minutes (including freezing time)
- Portion Size: About 24 bite-sized pieces
- Complexity: Simple
Nutritional Recipe
- Calories per portion: 90
- Protein: 1.5 grams
- Carbs: 9 grams
- Fats: 5.5 grams
- Fiber: 0 grams
- Sugars: 5 grams
- Sodium: 50 mg
Why You’ll Love This Frozen Cheesecake Bites
Imagine a dessert that makes you feel like you’re indulging while still being easy to whip up in your kitchen. Kids adore them, and adults can’t resist the delightful symphony of flavors. These bites can be a guilt-free treat tucked away in the freezer, ready for whenever cravings strike. Plus, they are versatile! You can customize them with different toppings or flavors, making them even more exciting each time you reach for a snack.
The Complete Cooking Journey
Let’s take a little stroll through the steps to create these Frozen Cheesecake Bites. It all starts with whipping up a smooth and creamy filling and ends with a tasty chocolate coating. Follow along; I promise it’s fun and absolutely rewarding!
Ingredients:
- 8 oz cream cheese, softened
- 1/2 cup sugar
- 1 tsp vanilla extract
- 1 cup whipped cream
- 1 cup chocolate chips
- 1 tbsp coconut oil (optional for melting chocolate)
- Graham cracker crumbs (optional for coating)
Method:
Step 1: Blend the Base
In a bowl, beat the softened cream cheese, sugar, and vanilla extract until smooth. This silky base is the heart of your cheesecake bites.
Step 2: Fold in the Whipped Cream
Gently fold in the whipped cream until well mixed. This step adds the light, airy texture that makes these bites melt in your mouth.
Step 3: Spread the Cheesecake Mixture
Pour the mixture into a lined baking dish and spread it evenly. A spatula works wonders here for smooth, even layers.
Step 4: Freeze the Mixture
Place the dish in the freezer for about 2 hours or until firm. This step is crucial for achieving those satisfying, sliceable bites.
Step 5: Cut into Cubes
Once set, cut the cheesecake into bite-sized cubes. The excitement builds as you visualize these little treasures waiting to be coated in chocolate!
Step 6: Melt the Chocolate
Melt the chocolate chips with coconut oil in a microwave or double boiler. This step turns your chocolate into a smooth, shiny dressing for the cheesecake.
Step 7: Dip Each Cube
Dip each cheesecake cube into the melted chocolate, allowing excess to drip off. This part is messy but oh-so-fun!
Step 8: Add the Graham Cracker Crunch
Optionally, roll the dipped cubes in graham cracker crumbs for added crunch. The flavor of graham crackers enhances the cheesecake experience!
Step 9: Freeze Again
Place the chocolate-covered bites on a parchment-lined tray and return to the freezer until the chocolate hardens. Patience pays off here!
Step 10: Serve and Enjoy!
Serve chilled and enjoy! Whether it’s a party or a quiet evening at home, these bites will steal the show.
Serving Suggestions & Pairings
These cheesecake bites shine on their own, but they can be even more delightful served with fresh berries or a drizzle of raspberry sauce. Pair them with a chilled glass of milk or your favorite dessert wine for a truly indulgent experience.
Storage & Leftovers Guide
Store any leftovers in an airtight container in the freezer for up to a month. While they will taste great, keep in mind the first 2-3 weeks will offer the best texture and flavor.
Kitchen Wisdom & Success Tips
- Make sure your cream cheese is at room temperature for easy blending.
- If you prefer a less sweet option, reduce the sugar slightly.
- Use quality chocolate for melting; it makes a big difference in flavor.
- Experiment with other coatings like chopped nuts or sprinkles for a different texture!
Flavor Variations & Adaptations
Feel free to get creative! Add a swirl of fruit puree into the cheesecake filling or top with caramel sauce instead of chocolate for a delicious twist. You could also try different flavored extracts like almond or lemon for a unique kick.
Reader Questions & Solutions
-
Can I use low-fat cream cheese?
Yes, using low-fat cream cheese will yield a lighter cheesecake bite, though it may affect the texture slightly. -
How can I make these dairy-free?
Substitute the cream cheese with a dairy-free alternative and use coconut whipped cream instead of regular whipped cream. -
What can I use instead of chocolate for dipping?
Consider using white chocolate or a yogurt coating for something different! -
Why did my chocolate harden too quickly?
If melted chocolate is too hot, it may seize. Allow it to cool slightly before dipping. -
Can I make these bites ahead of time for a party?
Absolutely! They store well in the freezer and will be ready for you to impress your guests.
Wrapping Up
These Frozen Cheesecake Bites are not just simple to make, they’re a delightful escape from the ordinary dessert experience. With their creamy texture enveloped in chocolate and a hint of graham cracker crunch, these bites are sure to bring smiles and satisfy cravings. So roll up your sleeves, gather your ingredients, and dive into this joyful treat-making adventure. You deserve the sweet reward of whipping up something delicious!
PrintFrozen Cheesecake Bites
Delightfully creamy frozen cheesecake bites coated in rich chocolate, perfect for summer treats.
- Prep Time: 15 minutes
- Cook Time: 10 minutes
- Total Time: 150 minutes
- Yield: 24 pieces 1x
- Category: Dessert
- Method: No-Bake
- Cuisine: American
- Diet: Vegetarian
Ingredients
- 8 oz cream cheese, softened
- 1/2 cup sugar
- 1 tsp vanilla extract
- 1 cup whipped cream
- 1 cup chocolate chips
- 1 tbsp coconut oil (optional for melting chocolate)
- Graham cracker crumbs (optional for coating)
Instructions
- Blend the Base: In a bowl, beat the softened cream cheese, sugar, and vanilla extract until smooth.
- Fold in the Whipped Cream: Gently fold in the whipped cream until well mixed.
- Spread the Cheesecake Mixture: Pour the mixture into a lined baking dish and spread it evenly.
- Freeze the Mixture: Place the dish in the freezer for about 2 hours or until firm.
- Cut into Cubes: Once set, cut the cheesecake into bite-sized cubes.
- Melt the Chocolate: Melt the chocolate chips with coconut oil in a microwave or double boiler.
- Dip Each Cube: Dip each cheesecake cube into the melted chocolate, allowing excess to drip off.
- Add the Graham Cracker Crunch: Optionally, roll the dipped cubes in graham cracker crumbs.
- Freeze Again: Place the chocolate-covered bites on a parchment-lined tray and return to the freezer until the chocolate hardens.
- Serve and Enjoy: Serve chilled and enjoy!
Notes
Store leftovers in an airtight container in the freezer for up to a month. Best enjoyed within the first 2-3 weeks for optimal texture.
Nutrition
- Serving Size: 1 piece
- Calories: 90
- Sugar: 5g
- Sodium: 50mg
- Fat: 5.5g
- Saturated Fat: 3g
- Unsaturated Fat: 2.5g
- Trans Fat: 0g
- Carbohydrates: 9g
- Fiber: 0g
- Protein: 1.5g
- Cholesterol: 15mg