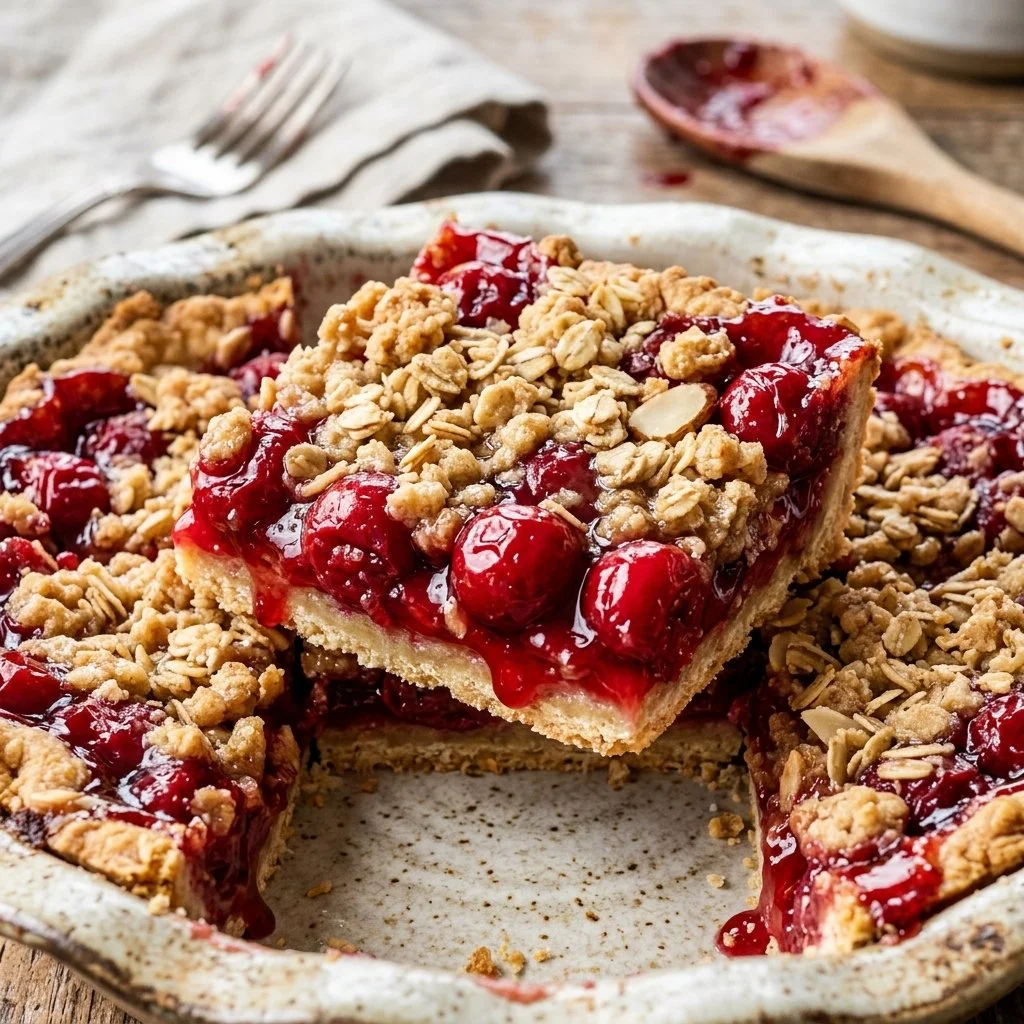
There’s something truly magical about desserts baked in a home kitchen—especially when it involves the sweet, tangy burst of cherries encased in a buttery, crumbly crust. Growing up, my grandmother would often whip up her classic cherry pie on lazy summer afternoons. The intoxicating aroma of warm cherries mixed with a hint of almond extract would waft through the house, drawing family and friends into the kitchen like moths to a flame. Though her recipe was a closely guarded secret, I’ve taken that childhood nostalgia and transformed it into a more modern treat: Cherry Pie Bars.
These delightful bars combine all the flavors of a traditional cherry pie but in a sliceable, easy-to-serve format. Perfect for picnics, potlucks, or simply enjoying with a cup of tea at home, they are sure to evoke fond memories and create new ones with each bite.
Recipe Timing
- Prep Duration: 15 minutes
- Active Cooking: 35 minutes
- Total Duration: 50 minutes
- Portion Size: 12 bars
- Complexity: Simple
Nutritional Recipe
- Calories per portion: Approximately 210
- Protein: 2g
- Carbs: 33g
- Fats: 9g
- Fiber: 1g
- Sugars: 14g
- Sodium: 95mg
Why You’ll Love This Cherry Pie Bars
These Cherry Pie Bars are not only easier to make than a full pie, but they also have the added bonus of being incredibly portable. The sweet cherry filling is perfectly complemented by the rich, crumbly crust, and the hint of almond makes every bite unforgettable. Plus, they can be dusted with powdered sugar for that lovely finishing touch, turning a simple dessert into something special. Whether you’re indulging on a perfect sunny day or during a cozy winter evening, these bars are sure to bring warmth and joy.
The Complete Cooking Journey
Making Cherry Pie Bars is a delightful experience from start to finish. You begin by creating a buttery crust that’s both tender and crumbly, followed by layering it with rich cherry filling that strikes the perfect balance between sweet and tart. Finally, the bars are baked until golden brown and topped with a dusting of powdered sugar, resulting in a dessert that is not only delicious but also incredibly satisfying to prepare and serve.
Ingredients:
- 2 cups all-purpose flour
- 1 cup granulated sugar
- 1/2 teaspoon salt
- 1/2 cup unsalted butter, softened
- 1 large egg
- 1/2 teaspoon almond extract
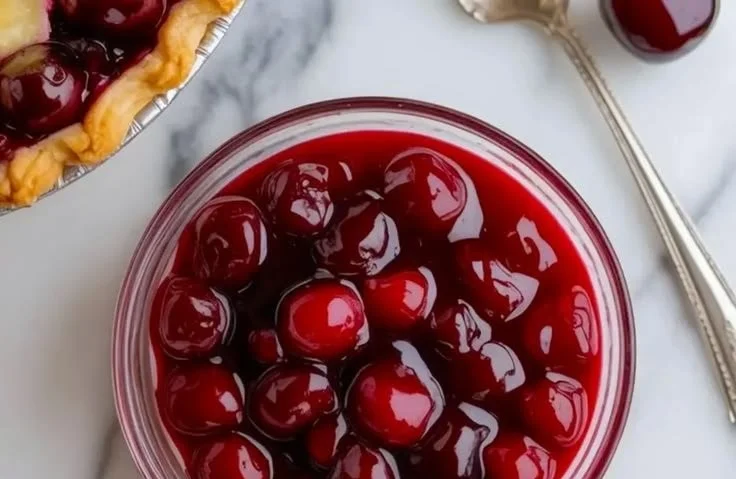
- 2 cups cherry pie filling
- 1 tablespoon cornstarch (optional, for thickening)
- Powdered sugar for dusting (optional)
Method:
Step 1: Preheat the Oven and Prepare the Pan
Preheat your oven to 350°F (175°C) and grease a 9×13 inch baking pan.
Step 2: Mix Dry Ingredients
In a bowl, mix together the flour, sugar, and salt. This combination creates a delicious base for your crust.
Step 3: Combine the Wet Ingredients
Add the softened butter, egg, and almond extract to the dry mixture. Mix until the texture is crumbly—this will form the crust’s delightful texture.
Step 4: Form the Crust
Press half of the mixture firmly into the bottom of the prepared pan to create a sturdy crust.
Step 5: Layer the Cherry Pie Filling
Spread the cherry pie filling evenly over the crust. If you’d like a thicker filling, mix the cornstarch with the cherry filling to help achieve that perfect consistency.
Step 6: Crumble the Top Dough
Crumble the remaining dough over the cherry filling, ensuring to cover it generously.
Step 7: Bake to Perfection
Place the pan in your preheated oven and bake for 30-35 minutes or until the top is golden brown.
Step 8: Cool and Dust
Let the bars cool completely before slicing them into squares. If desired, dust them with powdered sugar just before serving for that final touch of elegance.
Serving Suggestions & Pairings
These Cherry Pie Bars are delightful on their own, but they shine even brighter with a scoop of vanilla ice cream or a dollop of whipped cream. Pair them with a cup of coffee for a dessert that’s perfect for afternoon tea or serve them as a sweet treat after dinner.
Storage & Leftovers Guide
Store any leftovers in an airtight container at room temperature for up to 3 days, or refrigerate for up to a week. If you’d like to keep them longer, you can freeze the bars by wrapping them tightly in plastic wrap and then aluminum foil for up to 3 months. Just thaw them overnight in the fridge before serving.
Kitchen Wisdom & Success Tips
- Make sure your butter is softened to room temperature for the best mixing results.
- For added flavor, consider integrating some lemon zest into the cherry filling.
- If you’re short on time, you can use store-bought cherry pie filling for a quicker prep.
Flavor Variations & Adaptations
If cherries aren’t in season, feel free to substitute with other fruit fillings like blueberries, raspberries, or even apples. Adjust the sugar content based on the sweetness of your chosen fruit. For a nutty twist, you might incorporate ground almonds into the crust.
Reader Questions & Solutions
-
Can I use fresh cherries instead of pie filling?
Absolutely! Just pit and slice them, adding sugar and cornstarch to thicken the juices. -
What gluten-free options do I have?
Substitute the all-purpose flour with a gluten-free flour blend. Ensure all other ingredients are certified gluten-free. -
How can I tell when the bars are done baking?
The top should be golden brown, and you can check by inserting a toothpick into the center—if it comes out clean, they’re ready! -
Can I make these bars ahead of time?
Yes! You can prepare them a day or two in advance and store them in an airtight container. -
What if my cherry filling is too runny?
Adding cornstarch will help thicken it. If you forgot, simply bake it a little longer to allow excess moisture to evaporate.
Wrapping Up
There you have it—a delightful Cherry Pie Bars recipe that melds nostalgia with simplicity. Whether you’re sharing these with loved ones or savoring them solo, each bite promises to evoke warmth and happiness. So, gather your ingredients, preheat that oven, and whip up a batch of these bars that celebrate the sweet joys of life. Happy baking!
PrintCherry Pie Bars
Delightful Cherry Pie Bars that combine the flavors of traditional cherry pie in an easy-to-serve format, perfect for any occasion.
- Prep Time: 15 minutes
- Cook Time: 35 minutes
- Total Time: 50 minutes
- Yield: 12 bars 1x
- Category: Dessert
- Method: Baking
- Cuisine: American
- Diet: Vegetarian
Ingredients
- 2 cups all-purpose flour
- 1 cup granulated sugar
- 1/2 teaspoon salt
- 1/2 cup unsalted butter, softened
- 1 large egg
- 1/2 teaspoon almond extract
- 2 cups cherry pie filling
- 1 tablespoon cornstarch (optional, for thickening)
- Powdered sugar for dusting (optional)
Instructions
- Preheat your oven to 350°F (175°C) and grease a 9×13 inch baking pan.
- Mix together the flour, sugar, and salt in a bowl.
- Add the softened butter, egg, and almond extract to the dry mixture and mix until crumbly.
- Press half of the mixture firmly into the bottom of the prepared pan.
- Spread the cherry pie filling evenly over the crust.
- Crumble the remaining dough over the cherry filling.
- Bake for 30-35 minutes or until the top is golden brown.
- Let cool completely before slicing and dusting with powdered sugar if desired.
Notes
Serve with a scoop of vanilla ice cream or whipped cream for an extra treat. Can be stored in an airtight container at room temperature for up to 3 days or refrigerated for up to a week.
Nutrition
- Serving Size: 1 bar
- Calories: 210
- Sugar: 14g
- Sodium: 95mg
- Fat: 9g
- Saturated Fat: 5g
- Unsaturated Fat: 4g
- Trans Fat: 0g
- Carbohydrates: 33g
- Fiber: 1g
- Protein: 2g
- Cholesterol: 30mg