There’s something undeniably enchanting about the charm of red velvet. Its deep crimson hue paired with that signature cocoa flavor creates an irresistible allure that captures hearts and taste buds alike. I remember the first time I experienced red velvet brownies at a friend’s birthday party. I was immediately taken by their striking color and the decadent twist on the classic brownie. The moment I took a bite, the rich, velvety texture melted in my mouth, and the slight tanginess caught me off guard in the best possible way. That evening sparked a culinary obsession, leading me on a delightful journey to recreate my own batch of these scrumptious treats.
As I began experimenting in my kitchen, the creation of red velvet brownies became a cherished ritual, a tradition that not only satisfied my sweet tooth but also brought friends and family together. Whether it was a casual weekend gathering or a festive holiday celebration, these brownies were always a hit, and it quickly became clear: there’s nothing quite like serving a dessert that evokes joy and nostalgia.
Recipe Timing
- Prep Duration: 15 minutes
- Active Cooking: 30-35 minutes
- Total Duration: 50 minutes
- Portion Size: 16 brownies
- Complexity: Simple
Nutritional Recipe
- Calories per portion: Approximately 200
- Protein: 2g per serving
- Carbs: 28g per serving
- Fats: 10g per serving
- Fiber: 1g per serving
- Sugars: 15g per serving
- Sodium: 50mg per serving
Why You’ll Love This Red Velvet Brownies
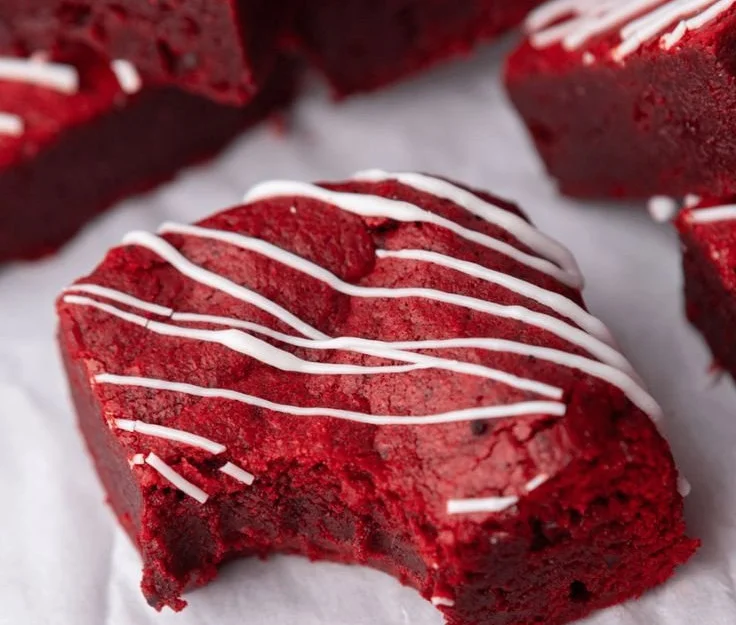
These red velvet brownies are not just visually stunning; they’re a harmonious balance of flavors and textures. The chocolatey richness, enhanced by the tang of buttermilk and a hint of vanilla, makes every bite an indulgent experience. And if you choose to drape them in melted white chocolate, you’re embarking on an unforgettable flavor journey. They are perfect for any occasion, whether you’re celebrating a birthday, hosting a book club, or simply craving something delightfully sweet.
The Complete Cooking Journey
Ready to embark on this delicious adventure? Let’s grab our ingredients and transform them into mouthwatering red velvet brownies that will leave everyone asking for seconds!
Ingredients:
- 3/4 cup unsalted butter (melted)
- 2 oz chopped semi-sweet chocolate bar
- 1 & 1/4 cup granulated sugar
- 2 large eggs
- 2 teaspoons vanilla extract
- 1 teaspoon white vinegar
- 1/2 tablespoons red gel food coloring
- 2 tablespoons unsweetened cocoa powder
- 1 & 1/4 cup all-purpose flour
- 1/4 teaspoon salt
- 1/2 cup white chocolate chips (optional, mixed in the batter or melted and drizzled on top of the brownies)
Method:
Step 1: Preheat the Oven
Preheat your oven to 350°F (175°C) and line an 8×8 inch baking pan with parchment paper. This will ensure easy removal of our delightful brownies once they’re baked.
Step 2: Melt Butter and Chocolate
In a large microwave-safe mixing bowl, melt the butter and chopped chocolate in the microwave in 30-second increments. Stir until fully melted and smooth, letting that rich aroma fill your kitchen.
Step 3: Combine Sugar and Eggs
Add in the granulated sugar and mix until fully combined. Then, crack in the eggs one at a time, beating well after each addition. Don’t forget to stir in the vanilla extract, white vinegar, and the vibrant red food coloring. This is where the magic truly begins to happen!
Step 4: Sift Dry Ingredients
In a separate bowl, sift together the cocoa powder, flour, and salt. This step helps to combine and aerate the dry ingredients, making for a fluffier brownie.
Step 5: Combine Wet and Dry Ingredients
Gradually add the dry mix to the wet ingredients, stirring gently until just combined. Take care not to overmix; we want our brownies to be deliciously chewy!
Step 6: Fold in White Chocolate Chips
If you’re feeling adventurous, fold in the white chocolate chips at this stage for an extra layer of sweetness and richness.
Step 7: Pour Batter and Spread
Pour the luscious red batter into the prepared 8×8 inch pan and spread it evenly, marveling at the beautiful color.
Step 8: Bake the Brownies
Bake in the preheated oven for approximately 30-35 minutes, or until a toothpick inserted into the center comes out with a few moist crumbs (not wet batter). The anticipation is half the fun!
Step 9: Cool the Brownies
Allow the brownies to cool completely in the pan before cutting them into squares. It’s tough, but patience is key here!
Step 10: Garnish (Optional)
For the grand finale, drizzle melted white chocolate on top of the brownies, allow it to set, slice, and get ready to enjoy!
Serving Suggestions & Pairings
These red velvet brownies pair beautifully with a scoop of vanilla ice cream, a dollop of whipped cream, or a cup of rich coffee. For an elegant touch, serve them on a dessert platter alongside fresh berries or a side of berry compote.
Storage & Leftovers Guide
Store your brownies in an airtight container at room temperature for up to 3 days, or in the refrigerator for up to a week. If you want to keep them for longer, they freeze beautifully—just wrap them individually in plastic wrap and place them in a freezer-safe bag for up to 3 months.
Kitchen Wisdom & Success Tips
- Room Temperature Ingredients: Ensure your eggs are at room temperature for an even mix.
- Don’t Overbake: For that fudgy texture, take them out as soon as a toothpick comes out with a few moist crumbs.
- Taste as You Go: Always taste the batter—just to ensure the balance of flavors is just right, right?
Flavor Variations & Adaptations
Feeling adventurous? Consider adding a sprinkle of espresso powder to enhance the chocolate flavor or mixing in toasted nuts for some added crunch. For a festive twist, incorporate peppermint extract around the holidays!
Reader Questions & Solutions
-
What can I substitute if I don’t have red gel food coloring?
You can use liquid food coloring, but start with a small amount as it’s less concentrated, or use beet juice for a natural alternative. -
Can I use cocoa powder instead of semi-sweet chocolate?
Yes! Just substitute with an additional 2 tablespoons of cocoa powder plus a touch more butter (1 tablespoon) to balance the fat content. -
Why didn’t my brownies rise?
Make sure your baking powder is fresh! Also, be cautious with mixing; overmixing can result in dense brownies. -
Can I add nuts to the brownie mix?
Absolutely! Pecans or walnuts would add a delightful crunch. -
How can I make my brownies less sweet?
Try reducing the sugar slightly and using dark chocolate instead of semi-sweet.
Wrapping Up
Now that you have the tools and tips to create these luscious red velvet brownies, it’s time to start baking! Whether it’s for a special occasion or just a sweet treat on a Wednesday, these brownies are bound to impress. So roll up your sleeves, preheat your oven, and let your culinary creativity shine! Happy baking!
PrintRed Velvet Brownies

Indulge in the rich and velvety texture of red velvet brownies, infused with cocoa and a hint of tanginess, perfect for any occasion.
- Prep Time: 15 minutes
- Cook Time: 30 minutes
- Total Time: 45 minutes
- Yield: 16 brownies 1x
- Category: Dessert
- Method: Baking
- Cuisine: American
- Diet: Vegetarian
Ingredients
- 3/4 cup unsalted butter (melted)
- 2 oz chopped semi-sweet chocolate bar
- 1 1/4 cup granulated sugar
- 2 large eggs
- 2 teaspoons vanilla extract
- 1 teaspoon white vinegar
- 1/2 tablespoons red gel food coloring
- 2 tablespoons unsweetened cocoa powder
- 1 1/4 cup all-purpose flour
- 1/4 teaspoon salt
- 1/2 cup white chocolate chips (optional)
Instructions
- Preheat your oven to 350°F (175°C) and line an 8×8 inch baking pan with parchment paper.
- Melt the butter and chopped chocolate in a microwave-safe bowl in 30-second increments until smooth.
- Add in the granulated sugar and mix until fully combined. Then, crack in the eggs one at a time, beating well and stir in vanilla extract, white vinegar, and red food coloring.
- Sift together the cocoa powder, flour, and salt in a separate bowl.
- Combine the dry mix with the wet ingredients gently until just mixed.
- Fold in white chocolate chips if desired.
- Pour the batter into the prepared pan and spread evenly.
- Bake for approximately 30-35 minutes, or until a toothpick comes out with a few moist crumbs.
- Cool completely in the pan before cutting into squares.
- Garnish with melted white chocolate if desired.
Notes
Enjoy these brownies with vanilla ice cream or whipped cream for an extra treat. Store in an airtight container for up to 3 days at room temperature.
Nutrition
- Serving Size: 1 brownie
- Calories: 200
- Sugar: 15g
- Sodium: 50mg
- Fat: 10g
- Saturated Fat: 5g
- Unsaturated Fat: 5g
- Trans Fat: 0g
- Carbohydrates: 28g
- Fiber: 1g
- Protein: 2g
- Cholesterol: 30mg