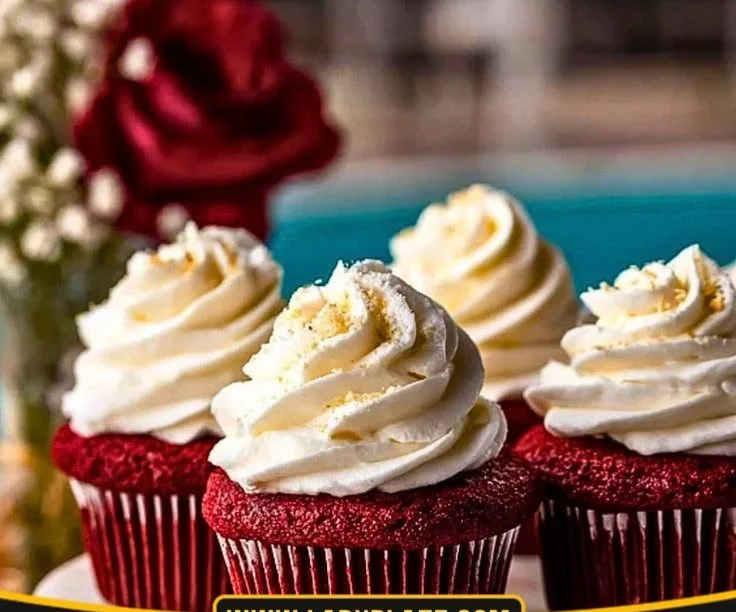
There’s something truly magical about a cupcake. It’s not just a little cake; it’s a sweet hug in a paper liner. I remember the first time I tasted a red velvet cupcake. It was at a quaint bakery on a rainy afternoon, where the air was fragrant with buttercream and cinnamon. The vibrant crimson color caught my eye immediately, and as I took that first bite, the soft, moist texture enveloped my mouth, enticing me with its rich chocolate undertone. Topped with a tangy, luscious cream cheese frosting, it was a dessert experience I’ve cherished ever since. Today, I want to share that same joy with you by helping you create your own batch of delightful Red Velvet Cupcakes.
Recipe Timing
- Prep Duration: 15 minutes
- Active Cooking: 25 minutes
- Total Duration: 40 minutes
- Portion Size: Makes 12 cupcakes
- Complexity: Simple
Nutritional Recipe
- Calories per portion: Approximately 307 calories
- Protein: 3 grams
- Carbs: 43 grams
- Fats: 15 grams
- Fiber: 0.5 grams
- Sugars: 31 grams
- Sodium: 240 mg
Why You’ll Love This Red Velvet Cupcakes
These Red Velvet Cupcakes are more than just a visual treat; they are a convergence of flavor and texture. The light buttermilk-infused batter creates an ultra-fluffy crumb that melts in your mouth, while the zesty cream cheese frosting complements the cake with its delightful tanginess. Ideal for birthdays, holidays, or just because—you’ll love their retro, vibrant charm that brings an iconic touch to any occasion.
The Complete Cooking Journey
Let’s embark on our culinary journey! Picture the aroma of warm cupcakes wafting through your kitchen—you can almost taste the buttery goodness. With each step, we’ll mix, bake, and frost our way to cupcake perfection.
Ingredients:
- 1 1/2 cups all-purpose flour
- 1 cup granulated sugar
- 1 teaspoon baking powder
- 1 teaspoon baking soda
- 1/2 teaspoon salt
- 1 cup vegetable oil
- 1 cup buttermilk, at room temperature
- 2 large eggs, at room temperature
- 2 tablespoons red food coloring
- 1 teaspoon vanilla extract
- 1 teaspoon white vinegar
- 8 ounces cream cheese, softened
- 1/2 cup unsalted butter, softened
- 4 cups powdered sugar
- 1 teaspoon vanilla extract (for frosting)
Method:
Step 1: Preheat and Prepare
Preheat the oven to 350°F (175°C) and line a cupcake pan with liners, making sure they’re all snug and ready to hold your batter.
Step 2: Whisk the Dry Ingredients
In a large bowl, whisk together the flour, sugar, baking powder, baking soda, and salt until they’re well combined. This is the foundation of your cupcakes!
Step 3: Mix the Wet Ingredients
In another bowl, mix the oil, buttermilk, eggs, food coloring, vanilla, and vinegar until everything is smoothly combined. Watch the color transform; it’s part of the fun!
Step 4: Combine Wet and Dry
Gradually add the wet ingredients to the dry ingredients, taking care to mix until just combined. Be gentle here—you want to keep all that fluffy goodness.
Step 5: Fill the Liners
Using a spoon or a scoop, fill the cupcake liners about 2/3 full with the vibrant red batter. This allows room for them to rise beautifully!
Step 6: Bake to Perfection
Bake for 20-22 minutes, or until a toothpick inserted into the center comes out clean. The smell will be irresistible! Allow them to cool completely in the pan.
Step 7: Make the Creamy Frosting
For the frosting, beat the cream cheese and butter together in a bowl until smooth. Gradually add the powdered sugar and vanilla, mixing until creamy and dreamy.
Step 8: Frost and Enjoy!
Frost the cooled cupcakes with the cream cheese frosting. A swirl or a dollop—get creative! Enjoy every bite and the smiles they bring.
Serving Suggestions & Pairings
These cupcakes shine on their own but pair wonderfully with a hot cup of coffee or a refreshing glass of milk. For a festive touch, you can sprinkle some edible glitter on top or serve them on a vibrant platter surrounded by strawberries or raspberries.
Storage & Leftovers Guide
Store your Red Velvet Cupcakes in an airtight container in the fridge for up to five days—if they last that long! For longer storage, they can be frozen (without frosting) for up to three months. Just let them thaw overnight in the refrigerator before decorating.
Kitchen Wisdom & Success Tips
- Make sure your eggs and buttermilk are at room temperature; it helps with the batter’s texture.
- Use oil instead of butter for a lighter texture and moisture.
- Don’t be too aggressive while mixing; overmixing can lead to dense cupcakes.
- If you don’t have buttermilk, regular milk with a splash of vinegar works well as a substitute.
Flavor Variations & Adaptations
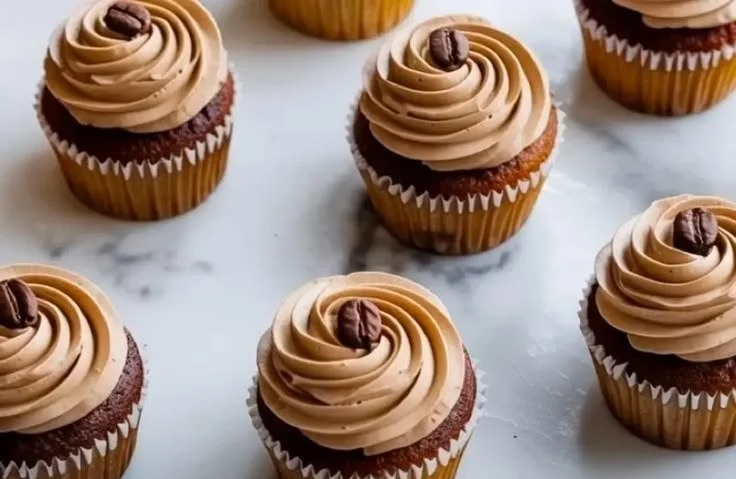
Feeling adventurous? Add a teaspoon of espresso powder to the batter for a mocha twist or mix in some chocolate chips. You could also swap out half the all-purpose flour for whole wheat to give a nuttier flavor and boost fiber content.
Reader Questions & Solutions
-
Why do my cupcakes come out dry?
- Make sure to measure your flour accurately; too much flour can cause dryness. Also, check your oven temperature with a thermometer to avoid overbaking.
-
Can I use other types of food coloring?
- Yes! You can use gel or paste food coloring for more vibrant results—just be cautious with the amount as these tend to be more concentrated.
-
What can I do if my frosting is too runny?
- If your frosting is too runny, add more powdered sugar until you reach your desired consistency.
-
How do I make mini cupcakes with this recipe?
- Simply fill mini cupcake liners about halfway full and bake for about 10-12 minutes.
-
Can I make this dairy-free?
- Swap the buttermilk for almond milk mixed with vinegar and use dairy-free cream cheese and butter for the frosting!
Wrapping Up
There you have it—your own journey to baking indulgent Red Velvet Cupcakes that promise to bring joy with every bite. Don’t forget to share your creations with friends, family, or just indulge on your own (you deserve it!). Happy baking!
PrintRed Velvet Cupcakes

Delightful Red Velvet Cupcakes topped with creamy cream cheese frosting for a rich, decadent treat.
- Prep Time: 15 minutes
- Cook Time: 25 minutes
- Total Time: 40 minutes
- Yield: 12 cupcakes 1x
- Category: Dessert
- Method: Baking
- Cuisine: American
- Diet: Vegetarian
Ingredients
- 1 1/2 cups all-purpose flour
- 1 cup granulated sugar
- 1 teaspoon baking powder
- 1 teaspoon baking soda
- 1/2 teaspoon salt
- 1 cup vegetable oil
- 1 cup buttermilk, at room temperature
- 2 large eggs, at room temperature
- 2 tablespoons red food coloring
- 1 teaspoon vanilla extract
- 1 teaspoon white vinegar
- 8 ounces cream cheese, softened
- 1/2 cup unsalted butter, softened
- 4 cups powdered sugar
- 1 teaspoon vanilla extract (for frosting)
Instructions
- Preheat the oven to 350°F (175°C) and line a cupcake pan with liners.
- Whisk together the flour, sugar, baking powder, baking soda, and salt in a large bowl until combined.
- Mix the oil, buttermilk, eggs, food coloring, vanilla, and vinegar in another bowl until smooth.
- Combine the wet ingredients with the dry ingredients, mixing until just combined.
- Fill the cupcake liners about 2/3 full with the batter.
- Bake for 20-22 minutes, or until a toothpick comes out clean. Allow to cool.
- Make the frosting by beating cream cheese and butter until smooth, then gradually adding powdered sugar and vanilla.
- Frost the cooled cupcakes and enjoy!
Notes
Store in an airtight container in the fridge for up to 5 days, or freeze (without frosting) for up to 3 months.
Nutrition
- Serving Size: 1 cupcake
- Calories: 307
- Sugar: 31g
- Sodium: 240mg
- Fat: 15g
- Saturated Fat: 5g
- Unsaturated Fat: 8g
- Trans Fat: 0g
- Carbohydrates: 43g
- Fiber: 0.5g
- Protein: 3g
- Cholesterol: 30mg