There’s something magical about chocolatey dessert goodness that can instantly transport us back to simpler times. As a child, I remember countless afternoons spent in my kitchen, surrounded by the scent of melting chocolate and flour dancing in the air. Whether it was holiday baking with family or simply whipping up sweet treats with friends after school, those moments created memories that linger in the heart. But what happens when those cravings hit, and the thought of waiting hours for a batch of brownies feels unbearable? Enter the Microwave Brownie in a Mug — a heartfelt solution for when you need a little sweet satisfaction in a fraction of the time.
Recipe Timing
- Prep Duration: 5 minutes
- Active Cooking: 1 minute and 30 seconds
- Total Duration: 7 minutes and 30 seconds
- Portion Size: 1 serving
- Complexity: Simple
Nutritional Recipe
- Calories per portion: Approximately 400 calories
- Protein: 6 grams
- Carbs: 55 grams
- Fats: 18 grams
- Fiber: 2 grams
- Sugars: 34 grams
- Sodium: 200 mg
Why You’ll Love This Microwave Brownie in a Mug
This Microwave Brownie in a Mug is the answer to your sweet tooth’s prayers! Imagine rich, fudgy chocolate goodness ready in under eight minutes — with no need for an oven. It’s perfect for late-night cravings, a quick dessert after dinner, or even a sweet treat to enjoy with a cup of coffee. The best part? You can personalize it with your favorite toppings or mix-ins, making each mug a unique experience. It’s like having a personal dessert chef cheering you on every step of the way!
The Complete Cooking Journey
Let’s embark on a delightful journey from ingredients to a gooey, chocolatey finish. With just a few simple ingredients and your trusty microwave, we’re about to create something extraordinary in mere minutes!
Ingredients:
- 4 tablespoons all-purpose flour
- 4 tablespoons sugar
- 2 tablespoons cocoa powder
- 2 tablespoons vegetable oil
- 2 tablespoons water
- 1/4 teaspoon vanilla extract
- A pinch of salt
Method:
Step 1: Gather Your Ingredients
Before diving in, gather all your ingredients in one place. This not only makes the process smoother but adds to the excitement.
Step 2: Mix the Dry Ingredients
In a microwave-safe mug, combine the flour, sugar, cocoa powder, and salt. This mix of dry ingredients will form the base of your brownie, channeling all the rich chocolatey flavors.
Step 3: Add the Wet Ingredients
Now it’s time for the magic! Pour in the vegetable oil, water, and a splash of vanilla extract. This combo will add depth and moisture to your brownie.
Step 4: Stir Until Smooth
Using a fork or a spoon, mix vigorously until you have a smooth batter. Aim for a nice, velvety consistency to ensure each bite is perfect.
Step 5: Microwave the Brownie
Pop your mug into the microwave and set it to high for 1 minute and 30 seconds. Keep an eye on it — every microwave is a bit different. You want it cooked through but still soft in the center.
Step 6: Let Cool Slightly
Once done, take your mug out of the microwave (careful, it’s hot!), and let it cool for just a couple of minutes. This allows the gooey center to settle and makes for the perfect brownie consistency.
Step 7: Dig In and Enjoy!
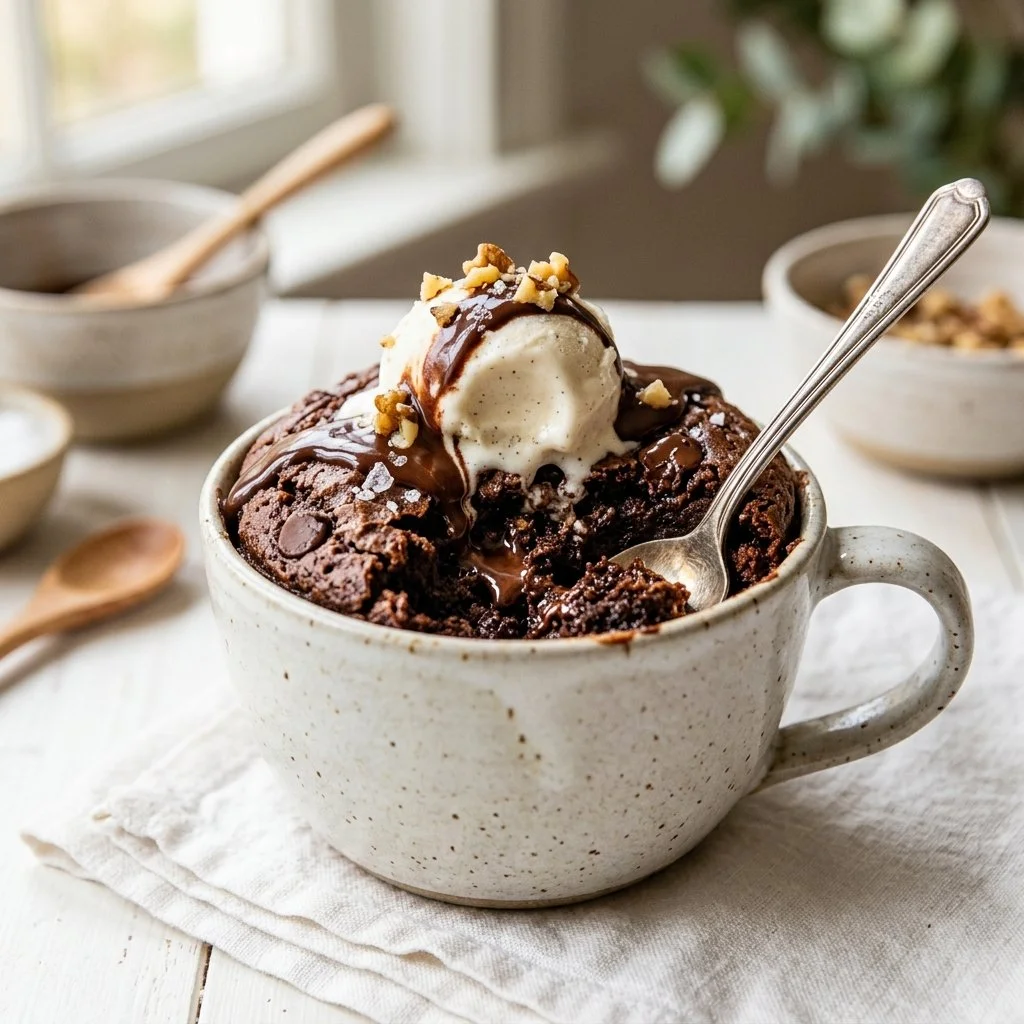
Grab a spoon and indulge in your warm, comforting brownie straight from the mug. You’ve earned it!
Serving Suggestions & Pairings
While this brownie is delicious on its own, consider adding a scoop of vanilla ice cream or a dollop of whipped cream on top for an extravagant treat. Drizzling some caramel or chocolate sauce can also elevate it to new heights. Pair it with a rich coffee or hot chocolate for the ultimate cozy moment!
Storage & Leftovers Guide
Should you have any leftovers (though I doubt you will!), you can cover the mug with plastic wrap and store it in the fridge for up to 2 days. When ready to enjoy again, simply microwave for 20-30 seconds to warm it up.
Kitchen Wisdom & Success Tips
- Microwave Variability: Your microwave may vary in power. Start at 1 minute and check the consistency before adding extra time.
- Mix-In Options: Consider adding chocolate chips, nuts, or any other favorite mix-ins to amp up the flavor and texture.
- Mug Size Matters: Ensure your mug is large enough to allow the brownie to rise during cooking to avoid spilling.
Flavor Variations & Adaptations
- Nutty Brownie: Toss in a handful of chopped walnuts or pecans for extra crunch.
- Mint Chocolate: Add a drop of peppermint extract for a refreshing twist.
- Spicy Kick: Incorporate a pinch of cayenne pepper to surprise your taste buds with a little heat!
Reader Questions & Solutions
-
Can I double the recipe?
For best results, make each brownie in its own mug; doubling may not cook evenly. -
What if my brownie is too dry?
Overcooking is often the culprit. Start with less time and increment as needed. -
Can I use a different oil?
Absolutely! Melted butter or coconut oil can be fantastic alternatives. -
What’s the best way to enjoy leftovers?
Warming it up with ice cream on top makes for an indulgent dessert! -
Can gluten-free flour be used?
Yes! Substitute it with a 1:1 gluten-free flour blend to accommodate dietary needs.
Wrapping Up
In just a few minutes, you’ve transformed simple pantry staples into an indulgent dessert that not only satisfies your chocolate cravings but also evokes fond memories of sharing sweet moments with loved ones. Embrace the joy of cooking and the comfort of a Microwave Brownie in a Mug. Happy cooking, and remember, life is too short to skip dessert!