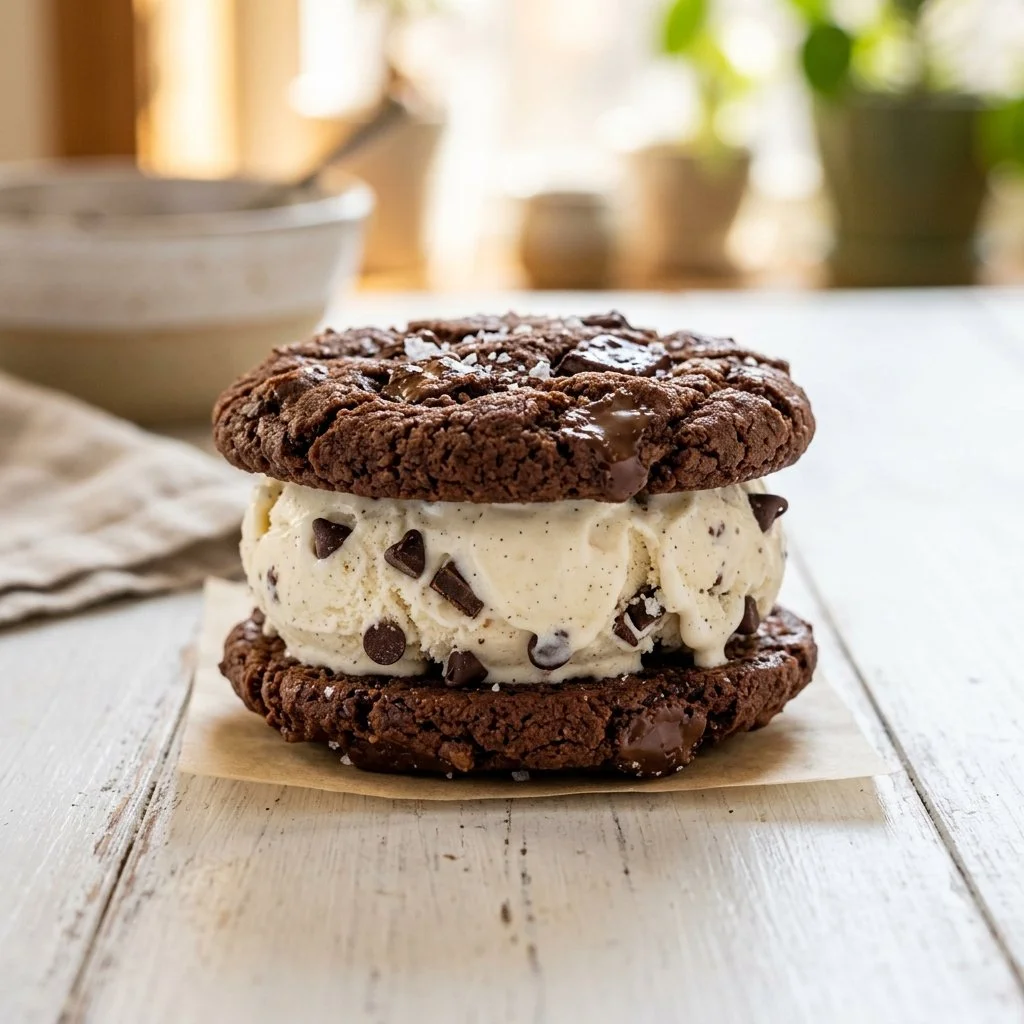
There’s something magical about biting into a homemade ice cream sandwich. It takes me back to warm summer afternoons, lounging in the backyard while the sun beams down and laughter floats in the air. I can almost hear the ice cream truck’s familiar tune weaving through the streets as memories of ice cream cone dribbles and sandwich treats fill my heart with joy.
With each mouthful of sweet, creamy ice cream nestled between soft, chewy cookies, it’s pure bliss. It’s not just a dessert; it’s a delightful experience that sparks nostalgia and creates new memories. And the best part? You can make these scrumptious Homemade Ice Cream Sandwiches at home in no time!
Recipe Timing
- Prep Duration: 15 minutes
- Active Cooking: 20 minutes
- Total Duration: 1 hour (including cooling)
- Portion Size: 12 sandwiches
- Complexity: Simple
Nutritional Recipe
- Calories per portion: 290
- Protein: 3g
- Carbs: 42g
- Fats: 14g
- Fiber: 1g
- Sugars: 22g
- Sodium: 180mg
Why You’ll Love This Homemade Ice Cream Sandwiches
These homemade treats are a beautiful blend of textures and flavors: the crisp edges of warm cookies meet the creamy dreaminess of ice cream. They are easily customizable with your favorite flavors and toppings—think sprinkles, chocolate chips, or even crushed nuts! Plus, they are the perfect way to celebrate any occasion or simply get together with friends or family. You can even make them ahead of time and stash them away for those spontaneous cravings.
The Complete Cooking Journey
Let me guide you through the delightful journey of making these ice cream sandwiches—from mixing the dough to chilling them just right.
Ingredients:
- 2 cups all-purpose flour
- 1/2 teaspoon baking soda
- 1/4 teaspoon salt
- 1 cup unsalted butter, softened
- 1 cup granulated sugar
- 1 cup brown sugar, packed
- 2 large eggs
- 2 teaspoons vanilla extract
- 2 cups ice cream (your choice of flavor)
- Chocolate chips or sprinkles (optional, for coating)
Method:
### Step 1: Preheat the Oven
Preheat your oven to 350°F (175°C), allowing it to reach the perfect baking temperature while you prepare your dough.
### Step 2: Mix the Dry Ingredients
In a bowl, whisk together the all-purpose flour, baking soda, and salt. This simple step ensures that the leavening agent is evenly distributed throughout the dough.
### Step 3: Cream the Butter and Sugars
In a separate bowl, cream together the softened butter, granulated sugar, and brown sugar until smooth and fluffy. This is where your cookies get their rich flavor!
### Step 4: Add Eggs and Vanilla
Beat in the eggs one at a time, letting them mix thoroughly before adding the next. Then, stir in the warm, fragrant vanilla extract—this step is essential for that comforting flavor profile.
### Step 5: Blend Dry Ingredients with Wet Mixture
Gradually blend the dry ingredients into the wet mixture. It’s like a beautiful dance as they come together to form a luscious cookie dough.
### Step 6: Shape the Cookies
Drop spoonfuls of the dough onto baking sheets lined with parchment paper, spacing them about 2 inches apart. The cookies will spread as they bake, so make sure to give them enough room!
### Step 7: Bake the Cookies
Bake for 10-12 minutes or until the edges are golden. Your kitchen will soon be filled with the irresistible aroma of freshly baked cookies!
### Step 8: Cool the Cookies
Allow the cookies to cool on the baking sheet for a few minutes before transferring them to a wire rack. This step helps them set and prevents them from breaking apart.
### Step 9: Assemble Your Sandwiches
Once cool, take one cookie, add a generous scoop of your favorite ice cream, and top it with another cookie to create a delicious sandwich.
### Step 10: Optional Decoration
For an extra fancy touch, roll the edges in chocolate chips or sprinkles. This isn’t just for looks—it adds a delightful texture!
### Step 11: Chill to Firm
Place the assembled sandwiches in the freezer for about 30 minutes to firm up before serving. Waiting can be tough, but trust me, it’ll be worth it!
Serving Suggestions & Pairings
Serve these ice cream sandwiches with a side of freshly brewed coffee or an iced tea for a delightful afternoon treat. You could also have them as a dessert at parties, picnics, or barbecues—everyone will be raving about them!
Storage & Leftovers Guide
These ice cream sandwiches can be stored in an airtight container in the freezer for up to 2 weeks. Just be sure to place parchment paper between layers to keep them from sticking together.
Kitchen Wisdom & Success Tips
- Use room temperature butter for better creaming—a fluffy batter leads to airy cookies.
- Don’t overbake! The cookies will continue to firm up as they cool.
- Experiment with different ice cream flavors or even try filling them with whipped cream for a twist.
Flavor Variations & Adaptations
Feel free to swap the all-purpose flour for almond flour to make gluten-free sandwiches. For a vegan version, replace the eggs with flaxseed meal and use coconut oil in place of butter, plus non-dairy ice cream!
Reader Questions & Solutions
-
Why are my cookies spreading too much?
If your cookies are spreading too thin, ensure your butter is softened, not melted. Also, check your flour measurement—too little can cause spreading. -
Can I use margarine instead of butter?
Yes! However, cookies made with margarine may not have the same rich flavor. -
What if the ice cream is too hard?
Let it soften at room temperature for about 10 minutes before scooping. -
Is there a way to prevent the cookies from sticking to the pan?
Using parchment paper is a great and easy solution to prevent sticking. -
Can I add mix-ins to the cookie dough?
Absolutely! Feel free to add chocolate chips or nuts into the dough for added texture and flavor.
Wrapping Up
Homemade Ice Cream Sandwiches are not just another dessert; they are a delightful way to indulge your sweet tooth while sharing joy with family and friends. So, let your creativity shine, bring flavors to life, and celebrate the deliciousness of homemade treats. Now roll up your sleeves and let’s get to baking—your summertime memories await!
PrintHomemade Ice Cream Sandwiches

Delicious homemade ice cream sandwiches made with soft cookies and creamy ice cream, perfect for warm summer days.
- Prep Time: 15 minutes
- Cook Time: 20 minutes
- Total Time: 60 minutes
- Yield: 12 sandwiches 1x
- Category: Dessert
- Method: Baking
- Cuisine: American
- Diet: Vegetarian
Ingredients
- 2 cups all-purpose flour
- 1/2 teaspoon baking soda
- 1/4 teaspoon salt
- 1 cup unsalted butter, softened
- 1 cup granulated sugar
- 1 cup brown sugar, packed
- 2 large eggs
- 2 teaspoons vanilla extract
- 2 cups ice cream (your choice of flavor)
- Chocolate chips or sprinkles (optional, for coating)
Instructions
- Preheat your oven to 350°F (175°C) while you prepare your dough.
- Mix together the all-purpose flour, baking soda, and salt in a bowl.
- Cream together the softened butter, granulated sugar, and brown sugar until smooth and fluffy.
- Add the eggs one at a time, then stir in the vanilla extract.
- Blend the dry ingredients into the wet mixture to form a dough.
- Shape the cookies by dropping spoonfuls of dough onto baking sheets lined with parchment paper.
- Bake for 10-12 minutes or until golden at the edges.
- Cool the cookies on a wire rack.
- Assemble your sandwiches by placing ice cream between two cookies.
- Optional: Roll the edges in chocolate chips or sprinkles.
- Chill the assembled sandwiches in the freezer for about 30 minutes before serving.
Notes
These sandwiches can be stored in an airtight container in the freezer for up to 2 weeks.
Nutrition
- Serving Size: 1 sandwich
- Calories: 290
- Sugar: 22g
- Sodium: 180mg
- Fat: 14g
- Saturated Fat: 8g
- Unsaturated Fat: 4g
- Trans Fat: 0g
- Carbohydrates: 42g
- Fiber: 1g
- Protein: 3g
- Cholesterol: 30mg