There’s something enchanting about the way certain desserts can evoke memories and create connections. Tiramisu, with its luscious layers of coffee-soaked ladyfingers and creamy mascarpone, is a treat that brings the essence of Italian cafes right to your kitchen. This classic dessert was first introduced to me during a trip to Italy, where I savored every spoonful while sitting in a bustling café, the air filled with laughter and the rich aroma of espresso. That first bite felt like a warm hug, and even now, each time I prepare it, I’m transported back to that sunlit terrace. This is why I’m excited to share not just the recipe but the love and nostalgia wrapped in every layer of this delightful Tiramisu.
Recipe Timing
- Prep Duration: 30 minutes
- Active Cooking: 20 minutes
- Total Duration: 4 hours (includes chilling time)
- Portion Size: Serves 8
- Complexity: Simple
Nutritional Recipe
- Calories per portion: Approximately 350
- Protein: 6g
- Carbs: 40g
- Fats: 20g
- Fiber: 1g
- Sugars: 16g
- Sodium: 100mg
Why You’ll Love This Tiramisu
If you’ve never tried making Tiramisu at home, you’re in for a delectable surprise! This recipe captures the balance of flavors and textures that makes Tiramisu such a beloved dessert. The bitterness of espresso harmonizes beautifully with the sweet mascarpone and the airy ladyfingers. Plus, it’s a relatively simple process that creates a show-stopping dessert, perfect for any occasion, from family gatherings to romantic dinners. Once you’ve tried it, you’ll feel as if you’ve mastered a classic.
The Complete Cooking Journey
Creating Tiramisu is a delightful journey that involves just a few steps, yet each one builds anticipation for the sweet reward to come. You’ll start by soaking the ladyfingers in rich espresso, then layering them with a creamy mascarpone mixture that’s whipped to perfection. The hardest part? Waiting for it to chill in the fridge, allowing all those incredible flavors to meld together. Trust me, the wait is worth every delicious bite!
Ingredients:
- 1 cup brewed espresso, cooled
- 3 tablespoons coffee liqueur (optional)
- 24 ladyfinger cookies
- 1 cup mascarpone cheese
- 1 cup heavy cream
- 1/2 cup powdered sugar
- 1 teaspoon vanilla extract
- Cocoa powder for dusting
Method:
Step 1: Prepare the Espresso Mixture
In a shallow dish, combine the brewed espresso and coffee liqueur (if using). This rich mixture will give the ladyfingers their coffee flavor, so adjust the liqueur to your taste.
Step 2: Dip the Ladyfingers
Quickly dip each ladyfinger into the espresso mixture, making sure not to soak them. A quick dip is all they need to absorb just the right amount of coffee goodness.
Step 3: Whisk the Mascarpone Mixture
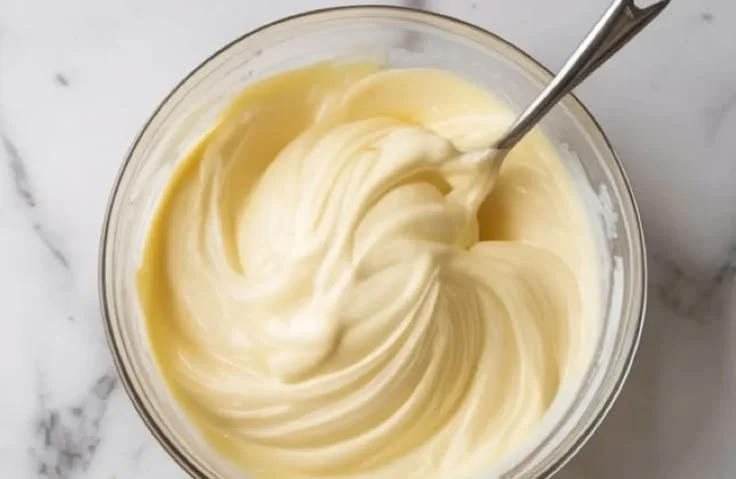
In a bowl, whisk together the mascarpone cheese, heavy cream, powdered sugar, and vanilla extract until smooth and fluffy. This is where the creamy magic happens!
Step 4: First Layer of Ladyfingers
Layer half of the dipped ladyfingers in a serving dish. Arrange them neatly to create a solid base for your Tiramisu.
Step 5: Spread the Mascarpone Mixture
Spread half of the mascarpone mixture over the ladyfingers, ensuring all are covered with that luscious creaminess.
Step 6: Repeat the Layers
Repeat with another layer of dipped ladyfingers and the remaining mascarpone mixture. This stacking creates a lovely, tall dessert!
Step 7: Chill the Dessert
Cover and refrigerate for at least 4 hours or overnight. This chilling time allows the flavors to meld and the dessert to set properly.
Step 8: Dust with Cocoa Powder
Before serving, dust the top with cocoa powder for that beautiful finish. The cocoa not only adds visual appeal but also complements the dessert’s flavors perfectly.
Serving Suggestions & Pairings
Tiramisu is stunning on its own, but you can elevate the experience with a few add-ons. Consider serving it with a shot of espresso or a glass of dessert wine like Vin Santo. For a little extra indulgence, pair it with dark chocolate shavings or fresh berries for a pop of color and flavor.
Storage & Leftovers Guide
Your Tiramisu can be stored in the refrigerator for up to 3 days. Make sure it’s well-covered to keep that lovely texture intact! It’s best enjoyed fresh but if you have leftovers, they make for a delightful treat on another day.
Kitchen Wisdom & Success Tips
- Ensure your mascarpone is at room temperature for easier mixing.
- If you’d like to add a twist, try infusing the espresso with a splash of almond extract or a hint of orange zest for unique flavor notes.
- Whole milk can be used in place of heavy cream if you want a lighter option, but the texture will be less rich.
Flavor Variations & Adaptations
Feel free to get creative with your Tiramisu! You can substitute the coffee liqueur with flavored ones like hazelnut or vanilla to change the profile. For a non-alcoholic version, simply omit the liqueur and use flavored coffee. You can even swap out half the mascarpone for Greek yogurt to lighten it up without losing that creamy goodness.
Reader Questions & Solutions
-
Can I use store-bought espresso?
Yes! Just ensure it’s strong enough to stand up against the sweetness of the mascarpone. -
How do I prevent the ladyfingers from getting too soggy?
Dip them quickly, just enough to absorb moisture without becoming mushy. -
Can I make Tiramisu ahead of time?
Absolutely! It’s best when made a day ahead, giving it extra time to chill and set. -
What can I substitute for mascarpone?
Cream cheese and heavy cream can work in a pinch, but the flavor will be slightly different. -
Can I freeze Tiramisu?
Freezing isn’t recommended as it can affect the texture, but you can keep it refrigerated for short-term storage!
Wrapping Up
There’s a reason Tiramisu is adored around the world—it embodies the joy of good company and sweet indulgence. Making this Tiramisu recipe at home allows you to bring a piece of Italy into your kitchen. The layers of coffee-soaked ladyfingers and creamy filling will always be a crowd-pleaser. So gather your ingredients, put on your favorite playlist, and enjoy the process of creating this timeless dessert. Celebrate the simple things—each bite is not just food, but a memory in the making!