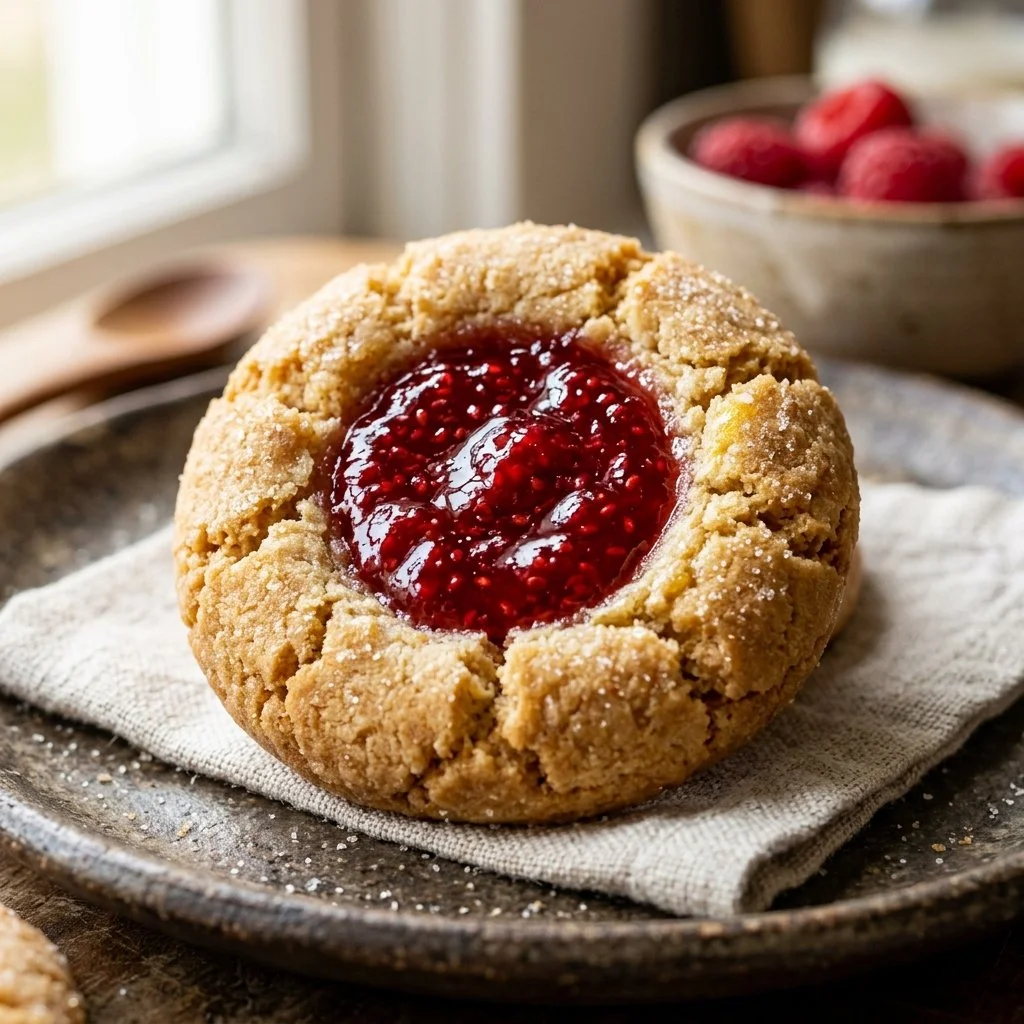
There’s something magical about the aroma of freshly baked cookies wafting through the house, isn’t there? It’s like a warm hug for your senses. Growing up, I remember spending rainy afternoons in the kitchen with my grandmother, who could whip up treats that would make anyone’s heart skip a beat. Among her many specialties, her thumbprint cookies were a family favorite. Soft, buttery, and bursting with fruity goodness from the jam filling, they were nothing short of delightful morsels that brought everyone together. Today, I want to share her beloved recipe with you, hoping it inspires warm memories and perhaps a few new ones of your own.
Recipe Timing
- Prep Duration: 15 minutes
- Active Cooking: 15 minutes
- Total Duration: 30 minutes
- Portion Size: About 24 cookies
- Complexity: Simple
Nutritional Recipe
- Calories per portion: Approximately 150 calories
- Protein: 2 grams per serving
- Carbs: 21 grams per serving
- Fats: 7 grams per serving
- Fiber: 0.5 grams per serving
- Sugars: 6 grams per serving
- Sodium: 50 mg per serving
Why You’ll Love This Thumbprint Cookies
These thumbprint cookies are the epitome of comfort food. They’re soft and chewy with a buttery flavor that melts in your mouth. The fruit jam filling adds a sweet yet tangy contrast, making each bite a delightful surprise. Plus, they’re easily customizable; whether you prefer raspberry, apricot, or even a more exotic jam, you can make them your own. They’re perfect for sharing at family gatherings, parties, or simply enjoying with a cup of tea as you unwind after a long day.
The Complete Cooking Journey
Let’s set off on this delightful baking adventure together! You’ll find the process easy, rewarding, and perhaps a bit nostalgic as the sweet aroma fills your kitchen. Ready your apron, and let’s create some cookie magic!
Ingredients:
- 1 cup unsalted butter, softened
- 1/2 cup granulated sugar
- 1/2 cup brown sugar, packed
- 1 teaspoon vanilla extract
- 2 cups all-purpose flour
- 1/4 teaspoon salt
- 1/2 cup fruit jam or preserves (such as raspberry or apricot)
- Chopped nuts (optional, for rolling)
Method:
Step 1: Preheat the Oven
Preheat the oven to 350°F (175°C). This crucial step will ensure your cookies bake evenly and come out beautifully golden.
Step 2: Cream the Butter and Sugars
In a large bowl, cream together the softened butter, granulated sugar, and brown sugar until smooth. This method incorporates air into the mixture, giving your cookies a light texture.
Step 3: Enrich with Vanilla
Mix in the vanilla extract, which will add a warm, aromatic flavor that complements the sweetness of the sugars beautifully.
Step 4: Combine the Dry Ingredients
Gradually add in the flour and salt, mixing until just combined. You don’t want to overmix at this stage; a few flour streaks are just fine!
Step 5: Shape the Dough
Roll the dough into small balls, about 1 inch in diameter, and place them on a baking sheet. Give them a little space; they’ll spread out as they bake!
Step 6: Create the Indentations
Use your thumb or the back of a spoon to make an indentation in the center of each ball. This is where the magic happens – trust me, you’ll want these little pockets for the jam!
Step 7: Fill with Jam
Fill each indentation with about 1/2 teaspoon of your chosen jam or preserve. Feel free to go generous with the jam; it’s the star of the show here!
Step 8: Optional Nut Coating
Optionally, roll the cookie balls in chopped nuts before baking. This adds an extra crunch and flavor that pairs wonderfully with the jam.
Step 9: Bake the Cookies
Bake for 12-15 minutes or until the edges are lightly golden. Keep an eye on them; the delightful smell will pull you in!
Step 10: Cooling Phase
Allow to cool on a wire rack before serving. This step is essential; it helps them firm up a bit so they’re easier to handle.
Serving Suggestions & Pairings
These cookies shine on their own, but you can elevate your snack time by pairing them with a scoop of vanilla ice cream or a warm cup of tea. They also make a fantastic addition to a dessert table at parties or gatherings!
Storage & Leftovers Guide
Store these cookies in an airtight container at room temperature for up to one week. If you want to keep them fresh for longer, you can also freeze them for up to three months. Just layer them with parchment paper in an airtight container before popping them in the freezer.
Kitchen Wisdom & Success Tips
- Make sure your butter is just softened, not melted, for the perfect creamy texture when mixing.
- Don’t skip the chilling step if you’re in a warmer climate; chilling the dough for about 30 minutes will help prevent the cookies from spreading too much during baking.
- Experiment with different jams! Each variation can transform your cookies completely.
Flavor Variations & Adaptations
Feeling adventurous? Try using different flavored jams like lemon curd, Nutella, or even a spiced apple butter for a cozy twist. You can also add a pinch of cinnamon to the dough for an aromatic touch!
Reader Questions & Solutions
-
Why are my cookies spreading too much?
Ensure your butter is softened and not melted. Also, consider chilling your dough before baking. -
Can I substitute margarine for butter?
Yes, but the flavor and texture might vary slightly. Unsalted butter is recommended for the best results. -
How do I know when the cookies are done?
Look for lightly golden edges; the centers may look soft but will firm up as they cool. -
Can I double the recipe?
Yes, simply double the ingredients and bake in batches if your oven cannot accommodate all the cookies at once. -
What if I don’t have any jam?
You can substitute with chocolate chips, peanut butter, or even a homemade chocolate ganache!
Wrapping Up
Embrace the joy of baking with these delightful thumbprint cookies that are as fun to make as they are to eat. Whether you’re sharing them with friends or indulging in some self-care time, these cookies are sure to bring smiles all around. So go ahead, indulge your senses, and create sweet memories in your kitchen today! Happy baking!
PrintGrandmother’s Thumbprint Cookies

Soft, buttery thumbprint cookies filled with fruity jam, perfect for sharing and creating warm memories.
- Prep Time: 15 minutes
- Cook Time: 15 minutes
- Total Time: 30 minutes
- Yield: 24 cookies 1x
- Category: Dessert
- Method: Baking
- Cuisine: American
- Diet: Vegetarian
Ingredients
- 1 cup unsalted butter, softened
- 1/2 cup granulated sugar
- 1/2 cup brown sugar, packed
- 1 teaspoon vanilla extract
- 2 cups all-purpose flour
- 1/4 teaspoon salt
- 1/2 cup fruit jam or preserves (raspberry, apricot, etc.)
- Chopped nuts (optional, for rolling)
Instructions
- Preheat the oven to 350°F (175°C).
- Cream together the softened butter, granulated sugar, and brown sugar until smooth.
- Mix in the vanilla extract.
- Combine gradually the flour and salt until just mixed.
- Shape the dough into small balls, about 1 inch in diameter.
- Create an indentation in the center of each ball with your thumb.
- Fill each indentation with about 1/2 teaspoon of jam.
- Optionally, roll in chopped nuts before baking.
- Bake for 12-15 minutes or until edges are lightly golden.
- Allow to cool on a wire rack before serving.
Notes
Store in an airtight container for up to one week or freeze for up to three months.
Nutrition
- Serving Size: 1 cookie
- Calories: 150
- Sugar: 6g
- Sodium: 50mg
- Fat: 7g
- Saturated Fat: 4g
- Unsaturated Fat: 3g
- Trans Fat: 0g
- Carbohydrates: 21g
- Fiber: 0.5g
- Protein: 2g
- Cholesterol: 30mg