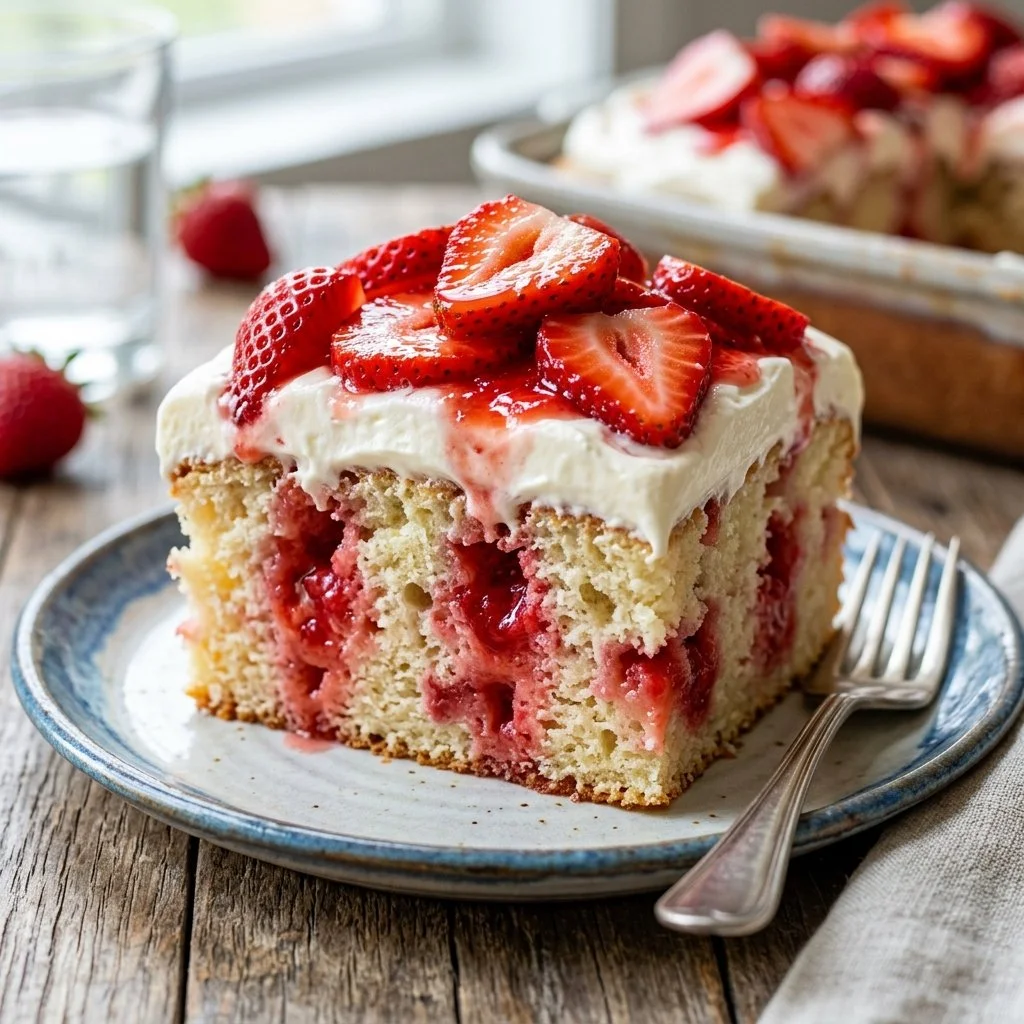
There’s something wonderfully nostalgic about a poke cake, isn’t there? Growing up, my summers were filled with sweet memories of potlucks and family gatherings, where desserts were the highlight of the meal. One such dish that always found its way to the table was the Strawberry Poke Cake. The vibrant red of the strawberries intertwined with the fluffy vanilla cake reminded me of bright summer days, filled with laughter and sunshine. It’s a dessert that doesn’t just satisfy the sweet tooth; it’s a celebration of flavors that brings people together.
This cake is incredibly easy to make, making it perfect for both novice bakers and seasoned pros. It doesn’t take much time to whip up, and the end result is always met with delight—everyone loves that beautiful, colorful surprise in each slice!
Recipe Timing
- Prep Duration: 15 minutes
- Active Cooking: 30 minutes
- Total Duration: 2 hours 45 minutes (including chilling)
- Portion Size: 12 servings
- Complexity: Simple
Nutritional Recipe
- Calories per portion: Approximately 230
- Protein: 2g per serving
- Carbs: 37g per serving
- Fats: 8g per serving
- Fiber: 0g per serving
- Sugars: 20g per serving
- Sodium: 180mg per serving
Why You’ll Love This Strawberry Poke Cake
Imagine slicing into a moist, airy cake that is not just drenched in strawberry goodness but also dotted with a rainbow of pink-hued strawberries. It’s a dessert that looks impressive yet is deceptively simple to put together. Every bite invites you to relish the layers of flavor and texture; the sweetness of the strawberries mingles beautifully with the lightness of the whipped cream. Plus, it’s a make-ahead dessert, freeing you up to enjoy the company of your loved ones rather than spending all day in the kitchen.
The Complete Cooking Journey
Every step in crafting this Strawberry Poke Cake is infused with joy. From preheating the oven with eager anticipation to watching your cake bake into a golden delight, the process is just as enjoyable as the finished product. Each poke in the cake is a promise of the sweet, fruity surprise waiting inside. This is not merely baking; it’s creating cherished memories.
Ingredients:
- 1 box of vanilla cake mix
- 3 eggs
- 1 cup of water
- 1 cup of strawberry gelatin
- 1 cup of boiling water
- 1 cup of sliced strawberries
- 1 cup of whipped cream
- 1/2 cup of powdered sugar
Method:
Step 1: Preheat the Oven
Preheat the oven to 350°F (175°C). Grease and flour a 9×13 inch baking pan.
Step 2: Mix the Batter
In a large bowl, mix the cake mix, eggs, and water until combined. Pour the batter into the prepared pan.
Step 3: Bake the Cake
Bake according to package directions until a toothpick inserted comes out clean. This usually takes about 25-30 minutes.
Step 4: Cool the Cake
Let the cake cool for 10 minutes, then poke holes all over the top with a fork. This is where the strawberry flavor magic begins!
Step 5: Prepare the Gelatin
In a separate bowl, dissolve strawberry gelatin in boiling water. Stir in the sliced strawberries, letting them soak up that beautiful flavor.
Step 6: Infuse the Cake
Pour the gelatin mixture over the cake, ensuring it seeps into the holes. This will create the "poke" effect and ensure every bite is bursting with strawberry goodness.
Step 7: Chill the Cake
Refrigerate the cake for 2-3 hours. This allows the layers to meld beautifully, creating a refreshingly cool and flavorful treat.
Step 8: Add the Whipped Topping
Before serving, mix the whipped cream and powdered sugar until soft peaks form. Spread this fluffy cloud over the top of the cake.
Serving Suggestions & Pairings
This Strawberry Poke Cake shines on its own, but why not serve it alongside a scoop of vanilla ice cream or a refreshing fruit salad? For a delightful twist, pair it with a chilled glass of sparkling lemonade or iced tea during a summer gathering.
Storage & Leftovers Guide
Once assembled, store the Strawberry Poke Cake in the refrigerator, where it will last for about 3-4 days. Make sure to cover it with plastic wrap or foil to keep it fresh. If you find yourself with leftovers (which is rare!), this cake can be stored in an airtight container for about a week.
Kitchen Wisdom & Success Tips
- Use fresh strawberries for the best flavor; go for ripe, sweet ones.
- If you want to change things up, try mixing in other berries like raspberries or blueberries for a mixed berry poke cake!
- Allow your cake to cool properly before poking holes to retain moisture.
Flavor Variations & Adaptations
Feeling adventurous? Swap out the strawberry gelatin for another flavor such as raspberry or cherry for a unique twist. This recipe is flexible and can cater to your personal taste preferences.
Reader Questions & Solutions
-
Can I use homemade cake instead of a box mix?
Yes! Feel free to bake your favorite homemade vanilla cake instead. Just ensure it’s fully cooled before poking holes. -
What if I can’t find strawberry gelatin?
You can use Jell-O or make a simple fruit syrup with mashed strawberries and sugar if you want a natural option. -
Can I use a different type of cream?
Absolutely! Whipped coconut cream or mascarpone cheese can add a delightful twist. -
How do I make this cake gluten-free?
Substitute the vanilla cake mix with a gluten-free baking mix, ensuring all other ingredients are also gluten-free. -
Can I freeze the poke cake?
It’s best to freeze it before adding the whipped topping. Wrap well in plastic wrap and foil before placing in the freezer, and it can last for 2-3 months.
Wrapping Up
The Strawberry Poke Cake is more than a recipe; it’s a timeless tradition that brings joy and sweetness into our lives. With its vibrant colors and delicious flavor, it’s a dessert worthy of any celebration. So gather your ingredients, roll up your sleeves, and let the sweet magic happen. You’ll not only end up with a delightful treat but also create memories that you and your loved ones will cherish for years to come! Happy baking!