
As the first signs of spring begin to bloom, I can’t help but recall the delightful scents that waft through the kitchen during this vibrant season. Each year, the arrival of warmer days reawakens memories of cozy gatherings and the laughter of family and friends sharing sweet treats. This year, my contribution to our springtime festivities is a batch of indulgent Spring Brownies—those rich, chocolatey squares that seem to hold all the joy of the season in each bite. Whether you’re celebrating Easter, hosting a spring bake sale, or simply looking for solace in the kitchen, these brownies are the perfect treat to uplift spirits and bring delight to any gathering!
Recipe Timing
- Prep Duration: 15 minutes
- Active Cooking: 30 minutes
- Total Duration: 45 minutes
- Portion Size: 24 brownies
- Complexity: Simple
Nutritional Recipe
- Calories per portion: Approximately 250
- Protein: 3g
- Carbs: 35g
- Fats: 12g
- Fiber: 1g
- Sugars: 20g
- Sodium: 100mg
Why You’ll Love This Spring Brownies
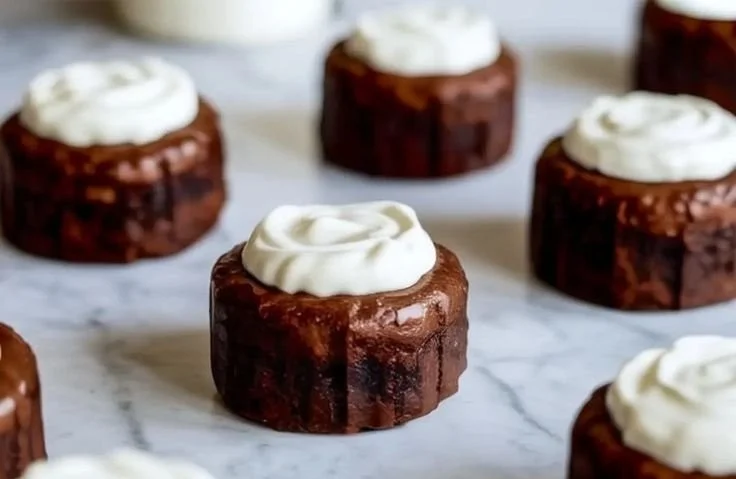
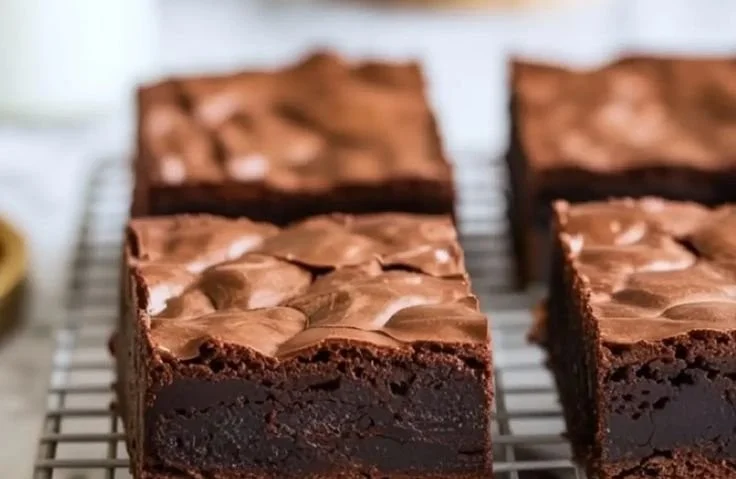
Imagine cutting into a rich, fudgy brownie topped with a swirl of pastel frosting, accented by colorful candies that remind you of blooming flowers. These Spring Brownies strike the perfect balance of being decadently rich while still feeling light and festive, making each square a celebration of the season. They’re glossy, chocolatey, and so easy to prepare that you’ll feel like a pastry chef ready to impress your guests. Best of all, the vibrant toppings transform the humble brownie into a visual delight, making it an instant showstopper on any dessert table.
The Complete Cooking Journey
When I first tried baking these brownies, I was a little skeptical about how they would turn out. But with every step from mixing to baking, the intoxicating scent of cocoa filled my kitchen, pulling my family in from all corners of the house. Once cooled and decorated with frosting and colorful candies, I presented them at our spring gathering. The joy and excitement that lit up the faces of my loved ones were priceless, and the compliments poured in. What I learned that day was simple: these brownies are a crowd-pleaser, and the memories they create are just as sweet as the flavors they offer.
Ingredients:
- 1 cup butter, melted
- 2 cups sugar
- 4 large eggs
- 1 teaspoon vanilla extract
- 1 cup all-purpose flour
- 1 cup cocoa powder
- 1/2 teaspoon salt
- 1/2 teaspoon baking powder
- Pastel candies (for topping)
- Frosting (for decoration)
Method:
Step 1: Preheat your oven
First things first, let’s get that oven ready! Preheat it to 350°F (175°C) and grease a 9×13 inch baking pan. This will ensure our brownies come out with a delightful crust and won’t stick when it’s time to serve.
Step 2: Combine butter and sugar
In a large bowl, mix together the melted butter and sugar until well combined. This sweet base is the foundation for our fudgy brownies, creating that rich texture we all love.
Step 3: Add eggs and vanilla
Next, add in the eggs one at a time, followed by the teaspoon of vanilla extract. Mix until everything is smooth and well-blended. This is where the magic truly begins—the flavors start to meld together!
Step 4: Sift dry ingredients
In a separate bowl, sift together the flour, cocoa powder, salt, and baking powder. This step is essential as it ensures there are no lumps and that our brownies turn out perfectly fluffy.
Step 5: Mix wet and dry ingredients
Gradually mix those dry ingredients into the wet mixture until just combined. Don’t over-mix; we want to preserve that dreamy texture which will yield fudgy brownies.
Step 6: Pour batter into the pan
Pour the brownie batter into the prepared baking pan and spread it out evenly. You’ll be tempted to taste the batter—believe me, it’s a heavenly temptation!
Step 7: Bake to perfection
Bake the brownies for about 25-30 minutes, or until a toothpick inserted comes out clean. The house will be filled with a lovely chocolate aroma that will have everyone eagerly waiting.
Step 8: Cool the brownies
Let the brownies cool in the pan before frosting them. Patience is key here, as the luscious frosting will just slide right off if the brownies are still warm.
Step 9: Decorate your creation
Once cooled, decorate the brownies with a generous layer of frosting and top them with colorful pastel candies. This step brings your dessert to life and adds that enchanting springtime flair.
Step 10: Serve and enjoy
Finally, cut the brownies into squares and serve them during your spring gatherings or bake sales. Be prepared for compliments, and don’t forget to indulge in a piece (or two) yourself!
Serving Suggestions & Pairings
These brownies shine on their own but also pair beautifully with a scoop of vanilla ice cream or a drizzle of chocolate sauce for extra decadence. If you’re feeling particularly festive, serve them alongside fresh strawberries or whipped cream for a delightful twist!
Storage & Leftovers Guide
Keep your brownies stored in an airtight container at room temperature for up to 4 days. If you need to prolong their life, you can refrigerate them for about a week. Just be sure to let them come back to room temperature before serving for the best taste!
Kitchen Wisdom & Success Tips
- Don’t overbake: Keep a close eye on your brownies while they bake. A toothpick should come out with a few moist crumbs but not batter.
- Customize your toppings: Don’t be shy—swap the pastel candies for nuts, sprinkles, or even fruit!
- Layer the frosting: For a more professional touch, use a piping bag to create beautiful swirls with your frosting.
Flavor Variations & Adaptations
Feeling adventurous? Try adding espresso powder to the batter for a mocha brownie twist! Or, fold in some mint or raspberry extract to give your brownies a refreshing flavor update.
Reader Questions & Solutions
-
Can I replace the butter with oil?
Yes, you can substitute melted oil in equal amounts, but the texture may be slightly less fudgy. -
What if I don’t have pastel candies?
No problem! Use chocolate chips, chopped nuts, or any other candy you love. -
Can I make the brownies gluten-free?
Absolutely! Swap the all-purpose flour for a gluten-free mix and ensure your baking powder is gluten-free as well. -
How do I know when the brownies are done?
A toothpick inserted in the center should come out with a few moist crumbs. If it comes out clean, you’ve overbaked them slightly. -
What can I do with leftover frosting?
Leftover frosting can be used to decorate cupcakes, cookies, or even slathered on toast for a sweet snack.
Wrapping Up
What’s beautiful about these Spring Brownies is not just how delicious they are, but also the joy they bring to those who enjoy them. They’re more than a dessert; they’re a vessel for memories, laughter, and connection amidst all the spring festivities. So gather your loved ones, pour a glass of milk, and indulge in these heavenly treats. Happy baking!
PrintSpring Brownies

Indulgent chocolate brownies topped with pastel frosting and colorful candies, perfect for spring celebrations.
- Prep Time: 15 minutes
- Cook Time: 30 minutes
- Total Time: 45 minutes
- Yield: 24 brownies 1x
- Category: Dessert
- Method: Baking
- Cuisine: American
- Diet: Vegetarian
Ingredients
- 1 cup butter, melted
- 2 cups sugar
- 4 large eggs
- 1 teaspoon vanilla extract
- 1 cup all-purpose flour
- 1 cup cocoa powder
- 1/2 teaspoon salt
- 1/2 teaspoon baking powder
- Pastel candies (for topping)
- Frosting (for decoration)
Instructions
- Preheat your oven to 350°F (175°C) and grease a 9×13 inch baking pan.
- Mix together the melted butter and sugar in a large bowl until well combined.
- Add the eggs one at a time, followed by the vanilla extract, mixing until smooth.
- Sift together the flour, cocoa powder, salt, and baking powder in a separate bowl.
- Mix the dry ingredients into the wet mixture until just combined.
- Pour the batter into the prepared baking pan and spread it out evenly.
- Bake for about 25-30 minutes, or until a toothpick comes out clean.
- Cool the brownies in the pan before frosting them.
- Decorate the cooled brownies with frosting and pastel candies.
- Serve in squares during gatherings or bake sales.
Notes
Store brownies in an airtight container at room temperature for up to 4 days, or refrigerate for about a week.
Nutrition
- Serving Size: 1 brownie
- Calories: 250
- Sugar: 20g
- Sodium: 100mg
- Fat: 12g
- Saturated Fat: 7g
- Unsaturated Fat: 4g
- Trans Fat: 0g
- Carbohydrates: 35g
- Fiber: 1g
- Protein: 3g
- Cholesterol: 30mg