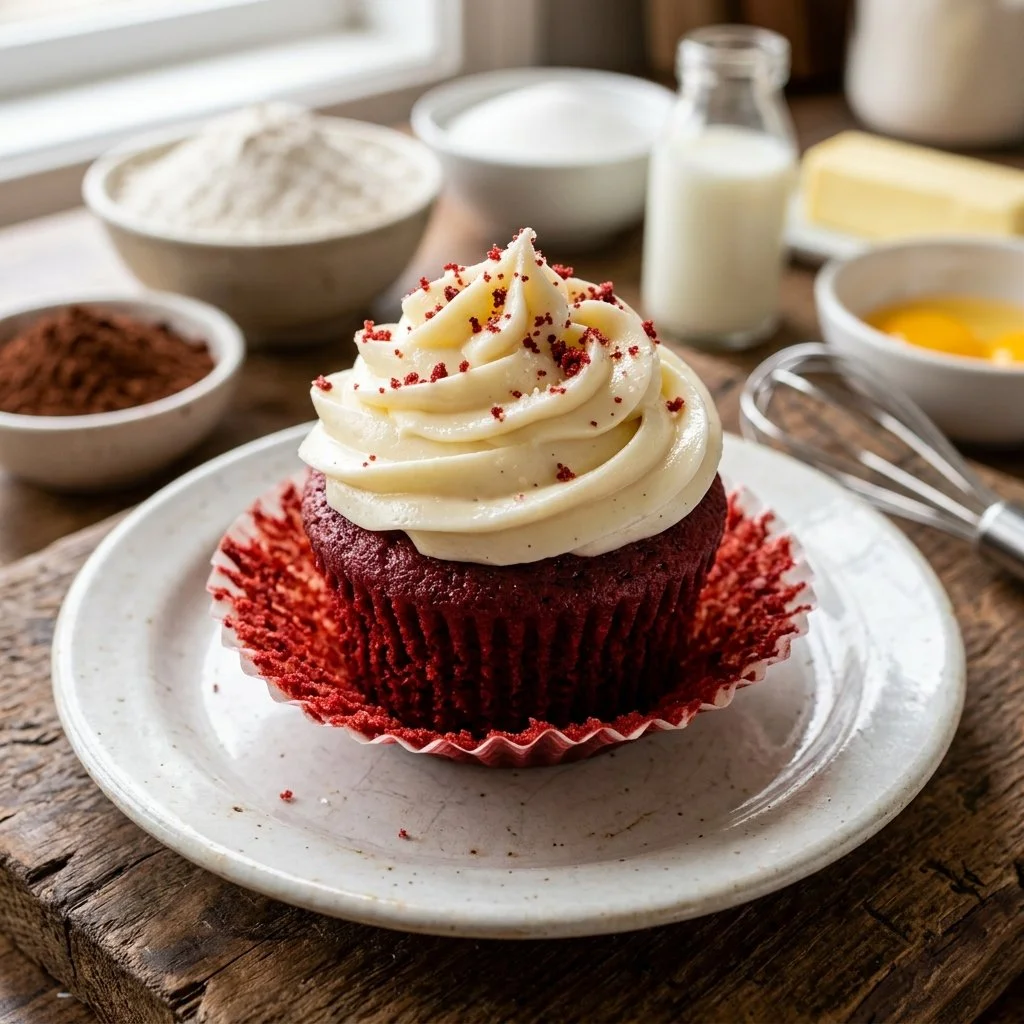
There’s something undeniably magical about the color red. It captivates the eye, evokes passion, and when brought into the kitchen, it transforms ordinary treats into show-stoppers. I remember the first time I encountered a Red Velvet Cupcake at a charming little bake shop in my neighborhood. As I bit into the moist, rich cake topped with fluffy cream cheese frosting, I realized I’d just discovered a dessert that was both delicious and delightful. Today, I’m excited to share my take on this classic treat that’s perfect for birthdays, anniversaries, or any occasion worthy of a sweet celebration. Let’s make your kitchen sparkle with these stunning red velvet cupcakes!
Recipe Timing
- Prep Duration: 15 minutes
- Active Cooking: 20 minutes
- Total Duration: 35 minutes
- Portion Size: 12 cupcakes
- Complexity: Simple
Nutritional Recipe
- Calories per portion: 210 calories
- Protein: 2g
- Carbs: 31g
- Fats: 10g
- Fiber: 0g
- Sugars: 18g
- Sodium: 200mg
Why You’ll Love These Red Velvet Cupcakes
These Red Velvet Cupcakes are not only visually stunning but have a taste that’s deeply satisfying. With a tender crumb and a subtle hint of cocoa, the vibrant red hue lights up any dessert table. They pair beautifully with the tangy cream cheese frosting that contrasts perfectly with the sweetness of the cupcake, making each bite an unforgettable experience. Plus, they’re incredibly versatile. Whether you’re throwing a fancy party or enjoying a cozy evening at home, these cupcakes will never fail to impress.
The Complete Cooking Journey
From the moment you preheat the oven to the final dusting of frosting, every step in creating these Red Velvet Cupcakes is filled with warmth and excitement. You will witness the transformation of simple ingredients into cupcake perfection as you mix, bake, and decorate.
Ingredients:
- 1 1/2 cups all-purpose flour
- 1 cup granulated sugar
- 1 teaspoon baking soda
- 1 teaspoon cocoa powder
- 1/2 teaspoon salt
- 1 cup vegetable oil
- 1 cup buttermilk, room temperature
- 2 large eggs, room temperature
- 2 tablespoons red food coloring
- 1 teaspoon vanilla extract
- 1 teaspoon white vinegar
Method:
Step 1: Preheat and Prepare
Preheat your oven to 350°F (175°C) and line a cupcake tin with paper liners. The aroma of the oven heating up creates an unmistakable feeling of comfort!
Step 2: Sift Dry Ingredients
In a medium bowl, sift together the flour, baking soda, cocoa powder, and salt. This step ensures that all dry ingredients are mixed evenly and helps create a lighter texture in your cupcakes.
Step 3: Mix Wet Ingredients
In a large bowl, mix the vegetable oil and sugar until well combined. Then, add the buttermilk, eggs, food coloring, vanilla, and vinegar, mixing until smooth. The vibrant red color will immediately put a smile on your face!
Step 4: Combine Mixtures
Gradually add the dry ingredients to the wet mixture, stirring until just combined. Be careful not to overmix; this keeps your cupcakes tender.
Step 5: Fill Cupcake Liners
Fill each cupcake liner about 2/3 full with batter. This allows room for the cupcakes to rise beautifully while baking.
Step 6: Bake the Cupcakes
Bake for 18-20 minutes, or until a toothpick inserted in the center comes out clean. As they bake, your kitchen will be filled with a heavenly scent that will make waiting all the more challenging!
Step 7: Cool Down
Let the cupcakes cool in the pan for a few minutes before transferring them to a wire rack to cool completely. Patience is key here, but the anticipation is worth it!
Step 8: Frost Away
Frost with cream cheese frosting, if desired. The tangy sweetness of the frosting elevates the cupcakes to a whole new level!
Serving Suggestions & Pairings
Serve these stunning cupcakes at parties, bridal showers, or festive gatherings. Pair them with a glass of cold milk, a scoop of vanilla ice cream, or even a nice cup of coffee for a delightful afternoon treat. They are perfect for sharing or for having as a sweet indulgence on a quiet evening.
Storage & Leftovers Guide
These cupcakes can be stored in an airtight container at room temperature for up to 2 days. If you want to keep them longer, refrigerate them for up to a week. Make sure they are well-covered to maintain moisture and freshness.
Kitchen Wisdom & Success Tips
- Ensure your ingredients are at room temperature for the best mixing and baking results.
- Don’t skip the sifting step; it makes a big difference in the final texture.
- If you don’t have buttermilk, you can make a substitute by mixing regular milk with a splash of vinegar and letting it sit for 5 minutes.
Flavor Variations & Adaptations
- For an exciting twist, add a teaspoon of almond extract in place of vanilla.
- Try incorporating chocolate chips or nuts for an added crunch.
- If you prefer something less sweet, top the cupcakes with whipped cream or a light frosting.
Reader Questions & Solutions
-
Q: Can I make these cupcakes gluten-free?
A: Yes! Substitute the all-purpose flour with a gluten-free flour blend. -
Q: What if I don’t have red food coloring?
A: You can use beet juice as a natural alternative for coloring, though the hue will be less vibrant. -
Q: How can I store leftover frosted cupcakes?
A: Store them in the refrigerator in an airtight container for up to a week. -
Q: Can I freeze the cupcakes?
A: Yes! Freeze the unfrosted cupcakes for up to 3 months. Thaw them overnight before frosting and serving. -
Q: How can I make the cream cheese frosting?
A: Beat together 8 oz of cream cheese, 1/2 cup of unsalted butter, 2 cups of powdered sugar, and a splash of vanilla until smooth.
Wrapping Up
Now that you have all the tips and tricks to create the perfect Red Velvet Cupcakes, it’s time to unleash your inner baker! Whether it’s for a special occasion or just a delightful treat for yourself, these cupcakes will certainly steal the show. So roll up your sleeves, gather your ingredients, and enjoy the sweet satisfaction of creating a dessert that everyone will love. Happy baking!