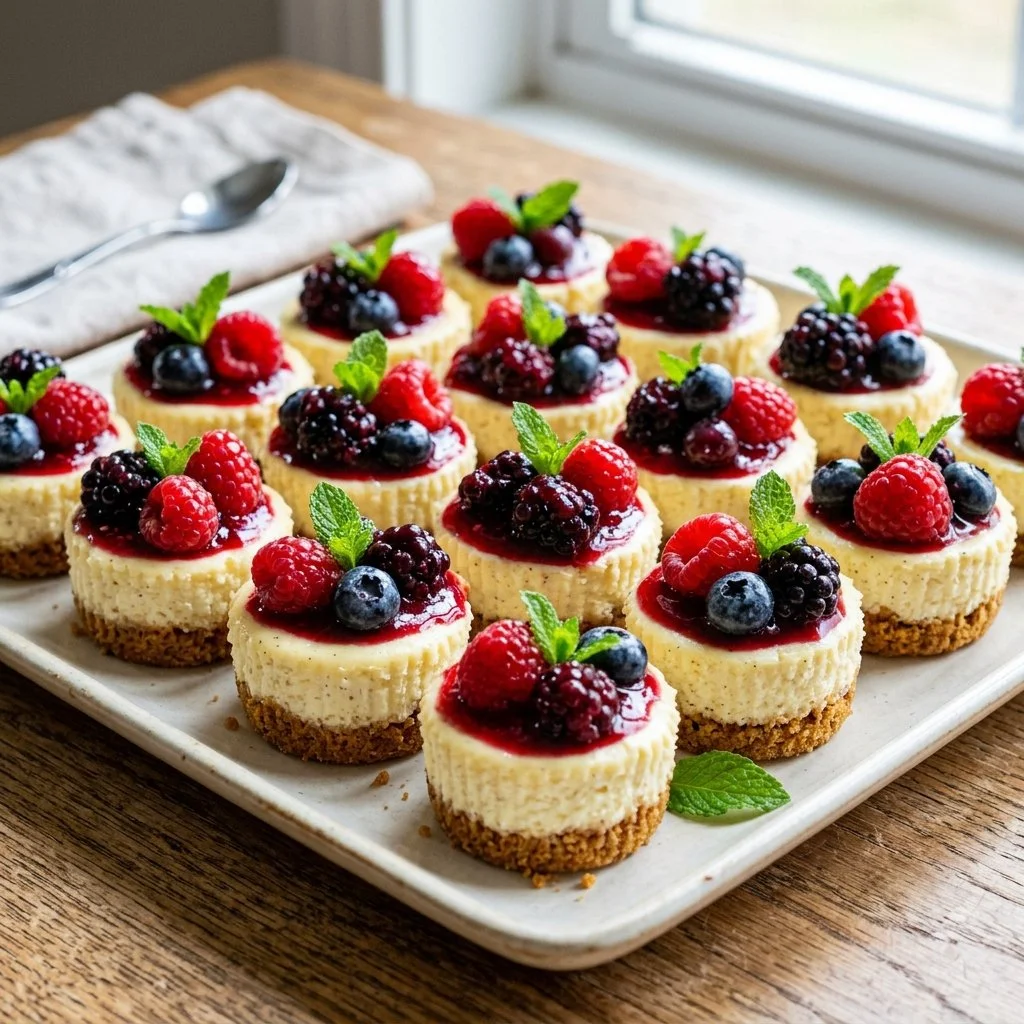
It was a rainy Sunday afternoon, the kind that tugs at the heartstrings and invites you to cozy up in the kitchen. As the clouds rolled in, I rummaged through my pantry and stumbled upon a treasure trove: a bag of graham cracker crumbs left from a previous baking adventure. Suddenly, the thought of mini cheesecake bites danced in my mind. These delightful little treats, golden buttery crusts hugging a creamy filling, bring joy with just a bite.
Gathering the ingredients, I felt a wave of nostalgia wash over me—sitting in my grandmother’s kitchen, where she would whip up cheesecakes for every celebration. I could almost hear her laughter and feel the warmth radiating from the oven. Inspired, I decided it was time to recreate those fond memories and make a batch of my own Mini Cheesecake Bites.
Recipe Timing
- Prep Duration: 15 minutes
- Active Cooking: 20 minutes
- Total Duration: 2 hours (including chilling time)
- Portion Size: 24 bites
- Complexity: Simple
Nutritional Recipe
- Calories per portion: 140
- Protein: 2g per serving
- Carbs: 19g per serving
- Fats: 7g per serving
- Fiber: 0g per serving
- Sugars: 7g per serving
- Sodium: 90mg per serving
Why You’ll Love This Mini Cheesecake Bites
These Mini Cheesecake Bites are the ultimate crowd-pleaser! Perfect for parties, family gatherings, or simply as a sweet treat to indulge in after dinner. Their petite size makes them easy to pop one (or several!) at a time, offering a rich burst of creamy cheesecake flavor balanced perfectly with a sweet, crumbly crust. Plus, they can be crowned with your favorite toppings—whether that’s a sprinkle of fresh fruit or a drizzle of chocolate—adding just the right touch of elegance.
The Complete Cooking Journey
Baking these little gems is a delightful journey that culminates in creamy bites of joy. You’ll start by creating the buttery, crumbly crust that serves as the perfect base for the luscious cheesecake filling. As they bake, your home will fill with the scent of vanilla and sweet anticipation, bringing your loved ones to the kitchen like moths to a flame. The final touch is the cooling and gilding with toppings, transforming these bites into miniature works of art.
Ingredients:
- 1 cup graham cracker crumbs
- 1/4 cup sugar
- 1/2 cup butter, melted
- 16 oz cream cheese, softened
- 1 cup powdered sugar
- 1 teaspoon vanilla extract
- 2 large eggs
- Fresh fruit or chocolate for topping (optional)
Method:
Step 1: Preheat Your Oven
Preheat your oven to 325°F (160°C). This ensures the perfect baking environment for your cheesecake bites.
Step 2: Create the Crust Mixture
In a bowl, mix together graham cracker crumbs, sugar, and melted butter until combined. You’re looking for a wet sand consistency that holds together when pressed.
Step 3: Form the Crusts
Press the crumb mixture into the bottom of mini muffin tins to form crusts. Don’t worry about being perfect—these bites are all about charm, not perfection.
Step 4: Whip Up the Filling
In another bowl, beat the cream cheese, powdered sugar, and vanilla until smooth. Make sure there are no lumps, as you want a silky filling that’s dreamy.
Step 5: Add the Eggs
Add eggs one at a time, mixing till just blended. Overmixing can lead to cracks, so mix gently but thoroughly until incorporated.
Step 6: Assemble the Cheesecakes
Pour the cream cheese mixture over the crusts in the muffin tins. Fill each one nearly to the top and revel in how creamy they are!
Step 7: Bake to Perfection
Bake for 15-20 minutes until set. The centers should still have a slight jiggle, which is what you’ll want for that creamy texture.
Step 8: Cool Down
Allow to cool, then refrigerate for a few hours. This step is crucial to achieving the perfect bite.
Step 9: Top and Serve
Top with fresh fruit or chocolate if desired before serving. Your guests will be thrilled to see them adorned with beautiful toppings.
Serving Suggestions & Pairings
Serve these Mini Cheesecake Bites as a delightful end to a meal, paired with coffee or tea for a perfect afternoon treat. For a complete dessert table, consider complementary treats like chocolate-dipped strawberries or a classic fruit tart. They also shine at birthday parties—whimsical, delicious, and a hit with both kids and adults alike!
Storage & Leftovers Guide
These bites store beautifully! Keep them in an airtight container in the fridge, where they will last for up to 5 days. If you want to keep them longer, they freeze well; simply wrap them tightly in plastic wrap and then place in a freezer bag. Thaw in the fridge before serving.
Kitchen Wisdom & Success Tips
- Softening Cream Cheese: Ensure your cream cheese is at room temperature for an easy blend; this prevents lumps.
- Even Baking: Use mini muffin tin liners for effortless removal and minimal cleanup.
- Don’t Overbake: Keep an eye on them; if you see cracks forming, they’ve likely been in the oven too long!
Flavor Variations & Adaptations
Feel free to customize these bites! Mix in different extracts, such as almond or lemon, for a unique flavor twist. You can also add chocolate chips, swirls of fruit puree, or even a hint of espresso for something extra special.
Reader Questions & Solutions
-
Can I use reduced-fat cream cheese?
Yes, but keep in mind they may not be as rich and creamy. -
Can I make these ahead of time?
Absolutely! They store wonderfully in the fridge for up to 5 days or can be frozen for later enjoyment. -
What if I don’t have mini muffin tins?
You can always adapt and use a standard muffin pan—just bake a bit longer, and adjust cooling times. -
Can I make these gluten-free?
Definitely! Use gluten-free graham cracker crumbs, and you’re all set. -
How can I get creative with toppings?
Fresh berries, lemon curd, or even a dollop of whipped cream can elevate these to the next level!
Wrapping Up
These Mini Cheesecake Bites are not just a recipe; they are a way to create delightful memories in your kitchen. Whether you share them with loved ones or keep them all to yourself, they’re sure to bring joy and deliciousness to any occasion. So grab those ingredients, pour your heart into the process, and watch the smiles bloom as you bite into these little slices of heaven. Happy baking!