
There’s something utterly enchanting about biting into a sweet treat that transports you to sun-drenched beaches and swaying palm trees. For me, that treat is none other than Coconut Dream Bars. The blend of creamy sweetness, the crunch of coconut, and a hint of nostalgia from childhood baking sessions make these bars a true gem in any dessert repertoire. I still remember my grandmother bringing out her treasured recipe, her face lighting up as she spoke of warm summer days spent making these bars with us. As we gathered around the kitchen table, the scent of melting butter and toasting coconut filled the air—every inch of that moment is now forever intertwined with love, laughter, and the best Coconut Dream Bars imaginable.
Recipe Timing
- Prep Duration: 15 minutes
- Active Cooking: 30 minutes
- Total Duration: 45 minutes
- Portion Size: Serves 16
- Complexity: Simple
Nutritional Recipe
- Calories per portion: Approximately 200
- Protein: 2g
- Carbs: 28g
- Fats: 9g
- Fiber: 1g
- Sugars: 15g
- Sodium: 60mg
Why You’ll Love This Coconut Dream Bars
These bars embody that sweet spot between chewy and crispy, topped off with a rich layer of sweetened condensed milk that ties it all together beautifully. Whether you’re looking to impress friends at a potluck or simply indulge in a slice of paradise after a long day, Coconut Dream Bars are the answer. They’re easy to whip up, incredibly satisfying, and let’s be real: they look downright irresistible on any dessert table.
The Complete Cooking Journey
Let’s dive right into the delightful process of making Coconut Dream Bars. Grab your mixing bowls and whisk—it’s time to create a tropical masterpiece in your very own kitchen!
Ingredients:
- 1 cup all-purpose flour
- 1/2 cup unsweetened shredded coconut
- 1/2 cup unsalted butter, softened
- 1 cup brown sugar
- 1/2 cup granulated sugar
- 1 egg
- 1 teaspoon vanilla extract
- 1/2 teaspoon baking powder
- 1/4 teaspoon salt
- 1 cup sweetened condensed milk
- 1 cup chopped nuts (optional)
Method:
Step 1: Preheat the Oven and Prepare the Pan
Begin by preheating your oven to 350°F (175°C). Grease a 9×9 inch baking pan, which will cradle our delightful creation.
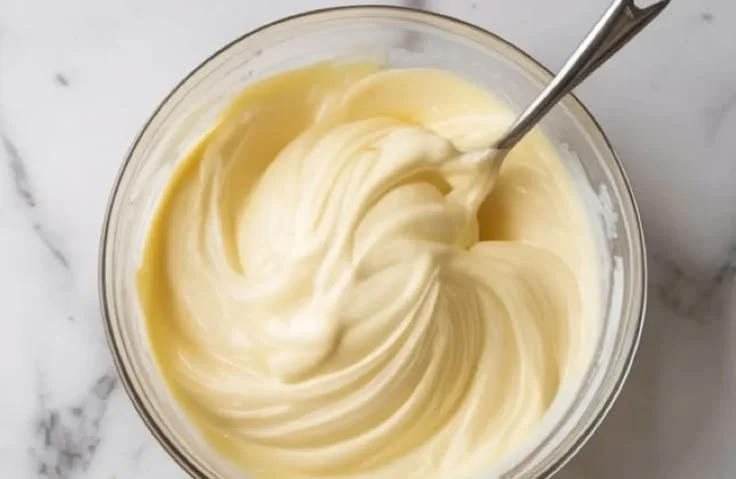
Step 2: Cream the Butter and Sugars
In a mixing bowl, cream together the softened butter, brown sugar, and granulated sugar until the mixture is fluffy and light. This step is crucial; it adds air into the batter, resulting in delightfully soft bars.
Step 3: Incorporate the Egg and Vanilla
Add the egg and vanilla extract to the fluffy mixture, mixing until everything is combined. The fragrant vanilla will envelop your senses, hinting at the sweetness to come.
Step 4: Combine the Dry Ingredients
In a separate bowl, whisk together the flour, shredded coconut, baking powder, and salt. Gradually add this dry mixture to the wet one, stirring until just combined. The shredded coconut will add a wonderful texture that’s hard to resist.
Step 5: Press the Batter into the Pan
Transfer the batter into the prepared baking pan, pressing it down evenly. This creates a sturdy base that will support all the heavenly layers that follow!
Step 6: Add the Sweetened Condensed Milk
Pour the sweetened condensed milk over the top, spreading it out evenly. It’s the luscious, creamy layer that makes these bars unforgettable. If you’re feeling adventurous, sprinkle the chopped nuts over the top for added crunch.
Step 7: Bake to Perfection
Bake in the preheated oven for about 25-30 minutes, or until the top is golden brown. Your kitchen will soon be filled with a heavenly aroma that foreshadows the deliciousness awaiting you.
Step 8: Cool and Serve
Allow the bars to cool before cutting them into squares. Patience is a virtue here, as cooling makes them easier to slice and enhances the flavors beautifully.
Serving Suggestions & Pairings
Serve your Coconut Dream Bars on a vibrant platter, perhaps accompanied by a scoop of vanilla ice cream. They also pair beautifully with a strong cup of coffee or a refreshing iced tea, making for the perfect afternoon treat.
Storage & Leftovers Guide
Store any leftovers in an airtight container at room temperature for up to 3 days or in the fridge for up to a week. You can also freeze them wrapped tightly in plastic wrap and placed in a freezer-safe bag for up to 3 months—ideal for those moments when a sweet craving hits!
Kitchen Wisdom & Success Tips
- Butter Temperature: Ensure your butter is softened but not melted for the best texture.
- Coconut Choices: Feel free to play with the type of coconut you use—try sweetened or unsweetened based on your preference!
- Chopped Nuts: If you love a nutty flavor, don’t skip the nuts! They provide a delightful crunch against the chewiness of the bars.
Flavor Variations & Adaptations
- Chocolate Lovers: Add chocolate chips to the batter for a cocoa twist.
- Tropical Flair: Toss in some dried pineapple or mango bits for a fruity touch.
- Spiced Up: Add a pinch of cinnamon or nutmeg to the dry ingredients for a warm flavor boost.
Reader Questions & Solutions
-
Can I use margarine instead of butter?
Yes, margarine works, but it might alter the flavor a bit. Use unsalted if possible for better control over saltiness. -
What can I use instead of sweetened condensed milk?
You can make your own by simmering milk and sugar or replace it with a homemade custard. -
How do I make these bars gluten-free?
Substitute the all-purpose flour with a gluten-free blend, ensuring it’s one that works for baking! -
Can I reduce the sugar?
Absolutely! Try using less sugar, but be mindful that it may affect the texture slightly. -
Why are my bars too crumbly?
They may need a bit more moist ingredients. Ensure your butter is sufficiently softened and measured accurately.
Wrapping Up
As you whip up these Coconut Dream Bars, remember that cooking is as much about the journey as it is about the destination. Every step in this process echoes with the potential for joy and satisfaction. Whether you’re sharing these bars with loved ones or savoring them solo, they’re bound to bring a smile. So, preheat that oven, gather your ingredients, and get ready to bring a touch of the tropics into your kitchen. Happy baking!
PrintCoconut Dream Bars
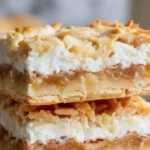
Indulge in these Coconut Dream Bars, combining chewy and crispy textures topped with a rich layer of sweetened condensed milk for a delightful treat.
- Prep Time: 15 minutes
- Cook Time: 30 minutes
- Total Time: 45 minutes
- Yield: 16 servings 1x
- Category: Dessert
- Method: Baking
- Cuisine: International
- Diet: Vegetarian
Ingredients
- 1 cup all-purpose flour
- 1/2 cup unsweetened shredded coconut
- 1/2 cup unsalted butter, softened
- 1 cup brown sugar
- 1/2 cup granulated sugar
- 1 egg
- 1 teaspoon vanilla extract
- 1/2 teaspoon baking powder
- 1/4 teaspoon salt
- 1 cup sweetened condensed milk
- 1 cup chopped nuts (optional)
Instructions
- Preheat the oven to 350°F (175°C) and grease a 9×9 inch baking pan.
- Cream together the softened butter, brown sugar, and granulated sugar until fluffy.
- Add the egg and vanilla extract, mixing until combined.
- Whisk together the flour, shredded coconut, baking powder, and salt in a separate bowl.
- Gradually add the dry mixture to the wet, stirring until just combined.
- Transfer the batter into the prepared pan, pressing it down evenly.
- Pour the sweetened condensed milk over the top and spread evenly.
- Bake for 25-30 minutes or until the top is golden brown.
- Allow to cool before cutting into squares.
Notes
Store leftovers in an airtight container for up to 3 days or in the fridge for up to a week. They can also be frozen for 3 months.
Nutrition
- Serving Size: 1 bar
- Calories: 200
- Sugar: 15g
- Sodium: 60mg
- Fat: 9g
- Saturated Fat: 5g
- Unsaturated Fat: 4g
- Trans Fat: 0g
- Carbohydrates: 28g
- Fiber: 1g
- Protein: 2g
- Cholesterol: 30mg