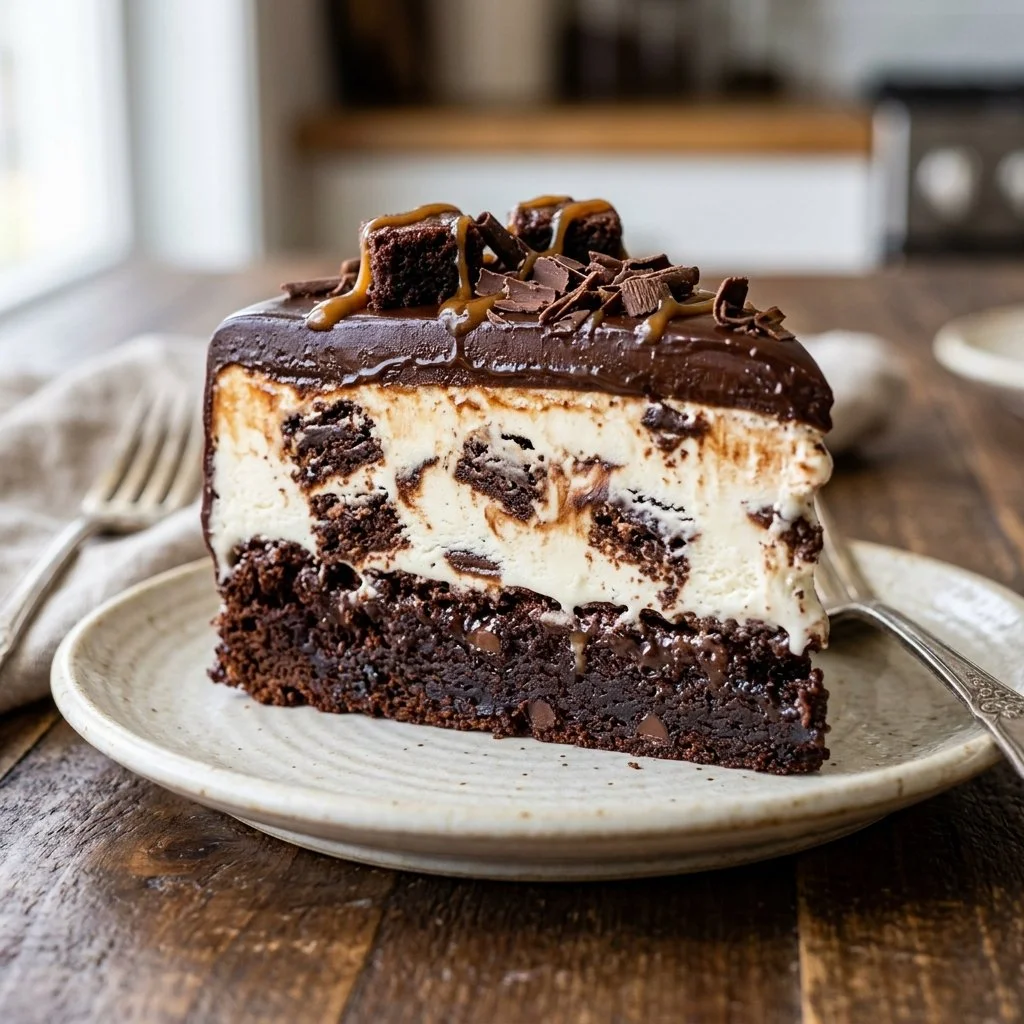
There’s an unmistakable joy that fills the air when you’re greeted with the unmistakable aroma of warm brownies cooling on the counter. I remember the first time I made a brownie ice cream cake. It was a hot summer’s day, and the idea of chocolatey decadence layered with creamy ice cream was simply irresistible. Friends gathered in my backyard, laughter mingling with the chatter of excited voices, and as I revealed the dessert, their eyes lit up with delight. That moment, of seeing pure joy on their faces as they dug into rich chocolate and smooth ice cream, is a memory I cherish.
The beauty of this Brownie Ice Cream Cake is that it combines two beloved desserts into one fantastic treat, allowing everyone to enjoy the best of both worlds. If you’re looking for a showstopper that’s easy to make and guaranteed to impress, let’s dive in!
Recipe Timing
- Prep Duration: 15 minutes
- Active Cooking: 30 minutes
- Total Duration: 2 hours and 45 minutes (includes freezing time)
- Portion Size: 12 servings
- Complexity: Simple
Nutritional Recipe
- Calories per portion: Approximately 300 calories
- Protein: 4g
- Carbs: 40g
- Fats: 14g
- Fiber: 1g
- Sugars: 25g
- Sodium: 150mg
Why You’ll Love This Brownie Ice Cream Cake
This Brownie Ice Cream Cake is the epitome of comfort and celebration. With every bite, you’ll experience the rich, fudgy texture of brownies brilliant contrasted with the smooth, creamy ice cream on top. It’s versatile too—you can customize it with your favorite ice cream flavor, add toppings like nuts or sprinkles, or simply drizzle with chocolate syrup for a truly indulgent experience. Perfect for birthdays, anniversaries, or just a sweet treat after a long week, this cake is sure to become a go-to dessert in your repertoire!
The Complete Cooking Journey
Let’s embark on this delightful cooking adventure together. Get your ingredients stocked and your kitchen ready—before long, you’ll be enjoying a slice of happiness!
Ingredients:
- 1 box of brownie mix
- Ingredients required for brownie mix (eggs, oil, and water)
- 1 quart of your favorite ice cream
- Chocolate syrup
- Whipped cream (optional)
- Cherries (optional)
Method:
Step 1: Preheat the Oven
Preheat the oven according to the brownie mix instructions. This ensures that your brownies will bake evenly, giving them that perfect fudgy texture.
Step 2: Prepare the Brownie Mix
Mix the brownie ingredients (eggs, oil, and water) in a bowl as per the package instructions. Stir until well combined, then pour the mixture into a greased 9×13 inch pan. Spread it evenly, and pop it into the oven to bake.
Step 3: Bake the Brownies
Bake according to the time indicated on the brownie mix box, usually around 20 to 25 minutes. The edges should be set, while the center remains a touch soft. A toothpick test should show a few moist crumbs (not wet batter).
Step 4: Cool the Brownies
Once baked, remove the brownies from the oven and let them cool completely in the pan on a wire rack. This step is vital for allowing the brownies to set and makes layering the ice cream easier.
Step 5: Spread the Ice Cream
After the brownies are completely cool, it’s time for the fun part! Spread a layer of your favorite ice cream evenly on top of the brownies. Choose a flavor that excites your taste buds—chocolate or vanilla is always a hit!
Step 6: Freeze the Cake
Place the brownie and ice cream creation into the freezer. Let it freeze for at least 2 hours so that the ice cream can firm up beautifully. This ensures clean slices when you serve.
Step 7: Finish with Toppings
Before serving, drizzle the cake with chocolate syrup. Add whipped cream and cherries on top for that extra indulgence. Trust me, the presentation is just as important as the taste!
Step 8: Cut and Enjoy
Once you’re ready to serve, take it out of the freezer, cut it into squares, and enjoy every delightful bite!
Serving Suggestions & Pairings
Pair slices of this Brownie Ice Cream Cake with fresh fruit, like strawberries or raspberries, for a refreshing complement. A dollop of whipped cream and a sprinkle of nuts or chocolate shavings can elevate your dessert experience. This cake is perfect with cold beverages like iced coffee or a creamy milkshake.
Storage & Leftovers Guide
To keep this dessert fresh, store any leftovers in the freezer, covered with plastic wrap or in an airtight container. It will maintain its deliciousness for about a week—if it lasts that long!
Kitchen Wisdom & Success Tips
- If the ice cream is too hard to spread, let it sit out for a few minutes to soften.
- Be patient when cooling your brownies; this prevents a messy assembly.
- Feel free to mix in chocolate chips into the brownie batter for added texture!
Flavor Variations & Adaptations
Try using different ice cream flavors like mint chocolate chip or coffee for a unique twist. Experiment by adding crushed cookies or candy bars into the ice cream for a fun crunchy surprise!
Reader Questions & Solutions
- What if my brownies come out too dry? A common issue is baking them too long. Stick to the package time, and opt for the toothpick method to check doneness.
- Can I make this dairy-free? Use a dairy-free brownie mix and ice cream to cater to dietary needs.
- How can I make it gluten-free? Look for gluten-free brownie mixes, widely available today.
- What if I can’t find the ice cream flavor I want? No problem! Use what you have on hand or even make your own homemade ice cream.
- How do I achieve perfect slices? Use a warm knife for cutting the cake—run it under hot water, dry it, then cut for clean edges!
Wrapping Up
There’s something magical about creating desserts that bring people together. This Brownie Ice Cream Cake is more than just a treat—it’s a way to celebrate life’s sweet moments. So whip out that brownie mix, gather your loved ones, and enjoy every morsel of this delicious creation. Happy baking!