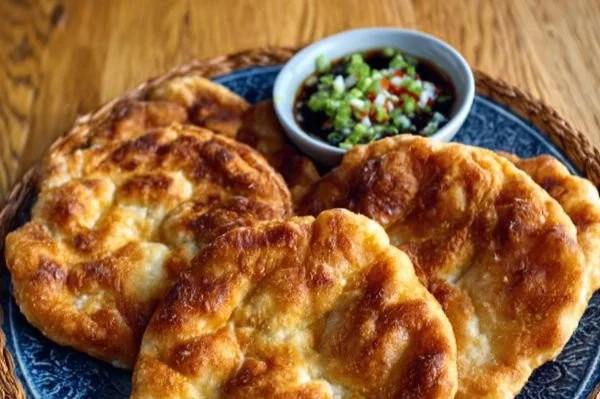
There’s something uniquely comforting about the aroma of warm bread wafting through the kitchen, a smell that calls us back to family gatherings and shared meals. As a child, I remember my grandmother making Bannock, that delightful fry bread, for family get-togethers. Each batch seemed to hold its own stories, often served with honey or jam, while we shared laughter and memories around the table. It was always a joy to watch that golden brown bread transform in the oil, puffing up beautifully and inviting us all to indulge. Today, I’ll guide you through an easy version of Bannock that’s close to my heart and sure to become a staple in your home!
Recipe Timing
- Prep Duration: 15 minutes
- Active Cooking: 15 minutes
- Total Duration: 30 minutes
- Portion Size: 6 servings
- Complexity: Simple
Nutritional Recipe
- Calories per portion: Approximately 210 calories
- Protein: 3 grams
- Carbs: 35 grams
- Fats: 9 grams
- Fiber: 1 gram
- Sugars: 0 grams (if sugar is not added)
- Sodium: 200 mg
Why You’ll Love This Bannock (Indigenous Fry Bread) made easy for you!
Bannock represents much more than just a recipe; it’s a cultural dish that connects people and reminds us of our roots. This version is quick, easy, and requires only a few basic ingredients that you probably have on hand. The beauty of Bannock lies in its versatility—enjoy it sweet or savory, as a snack or a side, and feel the warmth of tradition wrap around you with every bite. Whether you’re gathering friends for brunch or looking for a delicious way to savor a quiet evening, this fry bread is the perfect canvas for your culinary creativity.
The Complete Cooking Journey
Here’s how we’ll turn simple ingredients into something magical. Prepare your ingredients, mix them with love, fry them to perfection, and most importantly, enjoy the simple pleasures of cooking.
Ingredients:
- 2 cups all-purpose flour
- 1 tablespoon baking powder
- 1 teaspoon salt
- 1 tablespoon sugar (optional)
- 2 tablespoons vegetable oil or melted butter
- 3/4 cup water (adjust as needed)
- Oil for frying
Method:
Step 1: Whisk the Dry Ingredients
In a large bowl, whisk together the flour, baking powder, salt, and sugar (if using) until everything is well combined. The mingling of these dry ingredients sets the foundation for your Bannock.
Step 2: Mix in the Fat
Next, incorporate the vegetable oil or melted butter into the flour mixture. Stir it in until the mixture resembles coarse crumbs, creating that light and airy texture we desire.
Step 3: Bring It All Together
Now, slowly pour in the water while continuously mixing until a soft dough begins to form. Don’t hesitate to adjust the water amount as needed—our goal is a pliable dough that isn’t too sticky.
Step 4: Knead the Dough
Transfer the dough to a lightly floured surface. Knead it gently for about a minute until it feels smooth and ready to rise. This little bit of care goes a long way.
Step 5: Give It Some Rest
Let that dough rest for 10-15 minutes. This resting period is crucial, allowing the gluten to relax and the bread to puff beautifully when cooked.
Step 6: Shape the Discs
After resting, cut your dough into six equal portions. Flatten each piece into a disc about half an inch thick, giving them that traditional fry bread shape.
Step 7: Heat the Oil
In a large skillet, heat oil over medium heat until it’s hot enough for frying. A test you can do is drop a small piece of dough into the oil; if it sizzles right away, you’re good to go!
Step 8: Fry the Dough
Carefully place the dough discs into the skillet, frying them in batches if necessary. Fry each side for approximately 2-3 minutes or until they’re golden brown and fully cooked.
Step 9: Drain and Cool
Once cooked, remove the Bannock from the skillet and let them drain on paper towels. This step helps keep them crispy and delicious.
Step 10: Serve Warm
Serve your warm Bannock topped with honey, jam, or with savory options like chili or beans. The choice is yours—each bite is sure to take you on a delightful journey!
Serving Suggestions & Pairings
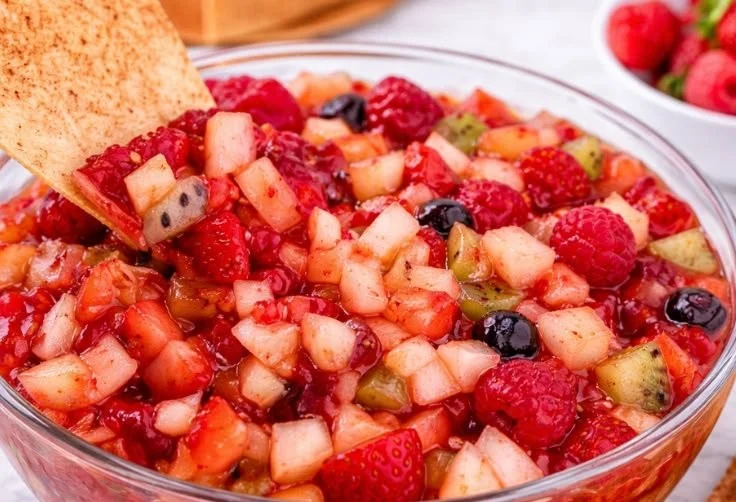
Warm Bannock pairs perfectly with a vibrant fruit jam or local honey for sweetness. It also makes a fantastic companion to savory stews or chili, enhancing the flavors of your main dishes. Consider adding a simple mixed greens salad or roasted vegetables on the side for a satisfying meal.
Storage & Leftovers Guide
If you find yourself with leftovers (which is unlikely because they’re so good!), store the cooled Bannock in an airtight container in the refrigerator for up to 3 days. For longer storage, freeze them in a freezer-safe bag for up to a month. Simply reheat in a skillet or microwave before serving.
Kitchen Wisdom & Success Tips
- Ensure your oil is hot enough before frying—this ensures a nice crispy exterior.
- If your dough feels too sticky, add a little more flour; if it’s too dry, a splash more water can help.
- Knead gently; overworking the dough can make it tough.
- Experiment with variations! Add herbs to the dough for a savory twist.
Flavor Variations & Adaptations
Feel free to customize your Bannock! You can add spices like garlic powder or onion powder for a savory flavor, or mix in cinnamon and nutmeg for a sweet version. Cheese or chopped herbs can also elevate your fry bread to the next level.
Reader Questions & Solutions
-
Can I use whole wheat flour instead of all-purpose flour?
Absolutely! Just note that the texture may be denser, so you might need a bit more water. -
What can I use instead of vegetable oil?
Melted butter works wonderfully, and for a more gourmet twist, try using olive oil. -
How do I know when the oil is ready for frying?
Drop a small piece of dough into the oil; if it sizzles immediately, it’s ready. -
Can I bake Bannock instead of frying it?
Yes! Preheat your oven to 425°F (220°C), place the discs on a baking sheet, and bake for 10-12 minutes until golden. -
What’s the best way to reheat leftover Bannock?
Reheat in a skillet over medium heat for a couple of minutes on each side to restore its crispy texture.
Wrapping Up
Cooking doesn’t have to be complicated to be rewarding. This simple Bannock recipe connects us to tradition and nourishes our souls. I hope you enjoy making this beloved fry bread as much as I do. Remember, every batch holds the potential for sweet stories and shared meals with those you love. So gather your ingredients, turn up your favorite tunes, and let the warm aroma of Bannock fill your home. Happy cooking!
PrintEasy Bannock (Indigenous Fry Bread)

A simple and quick version of traditional Bannock, perfect for sharing with family and friends.
- Prep Time: 15 minutes
- Cook Time: 15 minutes
- Total Time: 30 minutes
- Yield: 6 servings 1x
- Category: Side Dish
- Method: Frying
- Cuisine: Canadian
- Diet: Vegetarian
Ingredients
- 2 cups all-purpose flour
- 1 tablespoon baking powder
- 1 teaspoon salt
- 1 tablespoon sugar (optional)
- 2 tablespoons vegetable oil or melted butter
- 3/4 cup water (adjust as needed)
- Oil for frying
Instructions
- Whisk the flour, baking powder, salt, and sugar (if using) in a large bowl until combined.
- Incorporate the vegetable oil or melted butter into the flour mixture until it resembles coarse crumbs.
- Slowly pour in the water while mixing until a soft dough forms.
- Transfer the dough to a floured surface and knead gently for about a minute until smooth.
- Let the dough rest for 10-15 minutes to allow gluten to relax.
- Cut the dough into six equal portions and flatten each into a disc about half an inch thick.
- Heat oil in a skillet over medium heat until hot enough for frying.
- Carefully place the dough discs into the skillet, frying each side for 2-3 minutes until golden brown.
- Remove the Bannock from the skillet and drain on paper towels.
- Serve warm topped with honey, jam, or savory options like chili or beans.
Notes
Ensure oil is hot enough before frying for a crispy exterior. Experiment with spices or herbs for added flavor.
Nutrition
- Serving Size: 1 serving
- Calories: 210
- Sugar: 0g
- Sodium: 200mg
- Fat: 9g
- Saturated Fat: 2.5g
- Unsaturated Fat: 6g
- Trans Fat: 0g
- Carbohydrates: 35g
- Fiber: 1g
- Protein: 3g
- Cholesterol: 0mg