It was a cozy Sunday afternoon, and I found myself rummaging through my pantry, searching for inspiration. The sun poured through the kitchen window as I stumbled upon the leftover brownie mix from last week’s baking mishap—my quest for the perfect brownie recipe that seemed to elude me. However, rather than giving in to disappointment, I decided to make the best of it. That’s when Layered Dessert Cups came to life—an exquisite fusion of brownie chunks, creamy vanilla sweetness, and the nostalgic crunch of Oreos. This delightful dessert transformed our mundane afternoon into a celebration of flavors, textures, and shared laughter.
Recipe Timing
- Prep Duration: 15 minutes
- Active Cooking: 25 minutes
- Total Duration: 1 hour (including chilling time)
- Portion Size: Serves 4
- Complexity: Simple
Nutritional Recipe
- Calories per portion: 350
- Protein: 5g
- Carbs: 42g
- Fats: 20g
- Fiber: 2g
- Sugars: 28g
- Sodium: 250mg
Why You’ll Love This Layered Dessert Cups
These Layered Dessert Cups embody everything delightful that you crave in a dessert. They showcase rich, fudgy brownie chunks layered with a luxuriously sweet cream cheese mixture, crispy Oreo pieces, and a light, airy whipped topping. Each bite is a harmonious blend of creamy, crunchy, and chocolaty goodness that makes it hard to only have one! Plus, they are incredibly simple to make, making them the perfect treat for gatherings or just a cozy night in.
The Complete Cooking Journey
Let’s jump right in and explore the layers of flavor in your soon-to-be favorite dessert!
Ingredients:
- Brownie chunks
- Oreo cookies
- Whipped topping
- Cream cheese
- Powdered sugar
- Vanilla extract
Method:
### Step 1: Prepare the Brownies
Prepare the brownies according to package instructions and let them cool before cutting into chunks.
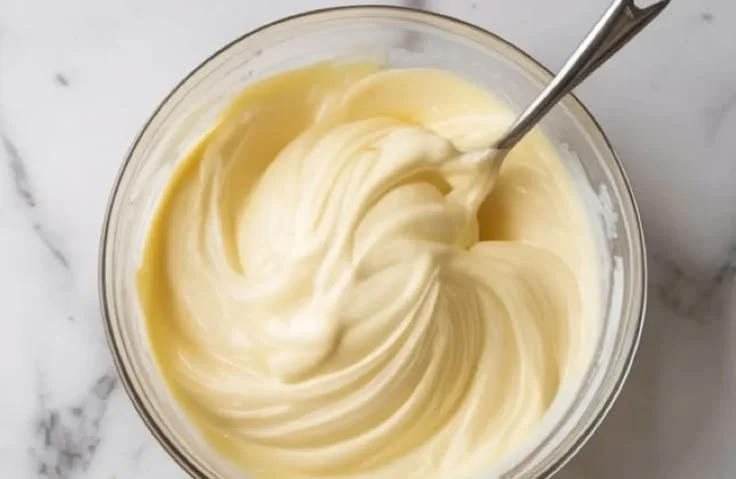
### Step 2: Make the Cream Cheese Mixture
In a bowl, mix cream cheese, powdered sugar, and vanilla extract until smooth.
### Step 3: Crush the Oreo Cookies
Crush the Oreo cookies into small pieces.
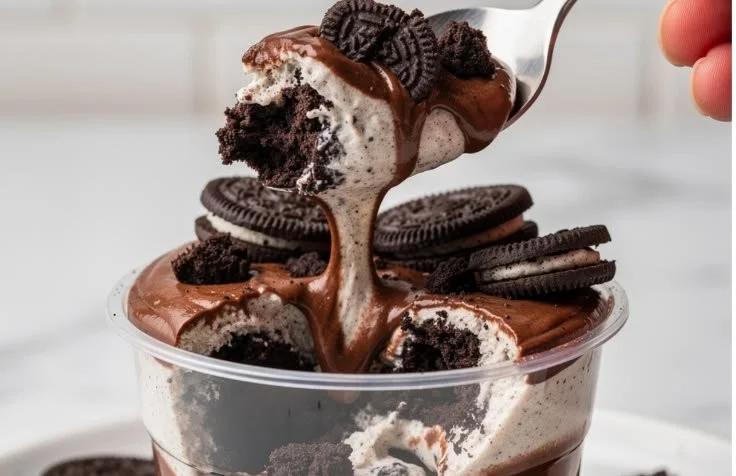
### Step 4: Layer the Dessert Cups
In dessert cups, layer the brownie chunks, cream cheese mixture, crushed Oreos, and whipped topping.
### Step 5: Repeat the Layers
Repeat the layers until the cups are filled.
### Step 6: Top and Chill
Top with more whipped topping and Oreo pieces, then chill in the fridge for at least 30 minutes before serving.
Serving Suggestions & Pairings
These delightful layered cups shine on their own, but feel free to get creative! They pair beautifully with a scoop of vanilla ice cream or a drizzle of chocolate sauce. For those who might want to serve them at a gathering, consider adding fresh berries or a mint leaf for a pop of color.
Storage & Leftovers Guide
Leftovers? Lucky you! These cups can be stored in the refrigerator for up to 3 days. Just be sure to cover them well to maintain their freshness. If you’re planning to prepare them in advance, wait to layer the whipped topping until just before serving for the best texture.
Kitchen Wisdom & Success Tips
- Use Room Temperature Cream Cheese: For the smoothest filling, make sure your cream cheese is at room temperature before mixing.
- Double the Recipe: These dessert cups disappear quickly, so if you’re expecting guests, consider doubling the recipe!
- Label Your Layers: If you have kids helping, let them pick their favorite layers—it makes the dessert fun and personal!
Flavor Variations & Adaptations
Feeling adventurous? Swap the Oreo cookies for your favorite cookie sandwich, like Nutter Butter for a peanut butter twist, or use gluten-free brownies and gluten-free cookies to accommodate dietary preferences. You could also add a splash of coffee or a bit of chocolate syrup to the cream cheese for an extra kick.
Reader Questions & Solutions
-
What if my brownies are too crumbly?
Make sure to let them cool completely before handling. If they still feel too dry, you could add a spoonful of melted butter to help bind them. -
How can I prevent the Oreos from getting soggy?
Layer the Oreos in between the brownie layers rather than the cream cheese mixture to help maintain their crunch. -
Can I use homemade whipped cream instead of whipped topping?
Absolutely! Just be sure to whip it until stiff peaks form for the best texture and stability. -
Is this recipe suitable for kids?
Yes! It’s a fun and simple project that kids can help with, especially with layering. Supervision is advised for mixing tasks. -
How do I make these ahead of time?
You can prepare all the components in advance, layering them just before serving to keep everything fresh.
Wrapping Up
These Layered Dessert Cups are not just a recipe; they’re a way to create sweet memories with friends and family. The next time your afternoon needs a sparkle or you’re looking for the perfect little treat to bring to a gathering, remember this easy, fun, and utterly delicious dessert. You’ll find that each bite is a celebration of flavors, and who knows? You might just find yourself in a cozy kitchen, creating another delicious story. Enjoy every moment—and every crumb!
PrintLayered Dessert Cups

Delightful Layered Dessert Cups with brownie chunks, creamy vanilla filling, and crunchy Oreos.
- Prep Time: 15
- Cook Time: 25
- Total Time: 60
- Yield: 4 servings
- Category: Dessert
- Method: Chilling
- Cuisine: American
- Diet: Vegetarian
Ingredients
- Brownie chunks
- Oreo cookies
- Whipped topping
- Cream cheese
- Powdered sugar
- Vanilla extract
Instructions
- Prepare the brownies according to package instructions and let them cool before cutting into chunks.
- Mix cream cheese, powdered sugar, and vanilla extract in a bowl until smooth.
- Crush the Oreo cookies into small pieces.
- Layer the dessert cups with brownie chunks, cream cheese mixture, crushed Oreos, and whipped topping.
- Repeat the layers until the cups are filled.
- Top with more whipped topping and Oreo pieces, then chill in the fridge for at least 30 minutes before serving.
Notes
These dessert cups can be stored in the refrigerator for up to 3 days. Layer the whipped topping just before serving for the best texture.
Nutrition
- Serving Size: 1 serving
- Calories: 350
- Sugar: 28g
- Sodium: 250mg
- Fat: 20g
- Saturated Fat: 10g
- Unsaturated Fat: 10g
- Trans Fat: 0g
- Carbohydrates: 42g
- Fiber: 2g
- Protein: 5g
- Cholesterol: 30mg