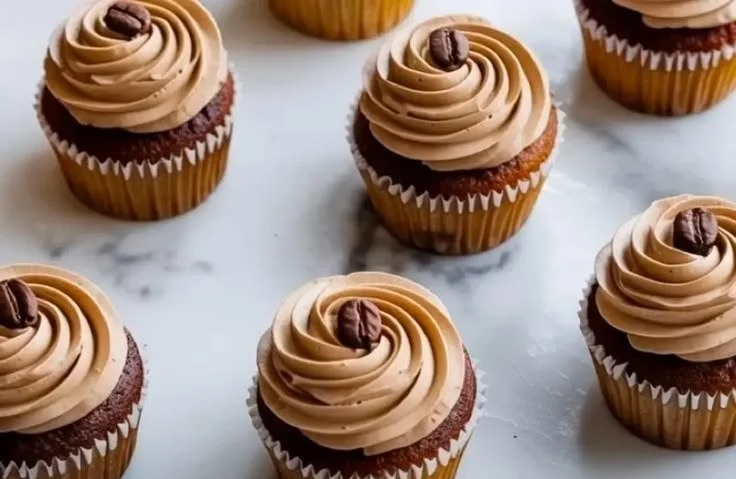
There’s something magical about a well-made cupcake, and Boston Cream Cupcakes possess that enchantment tenfold. Every time I whip up a batch, I’m transported back to my childhood visits to the local bakery, where the air was always filled with the scent of sweet vanilla and rich chocolate. Those moments, steeped in nostalgia, remind me of treats I could hardly wait to devour at birthday parties and family gatherings. What makes these cupcakes even more special is that they combine two classics—light, fluffy cake and creamy custard, all topped with a glossy chocolate glaze. With each bite, they deliver joy that’s reminiscent of childhood delights, making them perfect for a special dessert or even a casual afternoon snack. Whether you’re baking for a birthday celebration or simply to enjoy with a cup of coffee, these cupcakes are sure to impress.
Recipe Timing
- Prep Duration: 20 minutes
- Active Cooking: 20 minutes
- Total Duration: 40 minutes (plus cooling time)
- Portion Size: 12 cupcakes
- Complexity: Simple
Nutritional Recipe
- Calories per portion: Approximately 210
- Protein: 2 grams per serving
- Carbs: 28 grams per serving
- Fats: 11 grams per serving
- Fiber: 0 grams per serving
- Sugars: 10 grams per serving
- Sodium: 145 mg per serving
Why You’ll Love This Boston Cream Cupcakes
These Boston Cream Cupcakes are everything you adore about the classic dessert—but in a portable form! They boast a richly fluffy cupcake that complements the smooth, velvety custard filling, all enrobed in a luxurious chocolate glaze. Beyond the deliciousness, the process of making these treats can be a delightful activity to share. Gather loved ones around, make the batter together, and let everyone participate in the fun of filling and glazing. These cupcakes will elevate any occasion and are bound to become a favorite in your dessert repertoire.
The Complete Cooking Journey
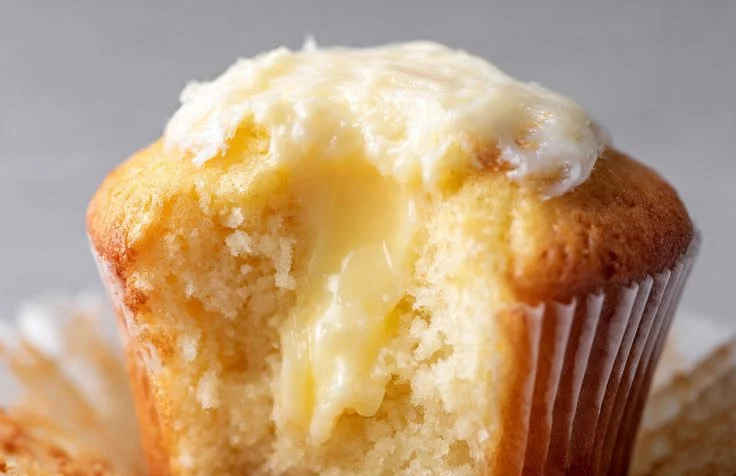
Baking these cupcakes is not just a task; it’s an experience filled with delightful anticipation. From the moment butter meets sugar, a transformation begins. The rhythmic act of mixing and folding in the ingredients creates a sense of joy and satisfaction that is hard to match. Once baked, the fragrant aroma fills your kitchen, beckoning everyone to gather around as you prepare to unveil the grand dessert. The best part? The blissful moment when the first bite reveals a luscious custard surprise.
Ingredients:
- 1 cup all-purpose flour
- 1/2 cup sugar
- 1/2 cup unsalted butter, softened
- 2 eggs
- 1/2 cup milk
- 1 teaspoon vanilla extract
- 1 teaspoon baking powder
- 1/8 teaspoon salt
- 1 cup custard (store-bought or homemade)
- 1 cup chocolate glaze (store-bought or homemade)
Method:
Step 1: Preheat the Oven
Preheat your oven to 350°F (175°C) and line a cupcake pan with liners.
Step 2: Cream the Butter and Sugar
In a mixing bowl, cream together the butter and sugar until light and fluffy. This process is crucial for creating a light texture in your cupcakes.
Step 3: Add the Eggs
Add the eggs one at a time, mixing well after each addition. This ensures they are fully incorporated for a smooth batter.
Step 4: Incorporate Vanilla and Milk
Stir in the vanilla extract and milk until well blended. This step adds moisture and flavor to your cupcakes.
Step 5: Mix Dry Ingredients
In a separate bowl, whisk together the flour, baking powder, and salt. Gradually add the dry ingredients to the wet mixture, mixing until just combined. Avoid overmixing to keep your cupcakes tender.
Step 6: Fill the Cupcake Liners
Fill the cupcake liners about 2/3 full with the batter. This allows room for the cupcakes to rise beautifully.
Step 7: Bake
Bake for 18-20 minutes or until a toothpick comes out clean. The aroma wafting through your kitchen will be irresistible!
Step 8: Cool Completely
Allow cupcakes to cool completely on a wire rack. Patience is key here!
Step 9: Create Cavity for Filling
Once cooled, use a small knife or a cupcake corer to create a cavity in the center of each cupcake. It’s time to make room for that luscious custard!
Step 10: Fill with Custard
Generously fill the cavity with custard. Each cupcake should have a delightful surprise inside.
Step 11: Glaze the Cupcakes
Dip the tops of the cupcakes in chocolate glaze or drizzle the glaze over the top. This is the final touch that brings everything together.
Step 12: Allow the Glaze to Set
Allow the glaze to set before serving. This will prevent a messy chocolate disaster when biting into your cupcakes!
Serving Suggestions & Pairings
Serve these scrumptious Boston Cream Cupcakes with a side of fresh berries or a light dollop of whipped cream. They pair beautifully with coffee, tea, or even a glass of milk. For added flair, adorn your platter with mint leaves or drizzle extra chocolate for presentation.
Storage & Leftovers Guide
These delightful treats can be stored in an airtight container at room temperature for up to 2 days. For longer freshness, place them in the fridge for about a week. Just remember to let them come to room temperature before serving for the best flavor!
Kitchen Wisdom & Success Tips
- Ensure all your ingredients are at room temperature for best results—this allows for better mixing and a more consistent batter.
- Don’t hesitate to use store-bought custard and chocolate glaze if time is short! They can save you valuable prep time while still delivering great taste.
- When making homemade custard, don’t rush the cooking process; it should be thick and creamy for the ultimate filling.
Flavor Variations & Adaptations
Feel free to experiment! Try adding a splash of almond extract for a different flavor profile, or switch up the chocolate glaze for a caramel or white chocolate drizzle. For an extra crunch, fold in some chocolate chips into the batter or sprinkle crushed nuts on top of the glaze.
Reader Questions & Solutions
-
How do I know when my cupcakes are done baking?
Insert a toothpick into the center; if it comes out clean or with a few crumbs, they’re ready! -
Can I make these cupcakes gluten-free?
Yes! Swap the all-purpose flour with a gluten-free blend, and make sure your baking powder is gluten-free as well. -
What can I use instead of butter?
You can substitute with equal parts coconut oil or canola oil for a dairy-free option. -
How can I make my custard thicker?
If making homemade custard, ensure you cook it on low heat and stir constantly until it thickens. You can also add a cornstarch slurry for additional thickness. -
Can I freeze these cupcakes?
Yes! Freeze unglazed cupcakes for up to 3 months. Thaw them at room temperature and glaze before serving.
Wrapping Up
Creating these Boston Cream Cupcakes not only fills your home with delightful aromas, but they also provide a wonderful opportunity to make lasting memories with family and friends. Each cupcake is a little piece of decadence that celebrates life’s sweet moments. So gather your ingredients, unleash your inner baker, and enjoy every bite of these amazing treats. Happy baking!
PrintBoston Cream Cupcakes
Delight in these light and fluffy Boston Cream Cupcakes filled with creamy custard and topped with a luscious chocolate glaze.
- Prep Time: 20 minutes
- Cook Time: 20 minutes
- Total Time: 40 minutes
- Yield: 12 cupcakes 1x
- Category: Dessert
- Method: Baking
- Cuisine: American
- Diet: Vegetarian
Ingredients
- 1 cup all-purpose flour
- 1/2 cup sugar
- 1/2 cup unsalted butter, softened
- 2 eggs
- 1/2 cup milk
- 1 teaspoon vanilla extract
- 1 teaspoon baking powder
- 1/8 teaspoon salt
- 1 cup custard (store-bought or homemade)
- 1 cup chocolate glaze (store-bought or homemade)
Instructions
- Preheat your oven to 350°F (175°C) and line a cupcake pan with liners.
- Cream together the butter and sugar until light and fluffy.
- Add the eggs one at a time, mixing well after each addition.
- Stir in the vanilla extract and milk until well blended.
- Whisk together the flour, baking powder, and salt in a separate bowl.
- Add the dry ingredients to the wet mixture, mixing until just combined.
- Fill the cupcake liners about 2/3 full with the batter.
- Bake for 18-20 minutes or until a toothpick comes out clean.
- Allow cupcakes to cool completely on a wire rack.
- Create a cavity in the center of each cupcake using a small knife or cupcake corer.
- Fill the cavity with custard.
- Dip the tops of the cupcakes in chocolate glaze or drizzle over the top.
- Allow the glaze to set before serving.
Notes
Serve with fresh berries or whipped cream. Store in an airtight container for up to 2 days at room temperature, or refrigerate for about a week.
Nutrition
- Serving Size: 1 cupcake
- Calories: 210
- Sugar: 10g
- Sodium: 145mg
- Fat: 11g
- Saturated Fat: 7g
- Unsaturated Fat: 4g
- Trans Fat: 0g
- Carbohydrates: 28g
- Fiber: 0g
- Protein: 2g
- Cholesterol: 30mg