There’s a hidden gem in the world of desserts—one that captures the gentle, fluffy texture of clouds and the delicate sweetness of its cream cheese essence. The first time I tasted Japanese cheesecake, I was completely mesmerized. As I sank my fork into its tender, wobbly body, the cake seemed to almost melt in my mouth, leaving behind a lingering hint of buttery depth and a whisper of citrus. It transported me to cozy cafés in Tokyo, where enticing aromas mingle with laughter, creating memories of shared moments and sweet indulgence.
With this recipe, I invite you to create your very own slice of bliss. Japanese cheesecake, often referred to as "cotton cheesecake," is an elegant balance between cheesecake and souffle. This dessert may invite a few steps, but trust me, every moment in the kitchen will be worth it!
Recipe Timing
- Prep Duration: 30 minutes
- Active Cooking: 1 hour 20 minutes
- Total Duration: 2 hours (plus cooling time)
- Portion Size: Serves 8
- Complexity: Moderate
Nutritional Recipe
- Calories per portion: Approximately 230
- Protein: 5 grams per serving
- Carbs: 13 grams per serving
- Fats: 18 grams per serving
- Fiber: 0 grams per serving
- Sugars: 8 grams per serving
- Sodium: 107 mg per serving
Why You’ll Love This Japanese Cheesecake Recipe
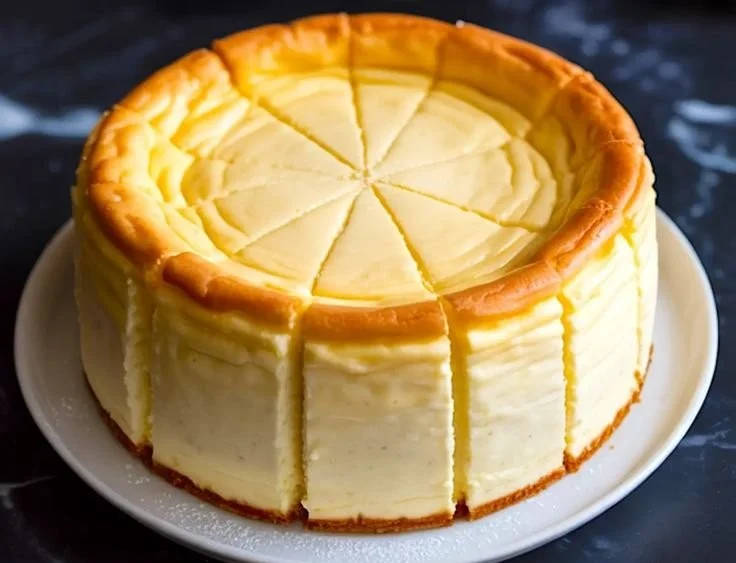
This Japanese cheesecake boasts an irresistibly light texture that floats on your taste buds. It’s not overly sweet, letting the nuanced flavors of cream cheese and a hint of lemon shine through. Whether you’re hosting a gathering or indulging in a quiet evening at home, it never fails to impress. Plus, the baking process involves a water bath that ensures even cooking, so your cheesecake emerges from the oven perfectly supple and crack-free.
The Complete Cooking Journey
Embarking on this baking adventure feels like both an art and a science. The delicate folding techniques teach you the importance of patience, while the gentle melting of ingredients evokes a sense of calm in the kitchen. The best part? Sharing a slice with someone special as you watch their eyes light up with delight.
Ingredients:
For the Cheese Batter:
- 250 grams cream cheese, softened
- 50 grams unsalted butter
- 100 milliliters whole milk
- 6 large eggs, separated
- 1 teaspoon vanilla extract
- 1 tablespoon lemon juice
- 60 grams cake flour
- 20 grams cornstarch
For the Meringue:
- 120 grams granulated sugar
Method:
Step 1: Prepare the Oven and Pan
Preheat the oven to 320°F (160°C). Line the bottom and sides of an 8-inch round springform pan with parchment paper, ensuring the sides extend 2 inches above the rim. Set aside a larger baking dish or roasting pan for the water bath.
Step 2: Make the Cheese Mixture
In a small saucepan over low heat, melt together the cream cheese, butter, and milk. Stir continuously until the mixture is smooth and free of lumps. Be cautious not to let it boil. Remove from heat and allow it to cool slightly.
Step 3: Combine with Egg Yolks
In a medium bowl, whisk the egg yolks until smooth. Gradually add the yolks to the slightly cooled cheese mixture, whisking until fully incorporated. Stir in the vanilla extract and lemon juice.
Step 4: Add Dry Ingredients
Sift the cake flour and cornstarch directly into the cheese mixture. Gently fold until the batter is smooth and free of lumps—be careful not to deflate it.
Step 5: Make the Meringue
In a clean mixing bowl, beat the egg whites on medium speed until foamy. Gradually add the sugar in three additions, beating until soft, glossy peaks form. Avoid overbeating; the meringue should hold its shape yet remain flexible at the tip.
Step 6: Fold in Meringue
Add the meringue to the cheese batter in three parts. Using a spatula, gently fold each addition in by cutting through the center, sweeping around the sides, and rotating the bowl. Fold just until no streaks remain, being very careful not to deflate the batter.
Step 7: Transfer to Pan and Set Up Water Bath
Pour the batter into the prepared pan and lightly tap it on the counter to release large air bubbles. Place the springform pan inside the larger baking dish and fill the outer dish with hot water halfway up the sides of the springform pan.
Step 8: Bake the Cheesecake
Bake at 320°F (160°C) for 25 minutes. Then, without opening the oven door, reduce the temperature to 285°F (140°C) and continue baking for an additional 55 minutes. The top should be lightly golden while the center should feel set but still slightly jiggly.
Step 9: Cool in Oven
Turn off the oven and prop the door open slightly. Allow the cheesecake to sit in the oven for 15 minutes to gradually cool. This helps prevent sudden temperature changes that might cause cracks.
Step 10: Chill Before Serving
Once cooled, carefully remove the cheesecake from the oven and water bath. Let it cool completely at room temperature in the pan, then refrigerate for at least 4 hours or overnight for the best texture.
Serving Suggestions & Pairings
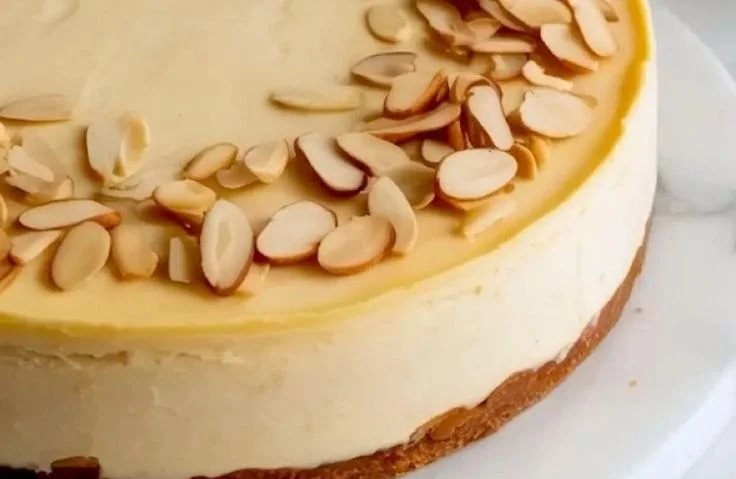
This light and fluffy cheesecake pairs beautifully with fresh berries, a dollop of whipped cream, or a drizzle of chocolate sauce. For a slightly different experience, consider serving it with a side of yuzu marmalade or matcha powder for an extra twist!
Storage & Leftovers Guide
Store any leftover cheesecake in an airtight container in the refrigerator for up to three days. If you want to keep it longer, individual slices can be frozen for up to a month; just thaw them overnight in the fridge before serving.
Kitchen Wisdom & Success Tips
- Ensure all ingredients are at room temperature for even mixing.
- Be gentle when folding in the meringue to maintain that airy texture.
- Use a digital kitchen thermometer to check the internal temperature for perfect doneness if you’re uncertain.
Flavor Variations & Adaptations
Feel free to experiment with flavor by adding finely grated lemon zest, chocolate, or matcha powder to the batter. You could also try substituting a portion of the cream cheese with mascarpone for a richer flavor.
Reader Questions & Solutions
-
Q: Why did my cheesecake crack?
A: Cracks often occur due to sudden temperature changes. Letting it cool gradually in the oven can help prevent this. -
Q: How can I make my cheesecake fluffier?
A: The folding technique is key! Make sure to fold the meringue gently to keep the airiness. -
Q: Can I make this cheesecake gluten-free?
A: Absolutely! Substitute the cake flour with a gluten-free blend for a delicious alternative. -
Q: My cheesecake didn’t rise. What went wrong?
A: Ensure your egg whites are whipped properly to create enough volume. They should form soft peaks but not be overbeaten. -
Q: How do I know when the cheesecake is done baking?
A: It should be lightly golden and the center will be slightly jiggly when you shake it gently—but not liquid.
Wrapping Up
Now that you’re armed with this dreamy Japanese cheesecake recipe, it’s time to create your masterpiece! Remember, every great dish is a labor of love, and the joy of sharing it with others is the cherry on top. Happy baking, and may your kitchen overflow with sweet, fluffy success!
PrintJapanese Cheesecake
A light and fluffy Japanese cheesecake that melts in your mouth, combining the textures of soufflé and traditional cheesecake.
- Prep Time: 30 minutes
- Cook Time: 80 minutes
- Total Time: 120 minutes
- Yield: 8 servings 1x
- Category: Dessert
- Method: Baking
- Cuisine: Japanese
- Diet: Vegetarian
Ingredients
- 250 grams cream cheese, softened
- 50 grams unsalted butter
- 100 milliliters whole milk
- 6 large eggs, separated
- 1 teaspoon vanilla extract
- 1 tablespoon lemon juice
- 60 grams cake flour
- 20 grams cornstarch
- 120 grams granulated sugar
Instructions
- Preheat the oven to 320°F (160°C) and line an 8-inch round springform pan with parchment paper.
- Melt the cream cheese, butter, and milk in a saucepan over low heat until smooth.
- Whisk the egg yolks in a medium bowl until smooth, then gradually add to the cooled cheese mixture.
- Sift the cake flour and cornstarch into the cheese mixture and gently fold until smooth.
- Beat the egg whites in a clean bowl, gradually adding sugar until soft peaks form.
- Fold the meringue into the cheese batter in three parts, being careful to maintain airiness.
- Pour the batter into the prepared pan, tapping gently to release air bubbles and place in a water bath.
- Bake for 25 minutes at 320°F (160°C), then lower to 285°F (140°C) for 55 minutes without opening the door.
- Cool in the oven for 15 minutes with the door ajar, then remove and let cool completely.
- Refrigerate for at least 4 hours or overnight for best texture.
Notes
Serve with fresh berries or chocolate sauce for an extra treat. Store leftovers in an airtight container for up to three days.
Nutrition
- Serving Size: 1 serving
- Calories: 230
- Sugar: 8g
- Sodium: 107mg
- Fat: 18g
- Saturated Fat: 10g
- Unsaturated Fat: 8g
- Trans Fat: 0g
- Carbohydrates: 13g
- Fiber: 0g
- Protein: 5g
- Cholesterol: 90mg