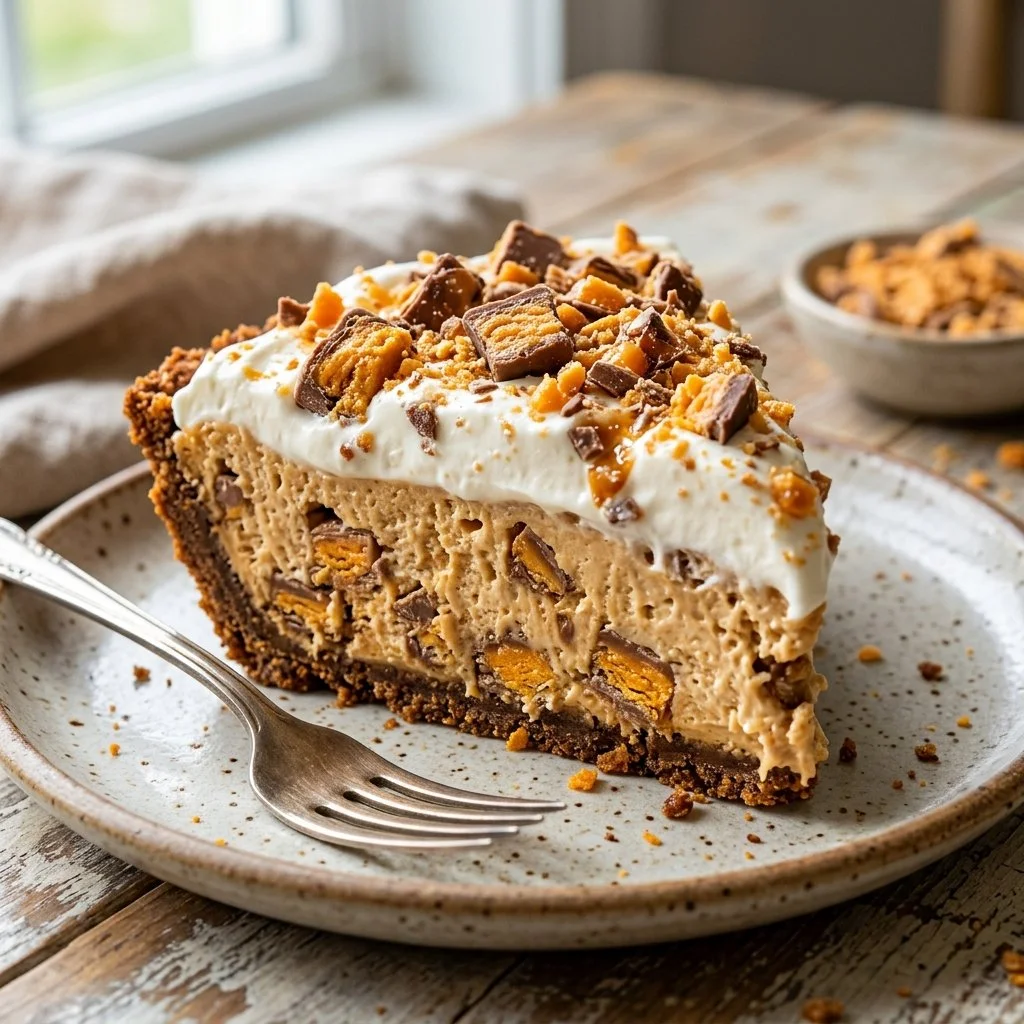
Butterfinger Pie is a dessert that brings back memories of carefree afternoons spent indulging in sweet treats. As a child, my love for peanut butter and chocolate was only rivaled by my obsession with Butterfinger candy bars. Imagine my delight when I first came across this recipe, a perfect marriage of my favorite flavors in a luscious, creamy pie. The moment I took my first bite, I was transported back to those fun-filled days of trick-or-treating, hunting for the elusive Butterfinger bar. This pie is not just a dessert; it tells a story of nostalgia and bliss in every slice.
Recipe Timing
- Prep Duration: 15 minutes
- Active Cooking: 15 minutes
- Total Duration: 4 hours 15 minutes (including chilling)
- Portion Size: 8 servings
- Complexity: Simple
Nutritional Recipe
- Calories per portion: Approximately 380 calories
- Protein: 7 grams
- Carbs: 40 grams
- Fats: 22 grams
- Fiber: 1 gram
- Sugars: 22 grams
- Sodium: 250 mg
Why You’ll Love This Butterfinger Pie
Butterfinger Pie is an absolute showstopper, combining smooth, creamy textures with the satisfying crunch of crushed Butterfinger bars. It’s like a heavenly bite of nostalgia, perfect for any gathering. The recipe is easy enough for a novice and will have your friends and family raving. You can whip it up in no time, let it chill, and then dazzle your guests with a delightful dessert that looks—and tastes—like a million bucks! Plus, who doesn’t love a no-bake pie?
The Complete Cooking Journey
The journey to creating this Butterfinger Pie starts with the simple act of gathering ingredients, which are likely already in your pantry. The process is straightforward: mix, fold, stir, and set. There’s something incredibly rewarding about preparing a dessert that requires minimal cooking yet packs a punch in flavor. This pie doesn’t just satisfy a sweet tooth; it creates moments of joy and shared smiles around the table.
Ingredients:
- 1 pre-made graham cracker crust
- 1 cup creamy peanut butter
- 1 cup powdered sugar
- 8 oz cream cheese, softened
- 1 container (8 oz) whipped topping
- 2-3 Butterfinger candy bars, crushed
- Chocolate sauce for drizzling (optional)
Method:
Step 1: Cream Together the Base
In a mixing bowl, combine softened cream cheese, peanut butter, and powdered sugar until smooth. Let the lovely peanut butter aroma fill your kitchen.
Step 2: Fold in the Whipped Topping
Gently fold in the whipped topping until well combined. The creaminess adds volume and lightness that makes this pie so irresistible.
Step 3: Add a Crunch with Butterfinger
Stir in the crushed Butterfinger bars, letting those pieces of candy bring a delightful crunch to the mix—a perfect contrast to the creamy filling.
Step 4: Pour into the Crust
Pour the mixture into the graham cracker crust and spread evenly. Watching it settle into the crust is like watching a painter carefully fill the canvas.
Step 5: Chill to Perfection
Refrigerate for at least 4 hours or until set. Patience is key here; let that pie sit, and it’ll reward you with the perfect texture.
Step 6: Drizzle and Serve
Drizzle with chocolate sauce before serving, if desired. It’s the final touch that brings this pie to life, visually appealing and extra delicious!
Serving Suggestions & Pairings
This Butterfinger Pie is a fantastic standalone dessert, but it pairs wonderfully with a scoop of vanilla ice cream or a dollop of extra whipped cream. You could even serve it alongside a refreshing fruit salad or some sliced strawberries for a little freshness.
Storage & Leftovers Guide
If you have the luxury of leftovers (lucky you!), store the Butterfinger Pie in an airtight container in the fridge for up to 3 days. Although, let’s be honest, it’s hard to resist a second slice, let alone keeping it around for long!
Kitchen Wisdom & Success Tips
- Make sure your cream cheese is softened properly to avoid lumps.
- Feel free to adjust the amount of crushed Butterfinger to your taste—more candy means more crunch!
- For a twist, consider using an Oreo crust instead of a graham cracker crust.
- If you want a chocolate boost, mix in chocolate chips to the creamy filling.
Flavor Variations & Adaptations
Feeling adventurous? Substitute the creamy peanut butter with crunchy peanut butter for an extra crunch! You could also experiment with different candy bars such as Snickers or Reese’s for a unique twist. A drizzle of caramel sauce along with the chocolate could add a sweet depth you didn’t know you needed!
Reader Questions & Solutions
-
Q: Can I make this pie ahead of time?
A: Absolutely! You can prepare the pie up to 2 days in advance and keep it sealed in the fridge until ready to serve. -
Q: What can I use instead of cream cheese?
A: You can try using Greek yogurt or a vegan cream cheese alternative for a lighter option. -
Q: Is there a gluten-free option for the crust?
A: Yes! Look for a gluten-free graham cracker crust or use ground nuts as a base. -
Q: How do I know when the pie is set?
A: The pie should be firm to the touch and hold its shape when cut—this typically takes about 4 hours of chilling. -
Q: Can I freeze this pie?
A: Yes, but for best texture, consider freezing individual slices. Just wrap them well to prevent freezer burn.
Wrapping Up
With its lush texture and delightful flavor, Butterfinger Pie is a treat that brings people together, sparking joy and sweet memories around the table. Whether you’re celebrating a special occasion or simply satisfying a dessert craving, this pie is sure to elevate the moment. So, what are you waiting for? Grab those ingredients, channel your inner pastry chef, and let the magic unfold in your kitchen. Every slice you share will be a delicious reminder of why we love baking!