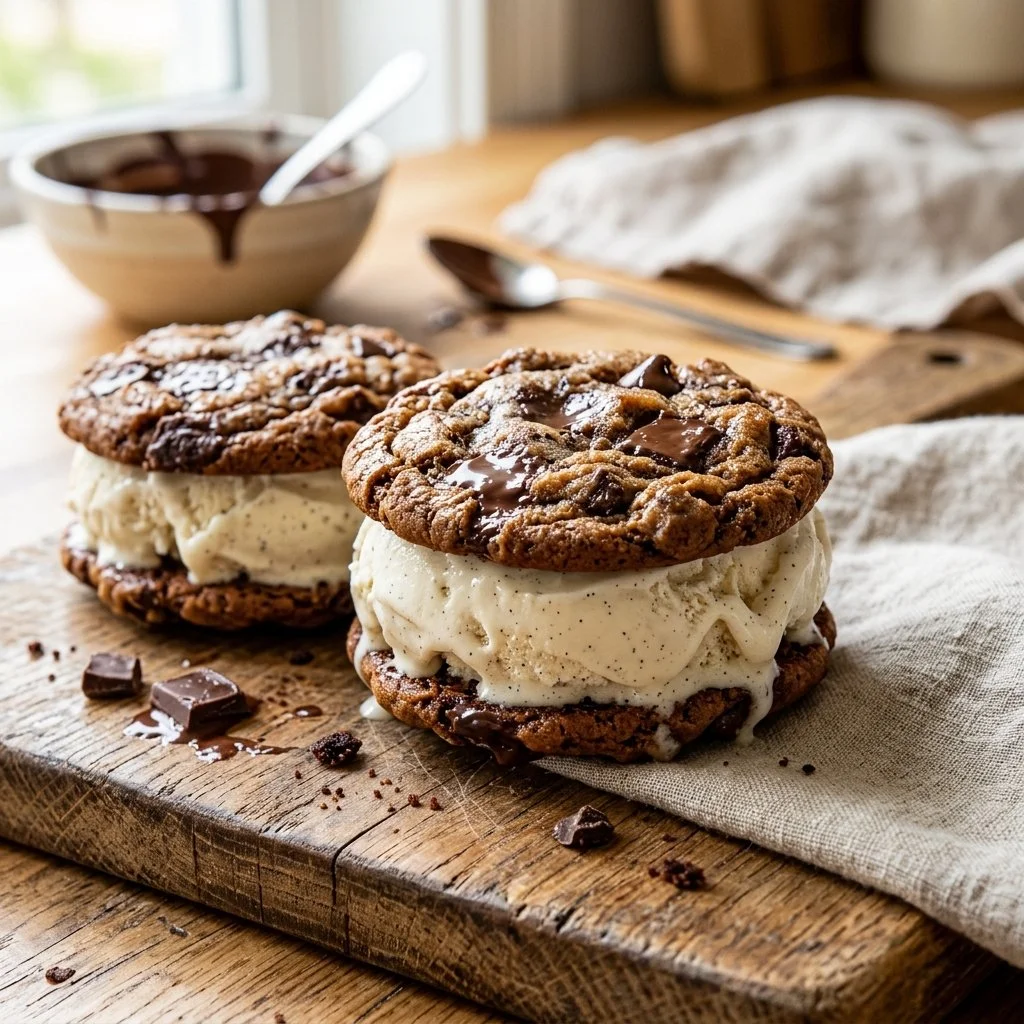
There’s something irresistibly nostalgic about ice cream sandwiches, isn’t there? As a child, I can vividly remember summer afternoons spent outdoors, the sun beating down as I raced to finish the melting cookie-ice cream masterpiece in my hands before it dripped down my arm. With each bite, the soft, chewy cookie paired with the creamy ice cream created a delightful harmony that felt like a little piece of happiness. Fast forward to today, and I find myself recreating that bliss in my own kitchen, bringing those cherished memories back to life.
Whether you’re looking to impress guests at a summer barbecue or simply indulge in a sweet treat at home, homemade ice cream sandwiches are the perfect solution. They’re versatile, customizable, and, best of all, they encourage you to get creative with your favorite flavors and toppings. So let’s dive into this delightful DIY adventure!
Recipe Timing
- Prep Duration: 15 minutes
- Active Cooking: 12 minutes
- Total Duration: 1 hour (including cooling time)
- Portion Size: About 12 sandwiches
- Complexity: Simple
Nutritional Recipe
- Calories per portion: Approximately 300
- Protein: 4g per serving
- Carbs: 42g per serving
- Fats: 15g per serving
- Fiber: 1g per serving
- Sugars: 20g per serving
- Sodium: 180mg per serving
Why You’ll Love This Homemade Ice Cream Sandwiches
Imagine sinking your teeth into a soft, warm chocolate cookie that practically melts in your mouth, only to discover a creamy scoop of ice cream tucked between two of them. The contrasting textures and temperatures create a blissful experience—each bite is a rush of nostalgia, sweetness, and the pure joy of indulgence. These ice cream sandwiches are not just desserts; they evoke memories of carefree summers and childhood laughter. Plus, you can personalize them endlessly, from different cookie flavors to an array of ice cream options. The best part? Kids and adults alike become instant fans!
The Complete Cooking Journey
Creating your homemade ice cream sandwiches is a delicious journey that begins with simple ingredients and ends with sweet satisfaction. Each step brings about wonderful aromas and the excitement of crafting something special. So roll up your sleeves, gather your ingredients, and let’s create some magic!
Ingredients:
- 2 cups all-purpose flour
- 1/2 cup unsweetened cocoa powder
- 1 teaspoon baking soda
- 1/2 teaspoon salt
- 1 cup unsalted butter, softened
- 1 cup granulated sugar
- 1 cup brown sugar, packed
- 2 large eggs
- 2 teaspoons vanilla extract
- 2 cups ice cream (any flavor)
Method:
Step 1: Preheat the Oven
Preheat the oven to 350°F (175°C). This sets the stage for baking your decadent cookies to perfection.
Step 2: Combine the Dry Ingredients
In a bowl, mix the flour, cocoa powder, baking soda, and salt. This combination will give your cookies that rich chocolate flavor and delightful texture.
Step 3: Cream the Butter and Sugars
In a separate bowl, cream together the softened butter with the granulated and brown sugars until the mixture is light and fluffy. This step is crucial for incorporating air into your batter, resulting in soft, chewy cookies.
Step 4: Add Eggs and Vanilla
Add the eggs one at a time, mixing well after each addition. Then, blend in the vanilla extract. The sweet aroma will fill your kitchen—get ready for a treat!
Step 5: Mix Wet and Dry Ingredients
Gradually add the dry ingredients to the wet mixture, mixing until just combined. Don’t overmix; you want your cookies to stay tender.
Step 6: Scoop the Dough
Scoop tablespoons of dough onto a baking sheet lined with parchment paper, spacing them out to allow for spreading during baking.
Step 7: Bake the Cookies
Bake in the preheated oven for 10-12 minutes until the cookies are set but still soft. Trust your nose to guide you, as the rich chocolatey scent will permeate your kitchen.
Step 8: Cool the Cookies
Allow the cookies to cool completely on the baking sheet. This is a perfect time to resist the temptation of tasting them warm—they’ll be even better later!
Step 9: Assemble the Sandwiches
Once the cookies are completely cooled, take one cookie, add a generous scoop of your favorite ice cream, and then sandwich it with another cookie. Repeat until all cookies are used up.
Step 10: Freeze the Sandwiches
Freeze the sandwiches for about 30 minutes to firm them up a bit. This step ensures that your sandwich holds its shape when you take that first delicious bite.
Serving Suggestions & Pairings
Serve these delightful ice cream sandwiches at summer gatherings, birthday parties, or simply enjoy them as an evening treat. They pair wonderfully with a glass of cold milk or hot chocolate for a cozy vibe. Drizzle some chocolate sauce or sprinkles over the top for a festive touch!
Storage & Leftovers Guide
Store any leftovers in an airtight container in the freezer. They should stay fresh for up to two weeks. If you are organizing a gathering, consider assembling your sandwiches right before serving for the freshest experience!
Kitchen Wisdom & Success Tips
- For chewier cookies, be careful not to over-bake them; they should look slightly underdone when you take them out.
- If you want to get adventurous, add chocolate chips, nuts, or sprinkles to the cookie dough for added flavor and texture.
- Letting your butter soften naturally at room temperature will yield a creamier texture; avoid softening in the microwave as it can melt too much.
Flavor Variations & Adaptations
Feel free to customize your ice cream sandwiches! Swap out the chocolate cookies for peanut butter or oatmeal raisin. Experiment with ice cream flavors from classic vanilla to adventurous salted caramel or matcha. You can even roll the edges of your ice cream sandwiches in crushed cookies, nuts, or sprinkles for an extra fun twist!
Reader Questions & Solutions
-
How do I make sure my cookies are perfectly soft?
Always watch your baking time! Take them out when they’re still a bit soft in the center; they’ll firm up as they cool. -
Can I make the dough ahead of time?
Absolutely! You can refrigerate the dough for up to two days or freeze it for future baking sessions. -
What can I use instead of eggs?
You can use flaxseed meal (1 tablespoon of meal + 2.5 tablespoons of water for each egg) or applesauce (1/4 cup per egg) as an alternative. -
How do I prevent my ice cream from melting too quickly during assembly?
Keep your ice cream in the freezer until last minute. If you need to soften it, let it sit out for just a few minutes to achieve scoopable consistency. -
What’s the best way to serve these sandwiches?
Serve them right out of the freezer for a few minutes, as they soften slightly but still hold their shape well.
Wrapping Up
There you have it—your delightful homemade ice cream sandwiches are ready to bring a smile to your face and sweeten your day! Share them with friends, family, or enjoy them all on your own—you deserve it! So gather your ingredients, step into your kitchen, and create these magical treats that are bound to spark joy and nostalgia, just like they did for me those sunny afternoons long ago. Happy baking!
PrintHomemade Ice Cream Sandwiches

Delicious homemade ice cream sandwiches made with soft chocolate cookies and your choice of ice cream.
- Prep Time: 15 minutes
- Cook Time: 12 minutes
- Total Time: 60 minutes
- Yield: 12 sandwiches 1x
- Category: Dessert
- Method: Baking
- Cuisine: American
- Diet: Vegetarian
Ingredients
- 2 cups all-purpose flour
- 1/2 cup unsweetened cocoa powder
- 1 teaspoon baking soda
- 1/2 teaspoon salt
- 1 cup unsalted butter, softened
- 1 cup granulated sugar
- 1 cup brown sugar, packed
- 2 large eggs
- 2 teaspoons vanilla extract
- 2 cups ice cream (any flavor)
Instructions
- Preheat the oven to 350°F (175°C).
- Combine the flour, cocoa powder, baking soda, and salt.
- Cream together the softened butter with the granulated and brown sugars.
- Add the eggs one at a time, mixing well after each addition, then blend in the vanilla extract.
- Mix the dry ingredients into the wet mixture until just combined.
- Scoop tablespoons of dough onto a baking sheet lined with parchment paper.
- Bake in the preheated oven for 10-12 minutes.
- Cool the cookies completely on the baking sheet.
- Assemble the sandwiches by adding a scoop of ice cream between two cookies.
- Freeze the sandwiches for about 30 minutes to firm them up.
Notes
For chewier cookies, do not over-bake them. Customize with different cookie or ice cream flavors as desired.
Nutrition
- Serving Size: 1 sandwich
- Calories: 300
- Sugar: 20g
- Sodium: 180mg
- Fat: 15g
- Saturated Fat: 9g
- Unsaturated Fat: 4g
- Trans Fat: 0g
- Carbohydrates: 42g
- Fiber: 1g
- Protein: 4g
- Cholesterol: 30mg