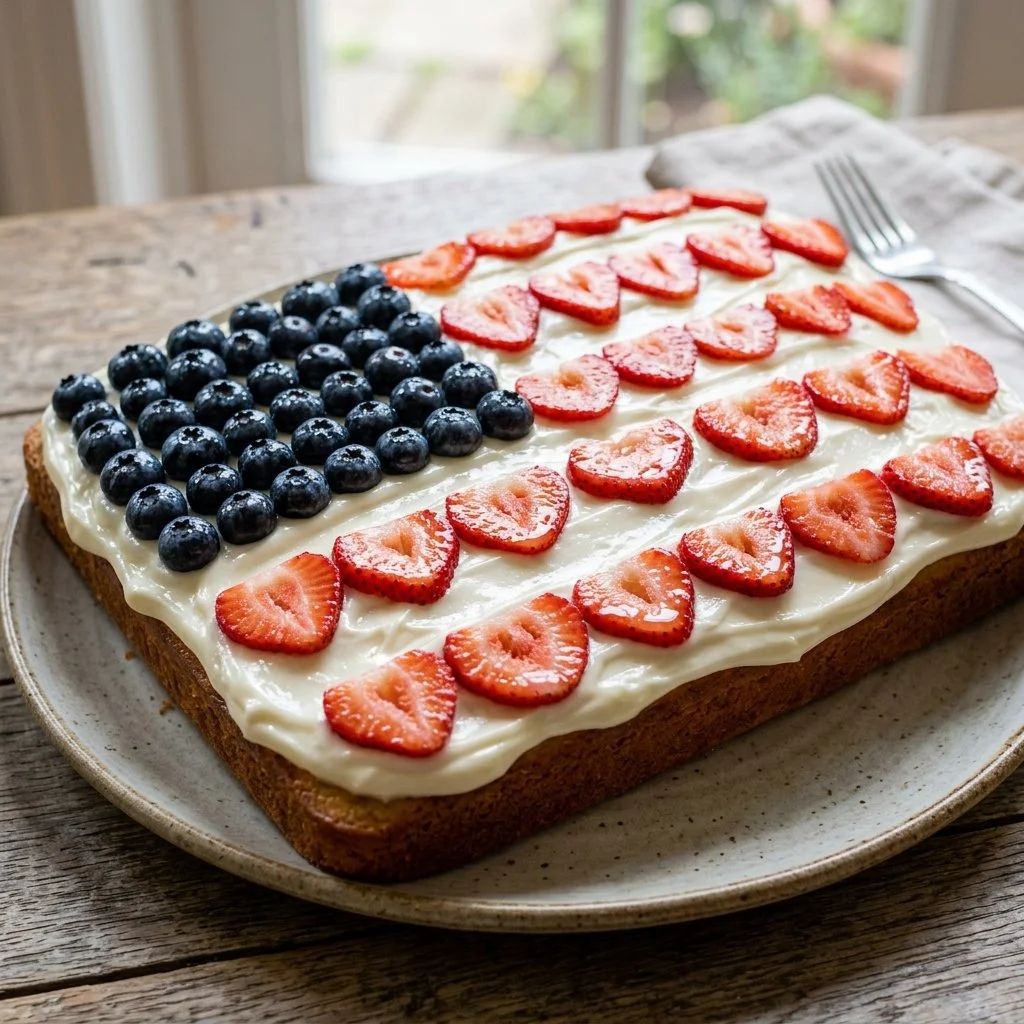
There’s something almost magical about a cake that can bring a celebration to life. I still remember the first time I baked a Flag Cake for the Fourth of July. It was bursting with vibrant colors, capturing the spirit of patriotism while also providing a delicious sweet treat that had everyone smiling. This impressive cake became our family tradition, effortlessly combining the celebration of freedom with the joy of sharing dessert. Whether you’re hosting a barbecue, attending a picnic, or simply expressing love for your country, this Flag Cake is the perfect centerpiece that makes any occasion special.
Recipe Timing
- Prep Duration: 30 minutes
- Active Cooking: 30 minutes
- Total Duration: 1 hour
- Portion Size: Serves 12
- Complexity: Simple
Nutritional Recipe
- Calories per portion: Approx. 250
- Protein: 2g
- Carbs: 40g
- Fats: 10g
- Fiber: 0g
- Sugars: 25g
- Sodium: 250mg
Why You’ll Love This Flag Cake
This Flag Cake isn’t just a feast for the taste buds; it’s also a visual delight! The layers of red, white, and blue come together beautifully, showcasing a creative design that pays homage to our nation. With a fluffy cake texture and the rich, creamy taste of buttercream frosting, every slice of this cake transports you to a place of joy and celebration. Not to mention, it’s incredibly easy to make—perfect for both seasoned bakers and beginners looking to make a splash at their next gathering!
The Complete Cooking Journey
Creating your own Flag Cake is not just about following a recipe; it’s an experience. Imagine the anticipation as you mix the vibrant colors, the scents of vanilla wafting through your kitchen, and the delight of arranging fresh strawberries and blueberries on top. It’s a way to connect with loved ones over a shared passion, creating delicious memories one slice at a time. Let’s dive into the recipe and bring this beautiful cake to life!
Ingredients:
- 1 box of white cake mix
- Ingredients required for cake mix (as per package instructions)
- Red gel food coloring
- Blue gel food coloring
- 1 batch of buttercream frosting
- Fresh strawberries
- Fresh blueberries
Method:
Step 1: Preheat the Oven and Prepare the Cake Mix
First, preheat your oven according to the instructions on the cake mix box and get your baking pans ready. This early step sets you up for success as you prepare the delicious batter.
Step 2: Divide the Batter into Three Bowls
Once your cake mix is fully prepared, carefully divide the batter into three bowls. This is where the fun starts, as you’ll be working with a canvas of colors!
Step 3: Add Color to the Batter
It’s time to bring your cake to life! Add red gel food coloring to one bowl and blue gel food coloring to the other. Keep the third bowl with just plain batter to create the white layer of the flag.
Step 4: Pour the Colors into Separate Cake Pans
Pour each colored batter into its own prepared cake pan. You’ll soon see a beautiful spectrum that would make any baker proud!
Step 5: Bake the Cakes
Now, bake the cakes according to the package instructions. The kitchen will start to smell amazing, and you’ll want to watch through the oven door as the cakes rise gently.
Step 6: Cool Your Cakes Before Layering
Once baked, remove the cakes from the oven and allow them to cool completely. Patience is key here—the layers will be much easier to work with when they’re cool!
Step 7: Layer with Buttercream Frosting
After the cakes have cooled, it’s time to layer them up! Spread a generous amount of buttercream frosting between each layer for added moistness and flavor —this is truly the heart of any cake.
Step 8: Frost the Top and Sides
Once layered, use the remaining frosting to coat the top and sides of the cake. This luscious buttercream will keep everything beautifully bound together.
Step 9: Create the Flag Design
Finally, the pièce de résistance! Decorate the top of the cake with fresh strawberries and blueberries to create a stunning flag design. This is where your cake truly shines, showing off both craftsmanship and creativity.
Serving Suggestions & Pairings
Serve this delightful Flag Cake with a scoop of vanilla ice cream or whipped cream for an even more indulgent experience. It pairs perfectly with a refreshing lemonade or iced tea, making your summer gatherings feel extra festive.
Storage & Leftovers Guide
If you happen to have any leftovers (which is rare with this crowd-pleaser!), store the cake in an airtight container in the refrigerator for up to 3 days. It can also be frozen for up to a month; just make sure to wrap it well to prevent freezer burn.
Kitchen Wisdom & Success Tips
- Use gel food coloring for a more vibrant hue.
- Ensure your cakes are cooled completely before frosting—this prevents melting and sliding!
- Feel free to double the recipe for larger gatherings.
Flavor Variations & Adaptations
Want to switch things up? Consider using lemon or almond extract in the cake mix for a different flavor profile. You could also incorporate fresh fruit into the buttercream for a fruity twist.
Reader Questions & Solutions
-
How can I make sure my layers are even?
- Use a kitchen scale to measure your batter into the pans for uniform layers.
-
What if I don’t have gel food coloring?
- Liquid food coloring works too but may result in a less vibrant color.
-
Can I use a different frosting?
- Absolutely! Cream cheese frosting or whipped cream can be great alternatives.
-
How do I prevent sticking?
- Grease your pans well and use parchment paper for easier release.
-
What can I do with the leftover frosting?
- Use it to pipe decorations on cupcakes or spread on cookies!
Wrapping Up
Baking a Flag Cake isn’t just about making a dessert; it’s an opportunity to connect with family and friends over something beautiful and delicious. So don’t hesitate—dive into this fun, colorful baking adventure and create a masterpiece that will bring smiles to all those around you. Celebrate with this joyful cake that’s not only easy to make but is sure to be the star of your next gathering! Happy baking!