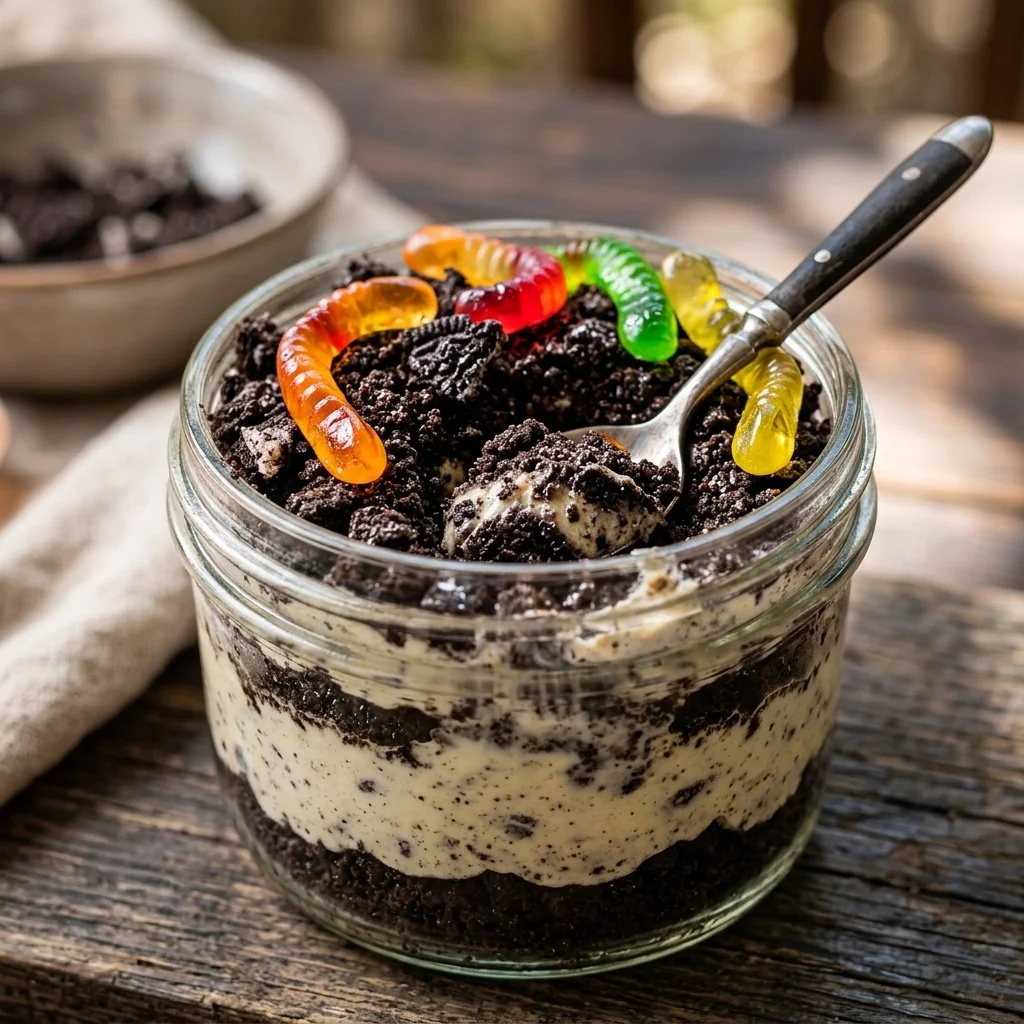
There’s something undeniably magical about dessert recipes that evoke fond memories. Some dishes just transport you back to your childhood, and Oreo Dirt Cake is one of those delights for me. I can vividly remember family gatherings where this treat was the crowning glory of the dessert table. At first glance, it looks like a whimsical cup of dirt—but don’t be fooled—what lies beneath that layer of Oreo crumbs is heavenly, creamy goodness!
This cake is not just a feast for the eyes; it’s also a crowd-pleaser that brings everyone together. Whether you’re hosting a barbecue, a birthday party, or just looking for a sweet treat to brighten up your evening, this Oreo Dirt Cake will have everyone clamoring for seconds (and thirds!). Easy to prepare and utterly delightful to eat, let’s dive into the ins and outs of this desirable dessert.
Recipe Timing
- Prep Duration: 20 minutes
- Active Cooking: 0 minutes (just mixing!)
- Total Duration: 2 hours 20 minutes (includes chilling time)
- Portion Size: Serves 8-10
- Complexity: Simple
Nutritional Recipe
- Calories per portion: Approximately 250
- Protein: 3g per serving
- Carbs: 35g per serving
- Fats: 12g per serving
- Fiber: 1g per serving
- Sugars: 20g per serving
- Sodium: 180mg per serving
Why You’ll Love This Oreo Dirt Cake
What’s not to love about a dessert that looks as fun as it tastes? The combination of crunchy Oreo layers, creamy filling, and the occasional chewy gummy worm (if you choose to add them) creates an unforgettable texture experience. Plus, the effortless preparation means you can whip this up and let it chill while you attend to other important party details. And let’s not forget how versatile it is; you can adapt it for various themes or occasions!
The Complete Cooking Journey
Get ready to embark on a delicious journey that begins with a cookie and culminates in a shareable delight. Using just a handful of ingredients, you’ll create a dessert that not only pleases the palate but brings smiles all around. Here’s your guide through each step!
Ingredients:
- 1 package Oreo cookies
- 1/2 cup butter, softened
- 1 package cream cheese (8 oz), softened
- 1 cup powdered sugar
- 2 cups milk
- 1 package instant vanilla pudding mix (3.4 oz)
- 1 container Cool Whip (8 oz)
- Gummy worms (for decoration, optional)
Method:
Step 1: Crush the Oreos
Begin the process by crushing your Oreo cookies. You can use a food processor, or if you want to unleash some stress, place them in a zip-top bag and crush them with a rolling pin. Set aside about 1 cup for the topping.
Step 2: Mix the Creamy Filling
In a mixing bowl, combine the softened butter, cream cheese, and powdered sugar. Beat until the mixture is smooth and creamy—this will create the luxurious base that balances out the Oreo crunch.
Step 3: Prepare the Pudding
In another bowl, whisk together the milk and instant pudding mix until it thickens. This creamy layer adds wonderful flavor and smoothness to the dish.
Step 4: Combine the Mixtures
Fold the thickened pudding mixture into the cream cheese mixture until fully combined. This creates a dreamy filling that pairs beautifully with the crushed Oreos.
Step 5: Fold in the Cool Whip
Gently fold in the Cool Whip, ensuring you maintain its light and airy texture. The Cool Whip adds a lovely fluffiness that lightens the cake and enhances the dessert’s appeal.
Step 6: Start Layering
In a large trifle dish or a big serving bowl, start layering by adding a generous amount of your crushed Oreo cookies, followed by the creamy mixture. Repeat this layering process until you have used all your ingredients, ending with a layer of Oreo crumbs on top.
Step 7: Chill and Set
Now it’s time to let the magic happen! Cover your dish and chill it in the refrigerator for at least 2 hours. This not only allows the flavors to meld but also firms up the layers beautifully.
Step 8: Decorate for Fun
Before serving, feel free to get creative! Top your Oreo Dirt Cake with the reserved crushed Oreos and garnish with gummy worms, making it the perfect treat for the kids (and kids at heart).
Serving Suggestions & Pairings
Pair your Oreo Dirt Cake with a scoop of vanilla ice cream or a drizzle of chocolate sauce for a decadent touch. It’s also great alongside fresh fruit, which helps cut through the richness of the dessert. Perfect for picnics, potlucks, or just a cozy night in!
Storage & Leftovers Guide
Leftovers? No problem! Store any uneaten portions in an airtight container in the refrigerator for up to 3 days. Just be sure to keep it covered—nobody likes stale cake!
Kitchen Wisdom & Success Tips
- For an easier assembly, consider using a large plastic bag to pipe the creamy filling instead of spooning it in.
- Make sure your cream cheese is at room temperature for easier mixing.
- Aside from gummy worms, consider topping with other fun candy or sprinkles for a different look.
Flavor Variations & Adaptations
Feel free to switch things up by incorporating flavored pudding mixes. Chocolate or cheesecake pudding could introduce a new twist to familiar flavors. You could even add layers of chopped fruit or different types of cookies for unique textures!
Reader Questions & Solutions
-
Q: My layer of cookies turned soggy, why?
- A: Ensure you’re layering the crumbs right before serving, or use a firmer cookie if your Oreos are extra soft.
-
Q: Can I use light cream cheese?
- A: Yes, but be aware it may alter the texture slightly.
-
Q: How can I make it gluten-free?
- A: Opt for gluten-free sandwich cookies in place of Oreos.
-
Q: What if I want to make it dairy-free?
- A: Substitute the cream cheese with a dairy-free cream cheese, use almond or coconut milk, and a non-dairy whipped topping.
-
Q: Can I freeze this dessert?
- A: Yes, but it’s best enjoyed fresh. If frozen, allow it to thaw in the fridge overnight for best results.
Wrapping Up
Creating delicious memories can often start with a simple recipe like Oreo Dirt Cake. This sweet treat is bound to bring joy to gatherings, sparking laughter, and playful moments. So, gather your ingredients and let this dessert shine at your next occasion. Embrace the joy of cooking and share your creations—there’s nothing quite like the satisfaction of a dessert that warms the heart! Enjoy every creamy, crumbled bite!
PrintOreo Dirt Cake

A delightful dessert made with layers of crushed Oreo cookies and creamy filling, perfect for gatherings and celebrations.
- Prep Time: 20 minutes
- Cook Time: 0 minutes
- Total Time: 140 minutes
- Yield: 8-10 servings 1x
- Category: Dessert
- Method: Chilling
- Cuisine: American
- Diet: Vegetarian
Ingredients
- 1 package Oreo cookies
- 1/2 cup butter, softened
- 1 package cream cheese (8 oz), softened
- 1 cup powdered sugar
- 2 cups milk
- 1 package instant vanilla pudding mix (3.4 oz)
- 1 container Cool Whip (8 oz)
- Gummy worms (for decoration, optional)
Instructions
- Crush the Oreos. Set aside about 1 cup for the topping.
- Mix the softened butter, cream cheese, and powdered sugar until smooth.
- Prepare the pudding by whisking together the milk and instant pudding mix until thickened.
- Combine the pudding mixture into the cream cheese mixture until fully integrated.
- Fold in the Cool Whip gently.
- Start layering in a trifle dish with crushed Oreos and creamy mixture until all ingredients are used.
- Chill in the refrigerator for at least 2 hours.
- Decorate with reserved crushed Oreos and gummy worms before serving.
Notes
Store leftovers in an airtight container in the refrigerator for up to 3 days.
Nutrition
- Serving Size: 1 serving
- Calories: 250
- Sugar: 20g
- Sodium: 180mg
- Fat: 12g
- Saturated Fat: 7g
- Unsaturated Fat: 5g
- Trans Fat: 0g
- Carbohydrates: 35g
- Fiber: 1g
- Protein: 3g
- Cholesterol: 30mg