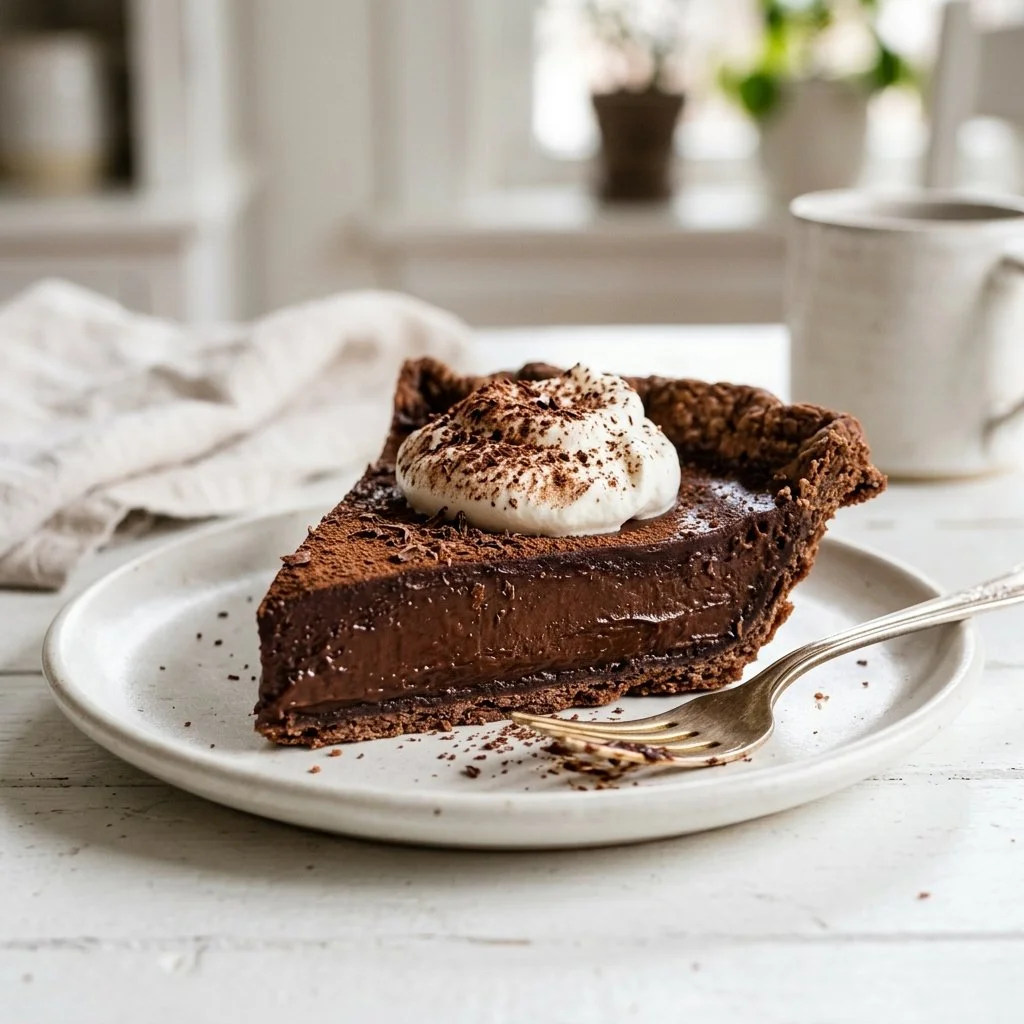
It was a warm summer evening, and the sun was setting, casting a golden hue over my kitchen. As the gentle breeze drifted in, the smell of my family’s favorite dessert wafted through the air, conjuring memories of childhood. Growing up, chocolate pie was more than just a dessert; it was a sweet celebration of family gatherings and happy moments. With that in mind, I decided it was time to recreate that nostalgic treat—this time with a twist: a silky, smooth filling nestled in a crunchy graham cracker crust. Let me take you on a delightful journey to make the most heavenly Chocolate Pie!
Recipe Timing
- Prep Duration: 20 minutes
- Active Cooking: 15 minutes
- Total Duration: 4 hours 35 minutes (including chilling time)
- Portion Size: Serves 8
- Complexity: Simple
Nutritional Recipe
- Calories per portion: Approximately 250
- Protein: 5g
- Carbs: 35g
- Fats: 10g
- Fiber: 1g
- Sugars: 20g
- Sodium: 100mg
Why You’ll Love This Chocolate Pie
This Chocolate Pie is rich yet balanced, providing a perfect blend of chocolate flavor and creaminess. It’s not just delicious; it’s incredibly versatile too! Serve it at family dinners, birthday parties, or as a comforting treat after a long day. The joy of seeing your loved ones dig into this creamy delight is unmatched. Plus, it’s easy to whip up, especially with a pre-made graham cracker crust. What’s not to love?
The Complete Cooking Journey
The process of making this Chocolate Pie is like a comforting rhythm. It starts with blending dry ingredients, creating a chocolatey base that envelops you in warmth from the very first step. Then, as you add the milk and bring it to a gentle simmer, the magic begins. The rich aroma and the transformation of the simple ingredients into something exquisite make each step worthwhile. Finally, as you let the pie chill and set in the fridge, you’ll feel that familiar excitement of anticipation.
Ingredients
- 1 pre-made graham cracker crust
- 1 cup sugar
- 1/3 cup unsweetened cocoa powder
- 1/4 cup cornstarch
- 1/8 teaspoon salt
- 2 cups milk
- 4 large egg yolks
- 2 tablespoons butter
- 1 teaspoon vanilla extract
- Whipped cream (for serving)
Method
Step 1: Mix the Dry Ingredients
In a medium saucepan, mix sugar, cocoa powder, cornstarch, and salt. This forms the sweet and chocolatey backbone of your filling.
Step 2: Gradually Add Milk
Gradually whisk in milk to the dry mixture, ensuring there are no lumps. Your arm may get a little tired, but the end result is so worth it!
Step 3: Thicken the Mixture
Cook over medium heat, stirring constantly, until the mixture thickens and starts to boil. The transformation into a luscious chocolate base is truly mesmerizing.
Step 4: Prepare the Egg Yolks
In a small bowl, beat the egg yolks until they’re smooth. This is the secret to achieving that rich, custard-like filling.
Step 5: Temper the Eggs
Slowly whisk a small amount of the hot mixture into the egg yolks, stirring constantly so that the eggs don’t scramble. Then, whisk the egg yolk mixture back into the saucepan, allowing it to enrich the filling.
Step 6: Final Cook
Cook for 2 more minutes, stirring constantly. Watch as your filling becomes thicker and denser, promising a delightful texture.
Step 7: Add Flavor
Remove from heat and stir in butter and vanilla. The aroma will be intoxicating, and you’ll want to taste it right away!
Step 8: Pour into Crust
Pour the sumptuous filling into the graham cracker crust, smoothing it out to ensure every slice will be perfect.
Step 9: Chill to Set
Let it cool to room temperature before refrigerating it until set, about 4 hours. This patience will pay off!
Step 10: Serve with Whipped Cream
When ready to serve, slice into the pie and top each piece with a generous dollop of whipped cream. Enjoy the smiles!
Serving Suggestions & Pairings
Serve this Chocolate Pie chilled, as is, or accompany it with fresh berries or a scoop of vanilla ice cream. For adults, a drizzle of espresso or a sprinkle of sea salt can elevate the flavors even further.
Storage & Leftovers Guide
Store any leftovers in the refrigerator, covered, for up to 3 days. It’s easy to grab a slice whenever you crave something sweet!
Kitchen Wisdom & Success Tips
- Whisk continuously: It’s crucial to stir constantly while cooking to prevent lumps and ensure smooth filling.
- Tempering eggs: Always add a bit of hot mixture to the yolks before returning to the pot to avoid curdling.
- Chill time: Don’t rush the chilling process; allowing the pie to set properly ensures the perfect slice.
Flavor Variations & Adaptations
- Nutty Twist: Add crushed nuts to the crust for added texture.
- Mint Chocolate: Infuse the filling with a few drops of peppermint extract for a seasonal twist.
- Fruit Flavor: Top the pie with sliced bananas or strawberries for a fruity complication.
Reader Questions & Solutions
-
Can I make the filling ahead of time?
- Yes! Prepare the filling a day in advance and store it in the fridge until you’re ready to assemble the pie.
-
What if my filling is too lumpy?
- If you notice lumps after cooking, you can blend the filling until smooth before pouring it into the crust.
-
How do I know when to take the filling off the heat?
- The filling should thickly coat the back of a spoon and hold its shape before you remove it from the heat.
-
Can I freeze the Chocolate Pie?
- Yes, wrapped tightly, it can be frozen for up to 2 months. Just be sure to thaw it in the fridge overnight before serving.
-
What alternatives can I use for the egg yolks?
- If you need a vegan version, consider using silken tofu blended until smooth as a replacement, though it may alter the texture slightly.
Wrapping Up
There you have it—a Chocolate Pie that’s not only delicious but also a heartwarming piece of nostalgia. Whether you’re celebrating a special occasion or just indulging in a sweet treat, this pie is bound to please. So grab your ingredients and create your own chocolate-filled memories. Enjoy the journey, and don’t forget to share the love! Happy baking!
PrintHeavenly Chocolate Pie
A nostalgic chocolate pie with a silky filling nestled in a crunchy graham cracker crust, perfect for family gatherings and special occasions.
- Prep Time: 20 minutes
- Cook Time: 15 minutes
- Total Time: 275 minutes
- Yield: 8 servings 1x
- Category: Dessert
- Method: Chilling
- Cuisine: American
- Diet: Vegetarian
Ingredients
- 1 pre-made graham cracker crust
- 1 cup sugar
- 1/3 cup unsweetened cocoa powder
- 1/4 cup cornstarch
- 1/8 teaspoon salt
- 2 cups milk
- 4 large egg yolks
- 2 tablespoons butter
- 1 teaspoon vanilla extract
- Whipped cream (for serving)
Instructions
- Mix the dry ingredients in a medium saucepan: sugar, cocoa powder, cornstarch, and salt.
- Gradually whisk in milk to the dry mixture, ensuring there are no lumps.
- Cook over medium heat, stirring constantly, until the mixture thickens and starts to boil.
- Beat the egg yolks in a small bowl until smooth.
- Slowly whisk a small amount of the hot mixture into the egg yolks, stirring constantly.
- Whisk the egg yolk mixture back into the saucepan.
- Cook for 2 more minutes, stirring constantly.
- Remove from heat and stir in butter and vanilla.
- Pour the filling into the graham cracker crust, smoothing it out.
- Let it cool to room temperature before refrigerating until set, about 4 hours.
- Slice into the pie and serve each piece with a generous dollop of whipped cream.
Notes
Store leftovers in the refrigerator for up to 3 days. Feel free to get creative with toppings or variations!
Nutrition
- Serving Size: 1 slice
- Calories: 250
- Sugar: 20g
- Sodium: 100mg
- Fat: 10g
- Saturated Fat: 6g
- Unsaturated Fat: 4g
- Trans Fat: 0g
- Carbohydrates: 35g
- Fiber: 1g
- Protein: 5g
- Cholesterol: 70mg